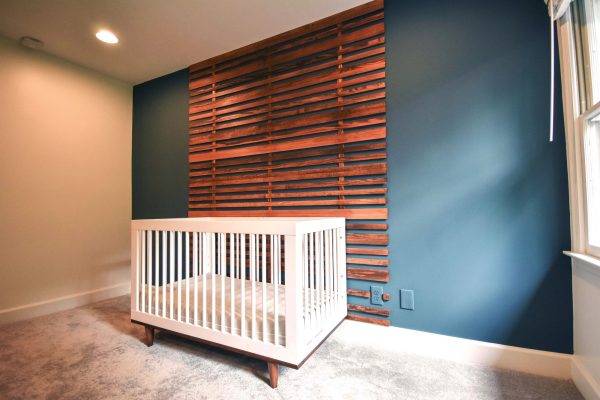
DIY Accent Wall: Ladder Slat Wall
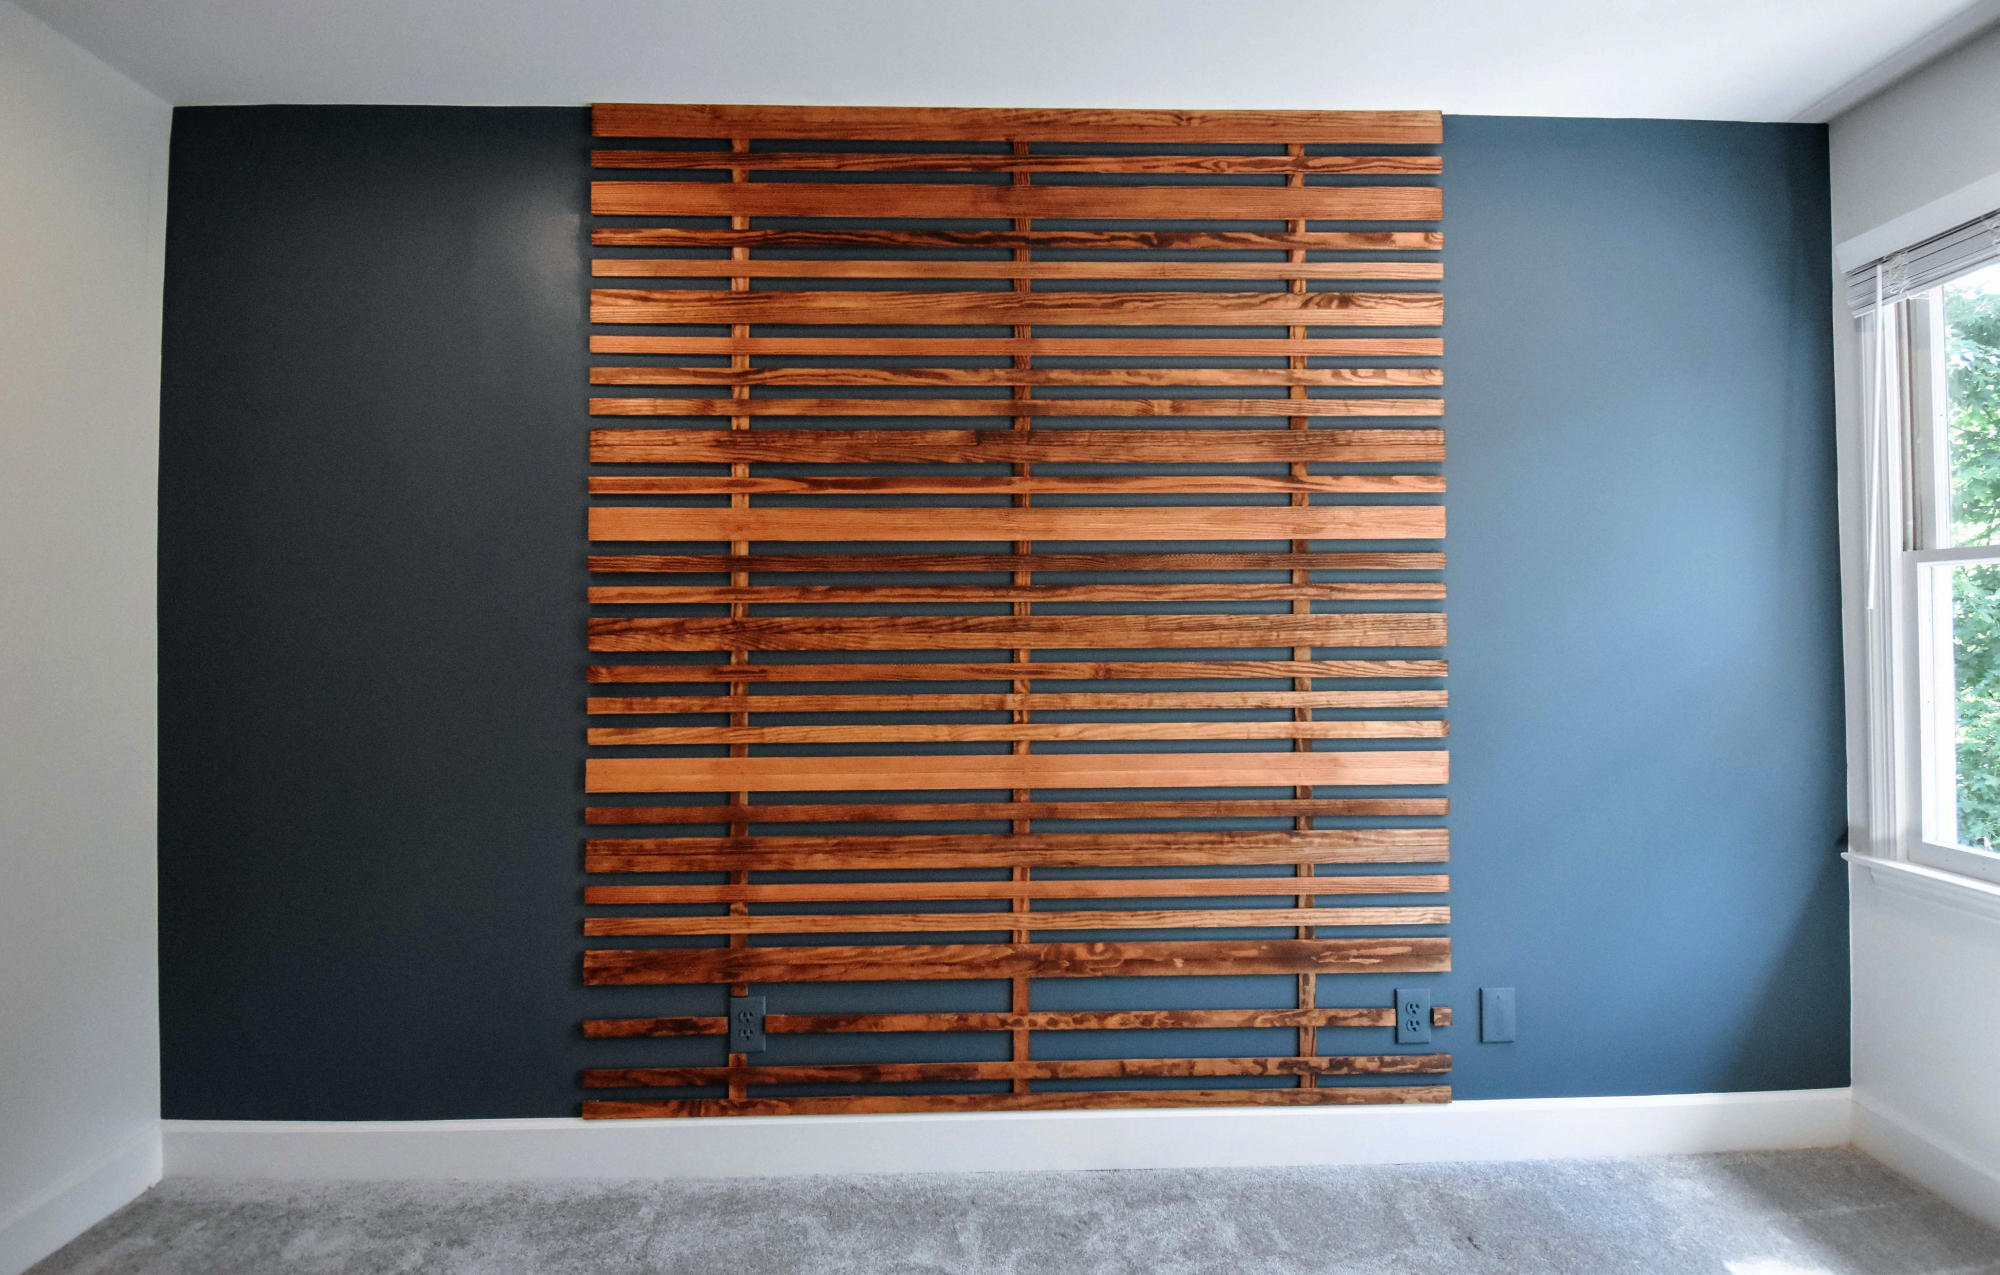
This DIY Accent Wall is called Ladder Slat Wall, which is an incredibly versatile accent wall that can be used in any room, and in this case, a newborn baby’s nursery! This slat wall idea is a great way to maintain a modern look while also bringing warmth, character, and texture to a room. Slat Walls aren’t a new concept, but they are a hot trend in interior spaces right now. Watch our video and follow the steps below to see how you can build a beautiful slat wall accent wall like this in just one day! If you’re looking for more accent wall ideas for your nursery, click here.
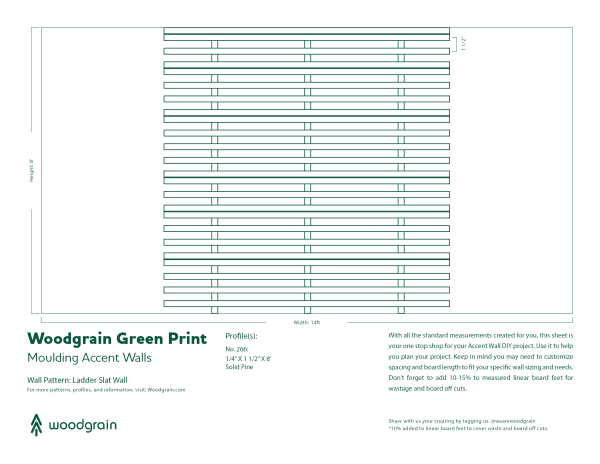
We used profile no. 266 lattice to create this Ladder Slat Wall.
New to accent walls? Check out our DIY Accent Wall: Quick Start blog post to learn the basics!
Materials:
- Plastic wood filler
- Measuring tape
- Level
- Paint (1 gallon), pre-stain, and stain
- Nail gun and finishing nails (2” nails)
- Paper and tape to cover up areas for paint
- Saw to cut moulding
- Paint sprayer or brush and roller
- Cloth or brush for pre-stain + stain
Profiles:
- 266 Lattice, 1/4″ X 1 1/2″ X 8′ Solid Pine
Use this Green Print as a guide, but feel free to be creative with your design! Note: the size of your wall and the moulding used will affect the placement of the moulding.
HOW TO INSTALL:
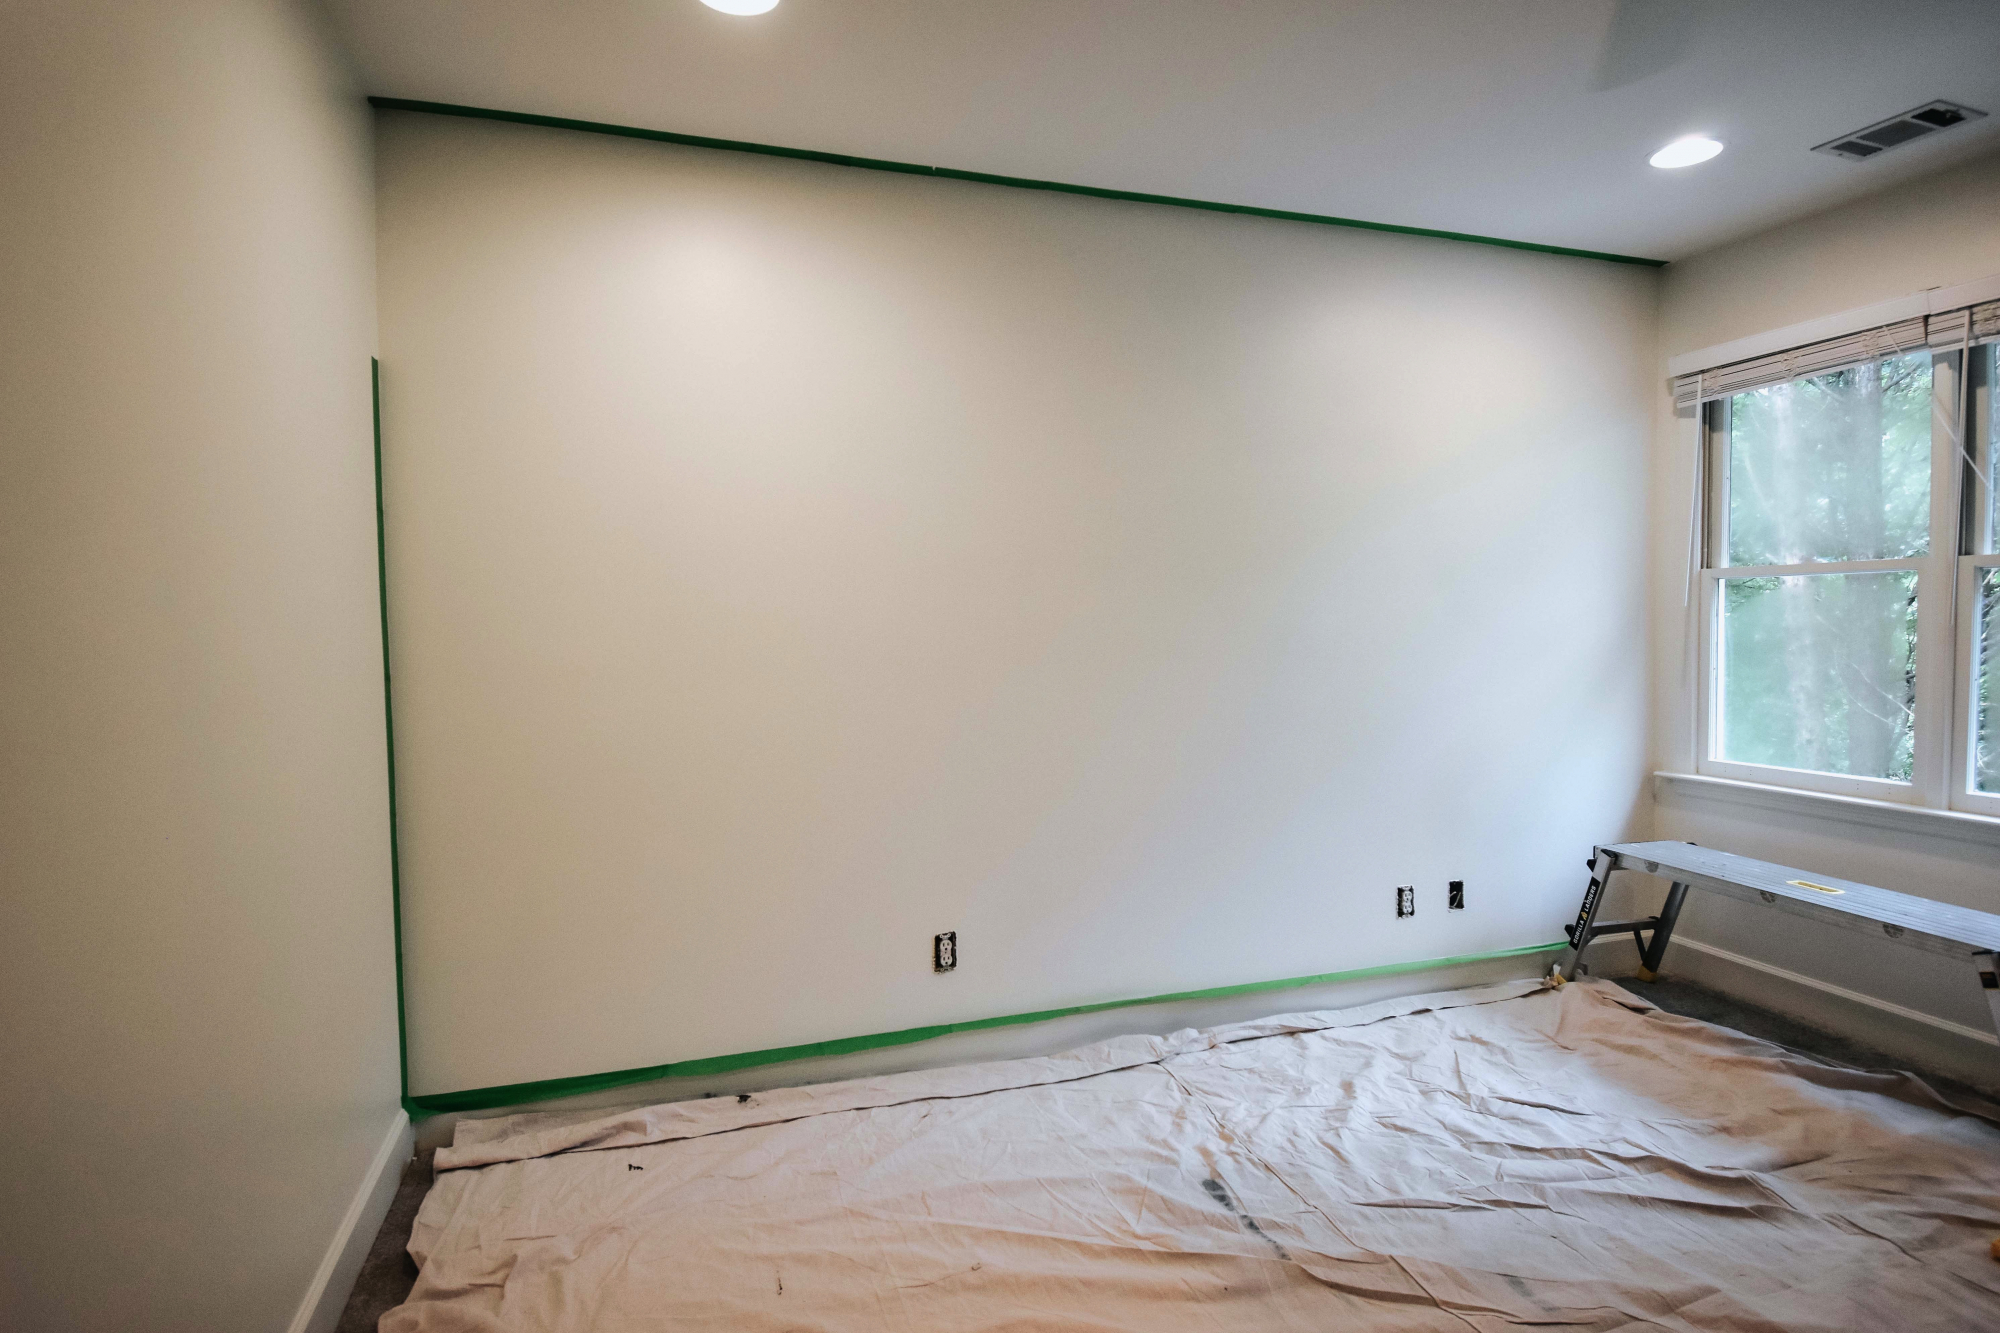
Prepare for painting
Mask areas that you don’t want to get paint on (outlets, lights, furniture, window ledges) and put a ground cloth on the floor to ensure the paint does not get on the floor.
Step 1: Paint your wall
For this wall, we recommend using a paintbrush and paint roller rather than a paint sprayer.
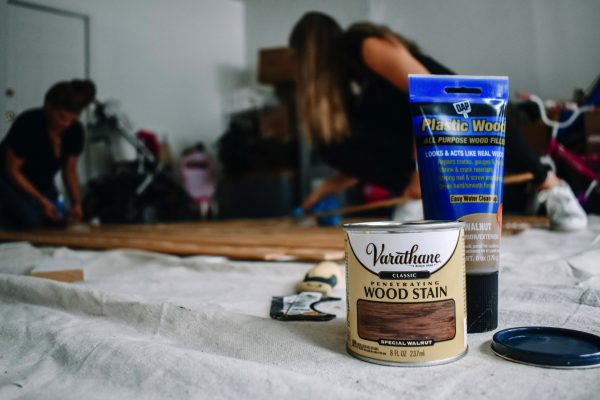
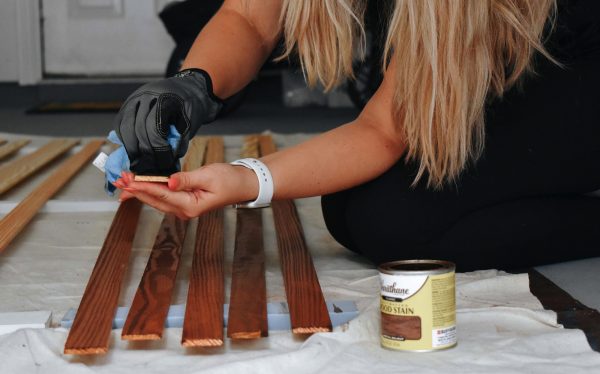
Step 2: Pre-stain + Stain
Pre-stain and stain your moulding. Treating the surface with Pre-Stain Wood Conditioner helps prevent streaks and blotches by evening out the absorption of oil-based stains. We recommend using a cloth or brush for application. Usually one coat gets the job done but additional coats may be applied to highly absorbent woods after 15 minutes. Then apply your finishing stain.
Step 3: Measure everything and mark your walls
Measure the wall height and width, and make sure you take into consideration outlets, windows and light switches. This will help you get a feel for the board footage needed and where to cut your moulding. We recommend adding 10-15% board feet for waste and board cuts.
Mark the wall where moulding will be placed to get a visual of how the moulding will look. We placed the 3 vertical slats on the wall first to map it out.
Step 4: Cut and install your moulding
Cut the moulding needed for your wall. This Ladder Slat Wall has a pattern of 2 (combined), 1 (individual), 2 (combined), 2 (individual), 2 (combined), 3 (individual), so on so forth to create a unique contrasted look. Refer to the green print for a better visual understanding.

When installing your moulding try to keep your angles and spacing as consistent as possible. We recommend using 2” finishing nails and a nail gun to secure the moulding profile for long term wear and tear. Keep in mind you’re going to have to finish the moulding with plastic wood filler, so the fewer nails, the better for less work on the finishing process.
Step 5: Fill in the holes and stain
Use plastic wood filler for all the nail holes and go over with stain to create a complete look!
Enjoy your beautiful accent wall!
HELPFUL TIPS WHEN CREATING AN ACCENT WALL
- Choose a balanced, unobstructed wall that stands out.
- Choose rooms or spaces where you want to make an impact. Bedrooms, living rooms and entryways are great spaces to create a custom look. Select spaces where guests will see it, or where you spend a good amount of your time.
- Bold colors really make a statement. Dark greens, grey, black and blue are currently in.
- White accent walls make a statement without being too bold.
- Try to pick a style of accent wall that complements the look of your home and room; just because you like a modern style wall doesn’t mean it’s the best pick for a colonial style room.
- Go in with a plan and draw out your design before beginning.
- Find 2-3 moulding profiles that you think will achieve the look you’re going for. Then, take each sample and place it on the wall to see which you like the best.
- Create a jig if you have to repeat a cut. This will save time and help with consistency.
- Use hot glue to apply moulding first so that you can adjust the moulding if needed. Then use finishing nails to secure the moulding.
- Rent a nail gun, use your own or use an adhesive.
- Once everything is in place, apply more nails to ensure it is long lasting.
- Use putty to the nail holes rather than caulking for a better finish.
- If using a paint sprayer, keep 1.5 to 2” of space between you and the wall for an even application.
- Take your time in the finishing stage. The little details when you finish will make the wall look more polished.
- We estimate that creating an accent on a 12′ x 8′ wall can cost around $200. This includes paint, moulding, tool rentals and other materials. You can save money by using tools from your home or borrowing from friends.
For more tips and home inspiration, follow us on Instagram, Pinterest and Facebook! @WeAreWoodgrain