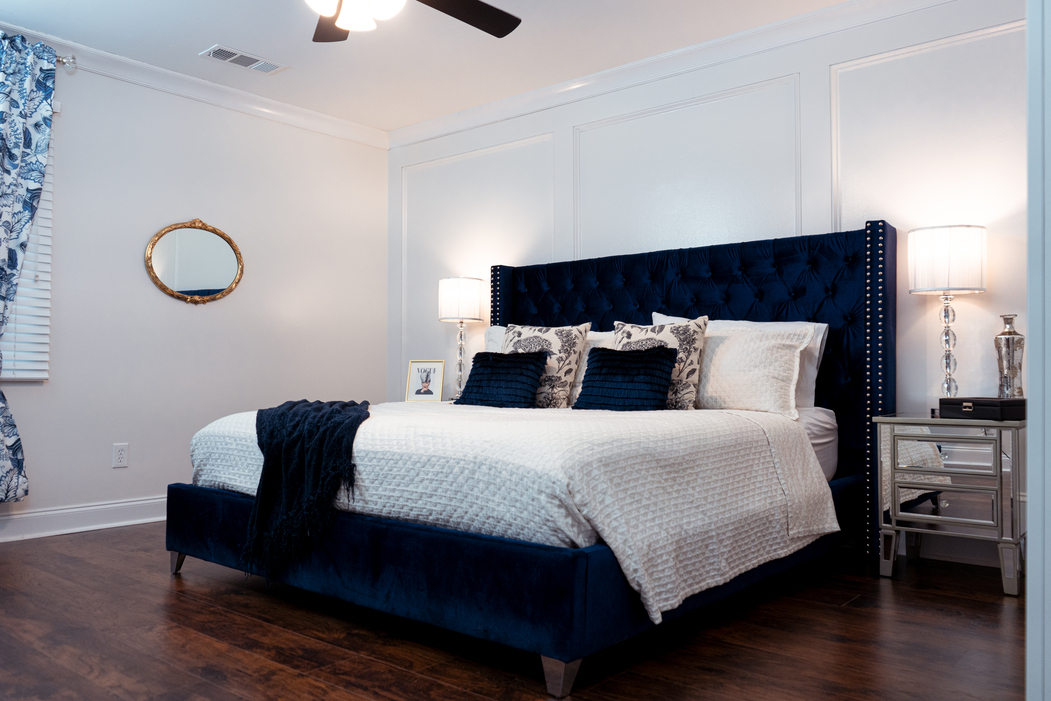
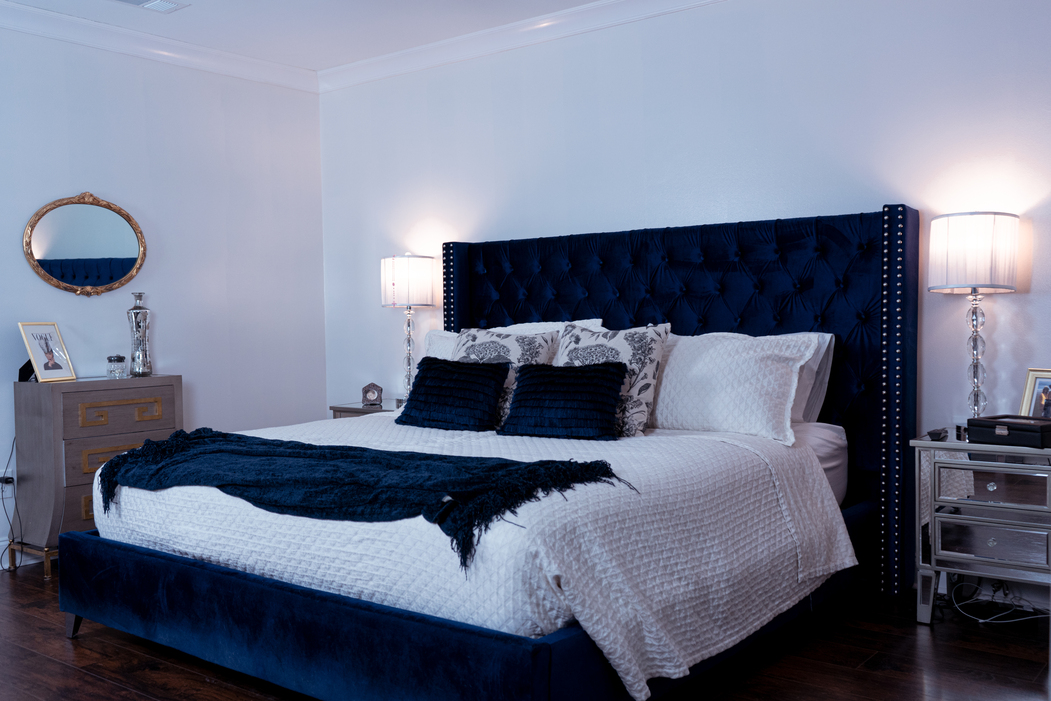
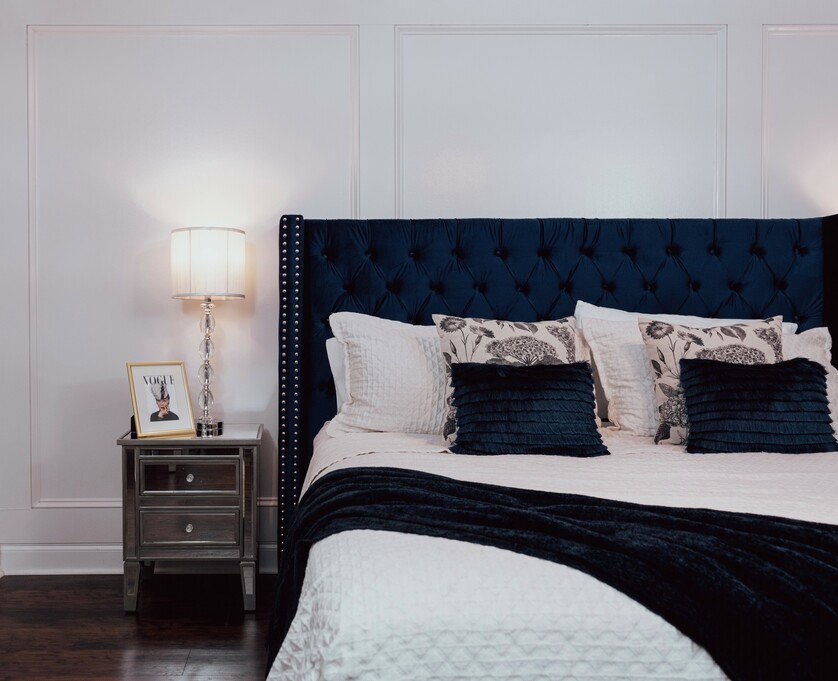
DIY Accent Wall: Decorative Build-up
This DIY accent wall is a twist on your typical board and batten design. This Decorative Build-Up takes a board and batten design and adds architectural interest with a piece of decorative moulding placed on the inside of the board and batten boxes. This craftsman design is now taken to a more colonial or even Victorian look dependent on the ornateness of the decorative moulding applied. Watch our video and follow the steps below to see how you can create a decorative build-up design like this in just one day! If you’re looking for more accent wall ideas, click here.
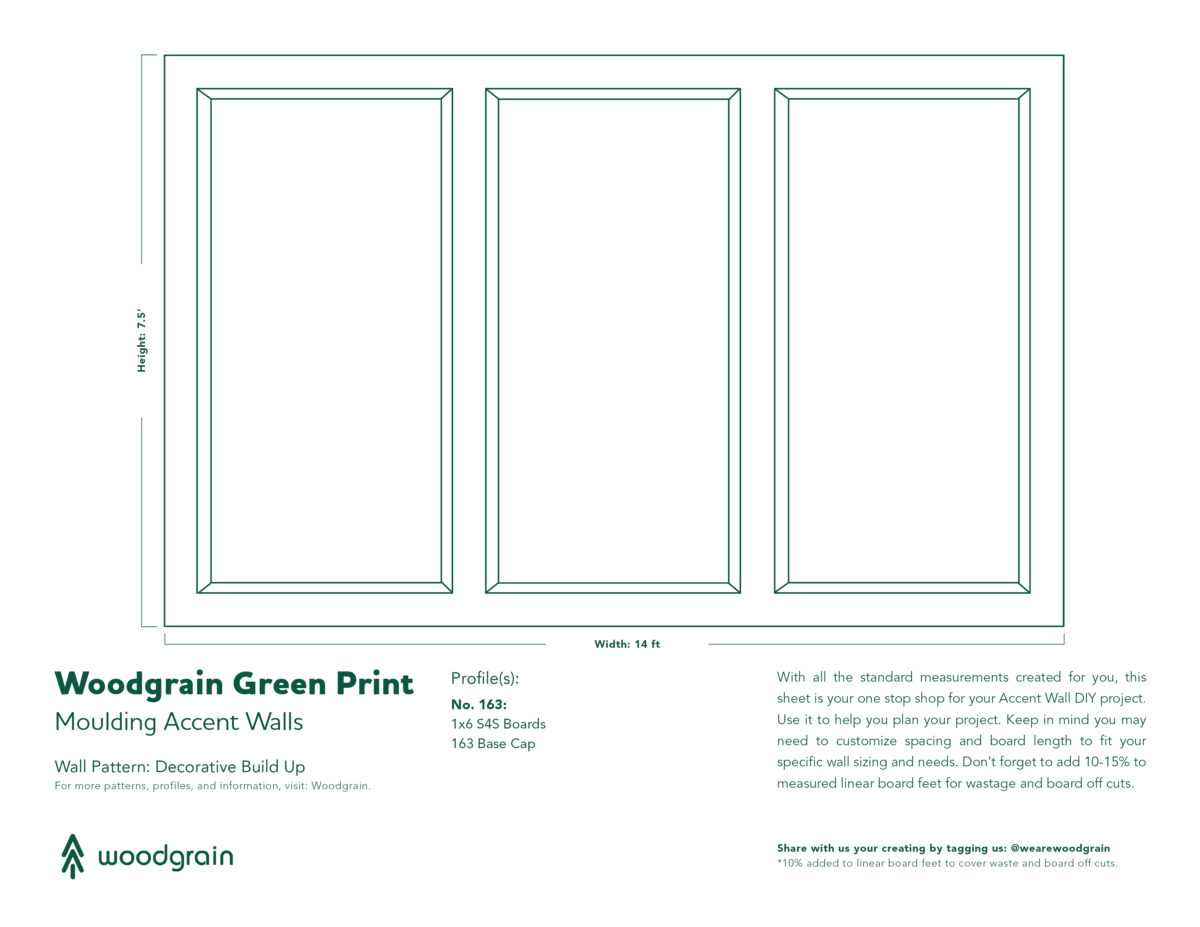
We used our 1X6 boards and 163 base cap to create this decorative build-up.
New to accent walls? Check out our DIY Accent Wall: Quick Start blog post to learn the basics!
Materials:
- Measuring tape
- Paint (1 gallon)
- Nail gun and nails
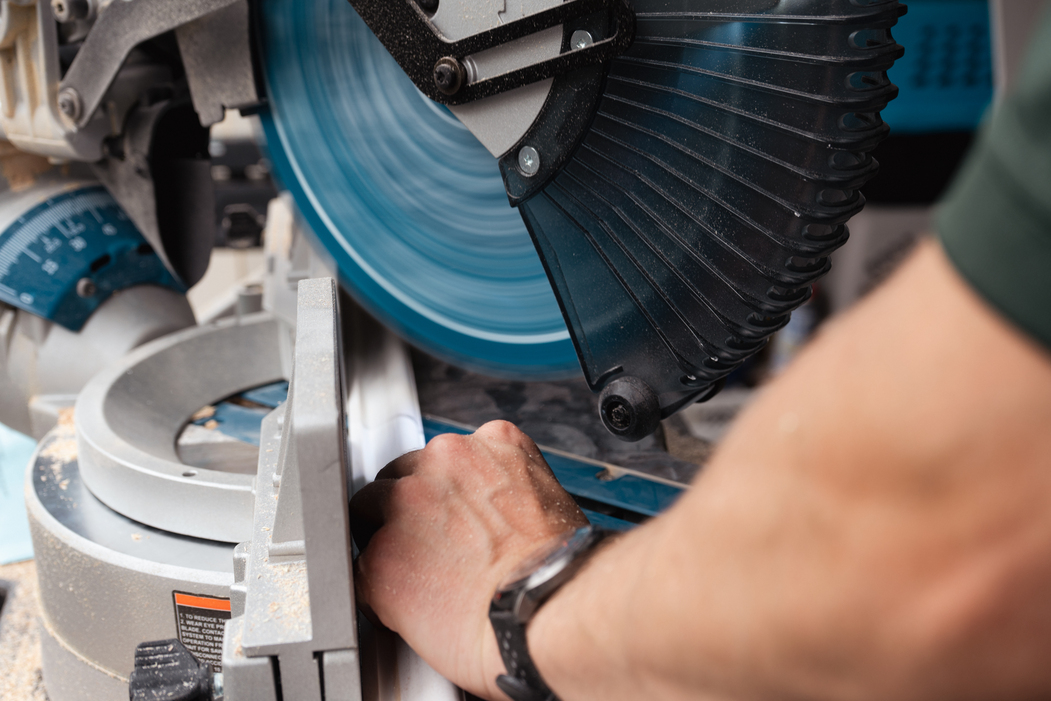
- Saw to cut moulding
- Paint sprayer or brush and roller
- Caulk
Profiles:
Use this Green Print as a guide, but feel free to be creative with your design! Note: the size of your wall and the moulding used will affect the placement of the moulding.
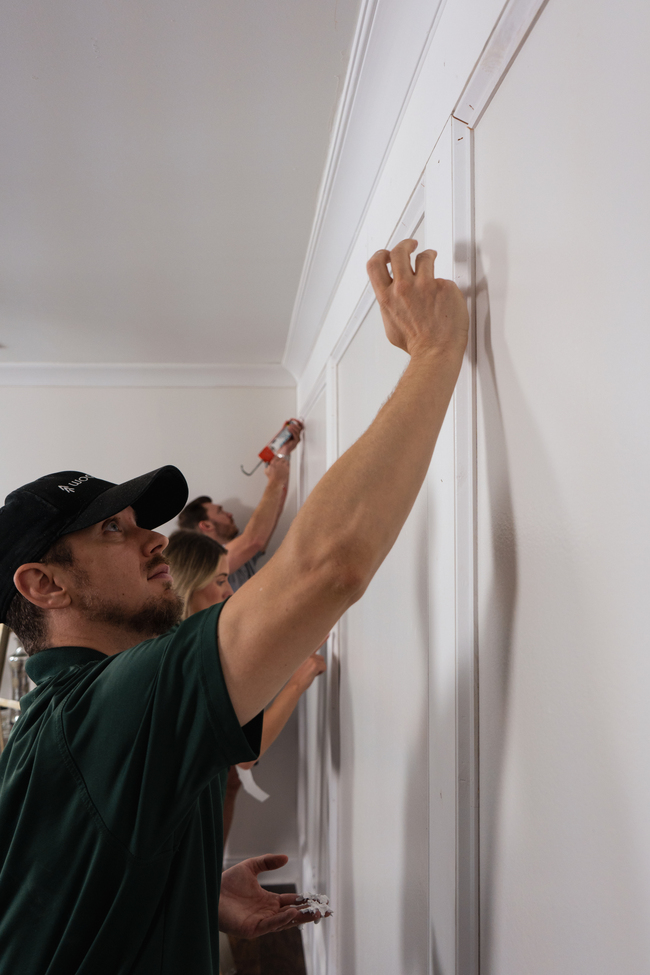
HOW TO INSTALL:
Step 1: Measure everything and mark your wall
Measure the wall height and width, and make sure you take into consideration outlets, windows and light switches. This will help you get a feel for the board footage needed and where to cut your moulding. We recommend adding 10-15% board feet for waste and board cuts.
Mark the wall where moulding will be placed to get a visual of how everything will look.
Step 2: Cut and install your boards
We recommending cutting the boards and installing them before cutting the decorative moulding. This will allow for more accurate measurements for the entire project. Refer to the green print for a better visual understanding. We started with cutting and installing the horizontal top and bottom boards. Once those pieces were cut and installed, we measured the lengths of the vertical boards and cut & installed them. For the boards, we did straight cuts.
Step 3: Cut and install your decorative moulding
Once your basic board and batten design is installed, you can start measuring, cutting, and installing the 163 base cap. For more accurate measurements, our recommendation is to instead of bending the tape at corners, place the body of the tape measure against the corner and add the case length to your total measurement. For the decorative moulding, we mitered the corners.
*Installing – We recommend using 2” finishing nails and a nail gun to secure the moulding for long term wear and tear. Keep in mind you’re going to have to finish the moulding with caulk, so the fewer nails, the better for less work on the finishing process.*
Step 4: Caulk all of your moulding
When caulking the moulding, use the caulk to fill in any holes created by nails and for the outer and inner seams of the moulding. We do not recommend caulking the seam in-between the boards and base cap as you will fill in the detail of the design. Tip: use water to smooth out caulk. Let the caulk dry completely before starting to paint.
Step 5: Paint your wall and moulding
For this accent wall, we did not pre-paint the moulding. We painted the moulding and wall at the same time. For the boards and wall, we recommend using a paint roller and for the decorative moulding, we recommend using a paint brush. Once the paint is dry, look for any spots that may need a touch up.
Enjoy your beautiful accent wall!
HELPFUL TIPS WHEN CREATING AN ACCENT WALL
- Choose a balanced, unobstructed wall that stands out.
- Choose rooms or spaces where you want to make an impact. Bedrooms, living rooms, and entryways are great spaces to create a custom look. Select spaces where guests will see it, or where you spend a good amount of your time.
- Bold colors really make a statement. Dark greens, grey, black, and blue are currently in.
- White accent walls make a statement without being too bold.
- Try to pick a style of accent wall that complements the look of your home and room; just because you like a modern style wall doesn’t mean it’s the best pick for a colonial style room.
- Go in with a plan and draw out your design before beginning.
- Find 2-3 moulding profiles that you think will achieve the look you’re going for. Then, take each sample and place it on the wall to see which you like the best.
- Create a jig if you have to repeat a cut. This will save time and help with consistency.
- Use hot glue to apply moulding first so that you can adjust the moulding if needed. Then use finishing nails to secure the moulding.
- Rent a nail gun, use your own, or use an adhesive.
- Once everything is in place, apply more nails to ensure it is long lasting.
- Use putty to the nail holes rather than caulking for a better finish.
- If using a paint sprayer, keep 1.5 to 2” of space between you and the wall for an even application.
- Take your time in the finishing stage. The little details when you finish will make the wall look more polished.
- We estimate that creating an accent on a 12′ x 8′ wall can cost around $300. This includes paint, moulding, tool rentals, and other materials. You can save money by using tools from your home or borrowing from friends.
Check out our Decorative Build-up Pinterest Board for more inspiration. Tag us in your pictures on Instagram, Pinterest and Facebook ! Follow us @WeAreWoodgrain