84 Lumber Installation
We recently took a trip to Columbia, SC to do an installation in 84 Lumber’s new showroom! The project was a unique one in which we created a wall specific to each one of our Collections: Victorian Elegance, Timeless Craftsman, Calming Coastal, and Classic Colonial! It’s an ORC you probably wouldn’t do in your own space, but a great way to show the power and versatility of moulding within the canvas of four walls in a single room. For those who aren’t exactly sure which style direction to take in their space, seeing examples of the “Big 4” styles right in front of you is the ultimate cheat sheet to help you decide. Let’s take a look at each of our four walls in this project and which moulding components we utilized to give the look that exemplifies each collection.
Classic, Symmetrical, Versatile
Our classic and traditional Classic Colonial Collection offers a symmetrical and formal assortment of wood mouldings, and doors that are versatile for any home. The colonial interior design incorporates clean lines, and a light and spacious feel. Blues, greys, and cream are often seen within the color palette for this design with mahogany wood bringing everything together. This style was introduced in the mid-1600s to mid-1700s when the creation of colonial furniture by American colonists rose in popularity.
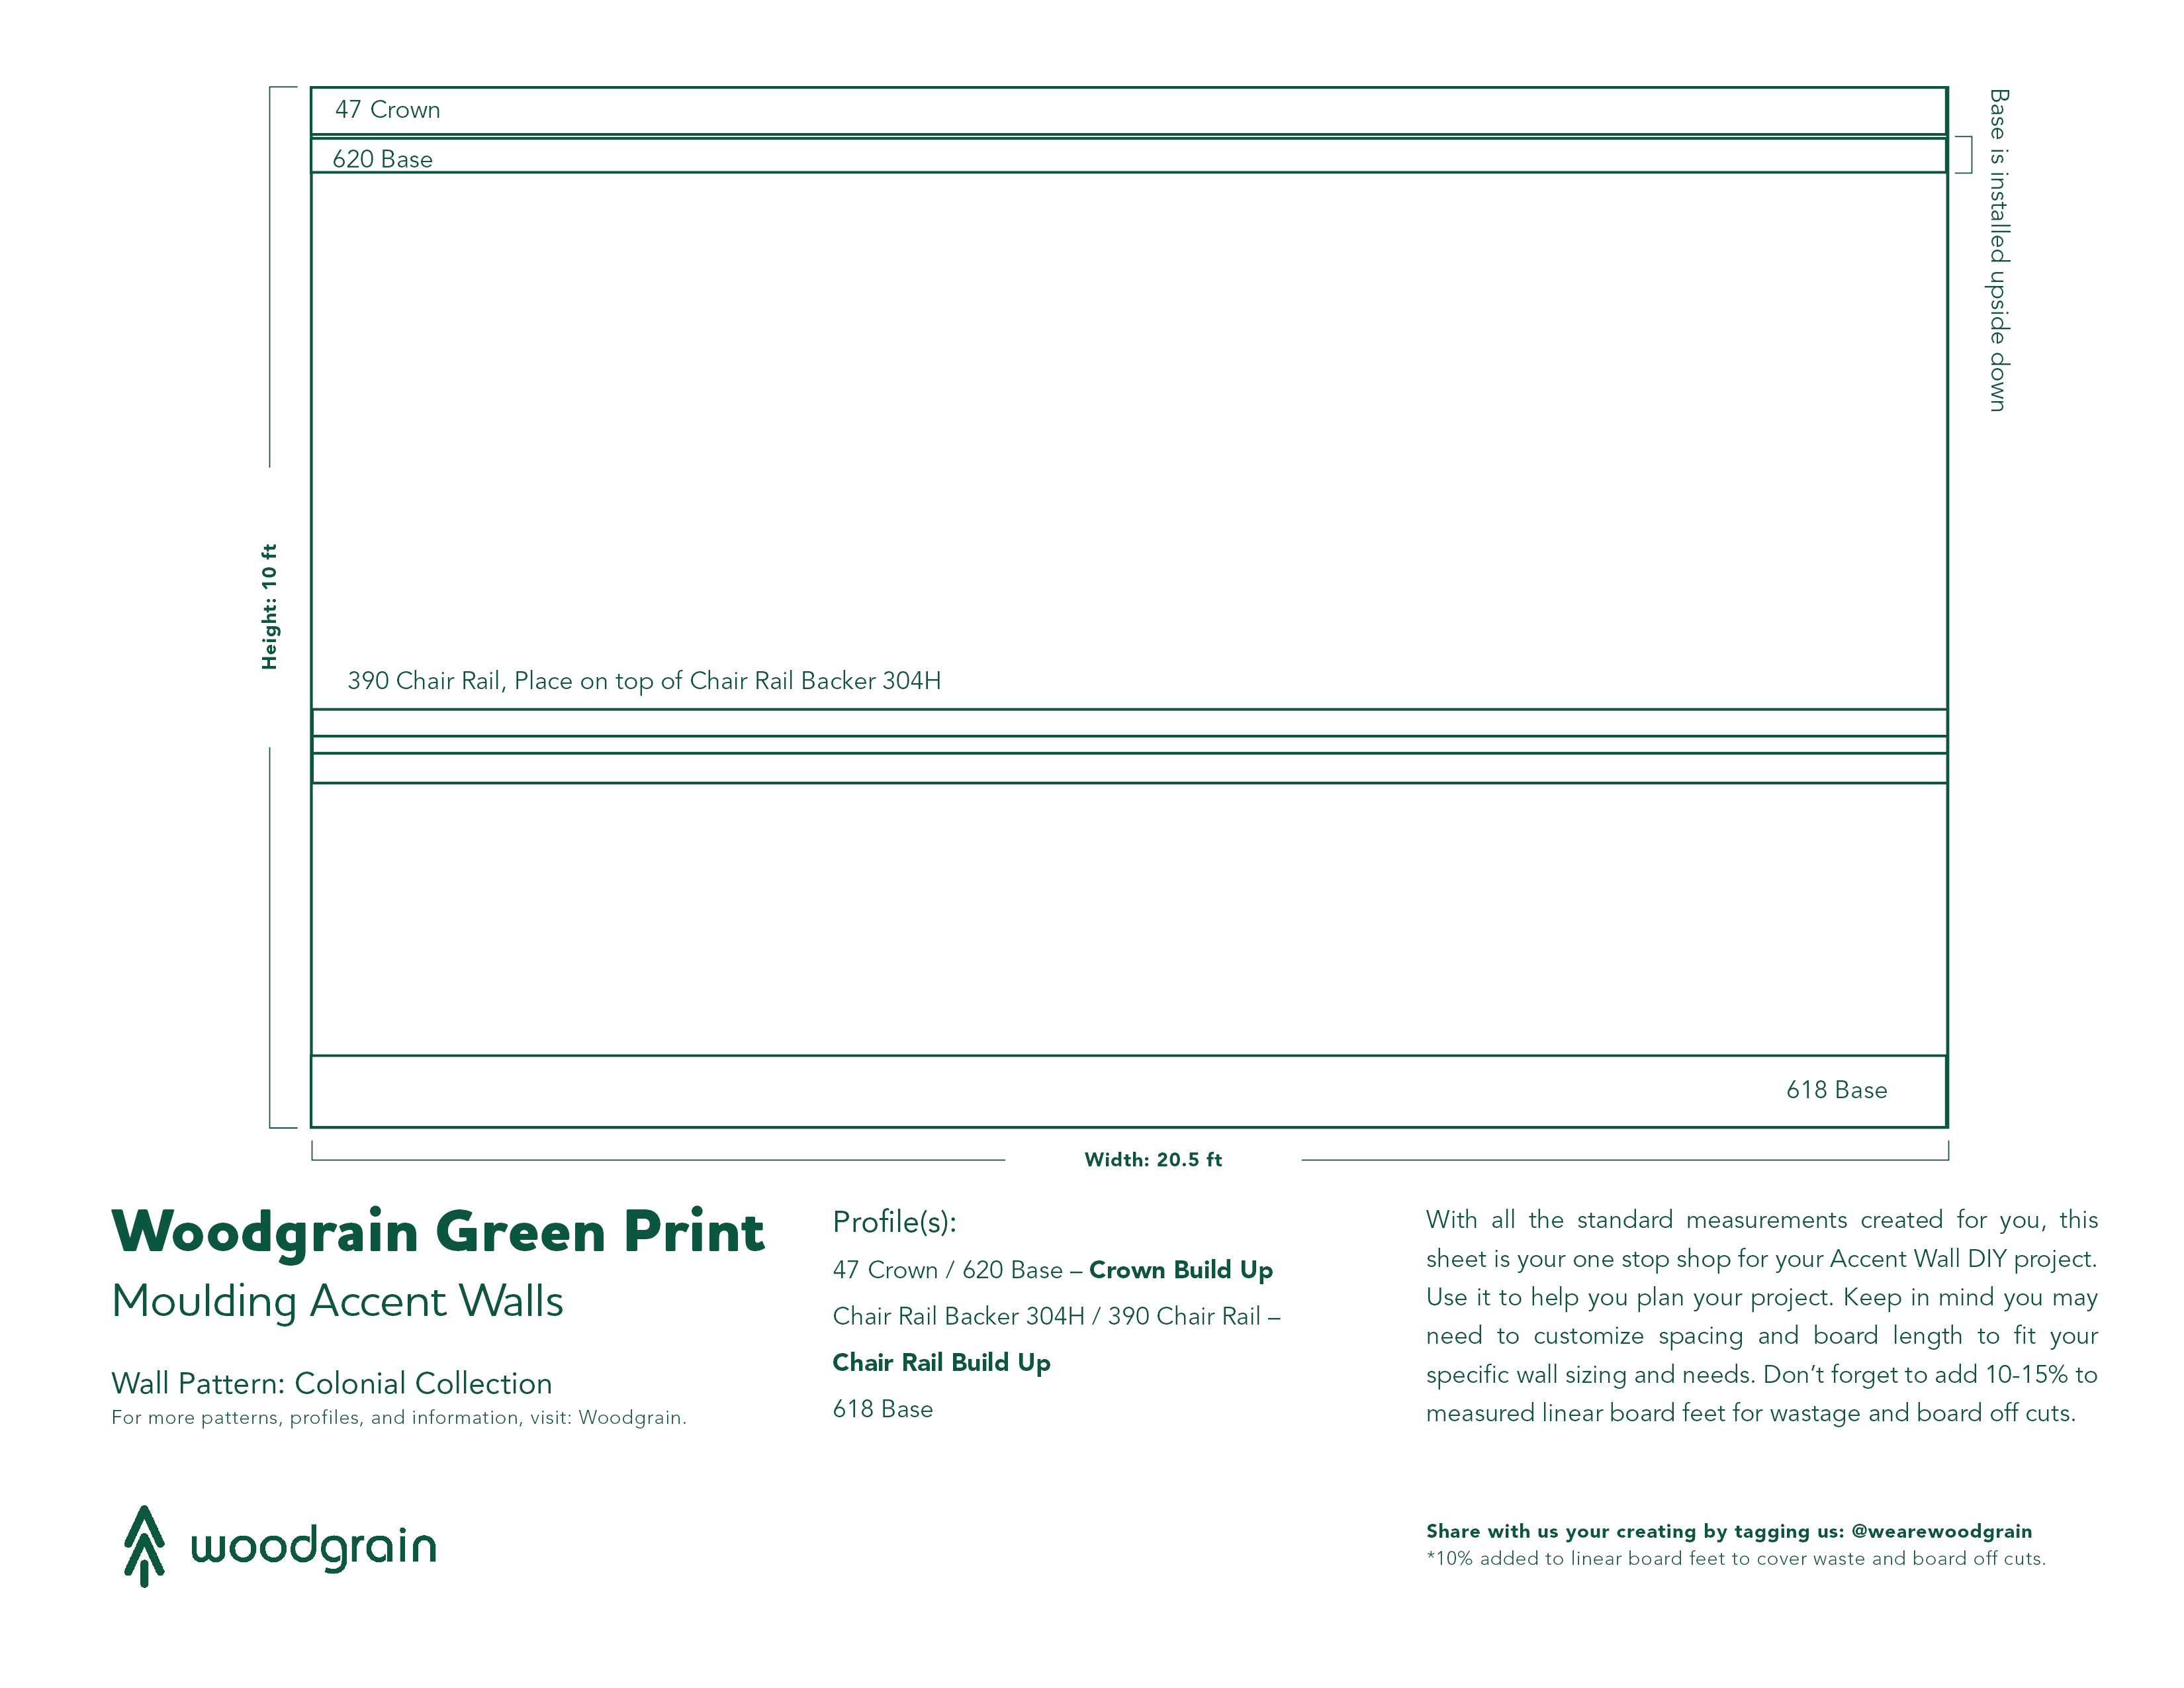
Profiles:
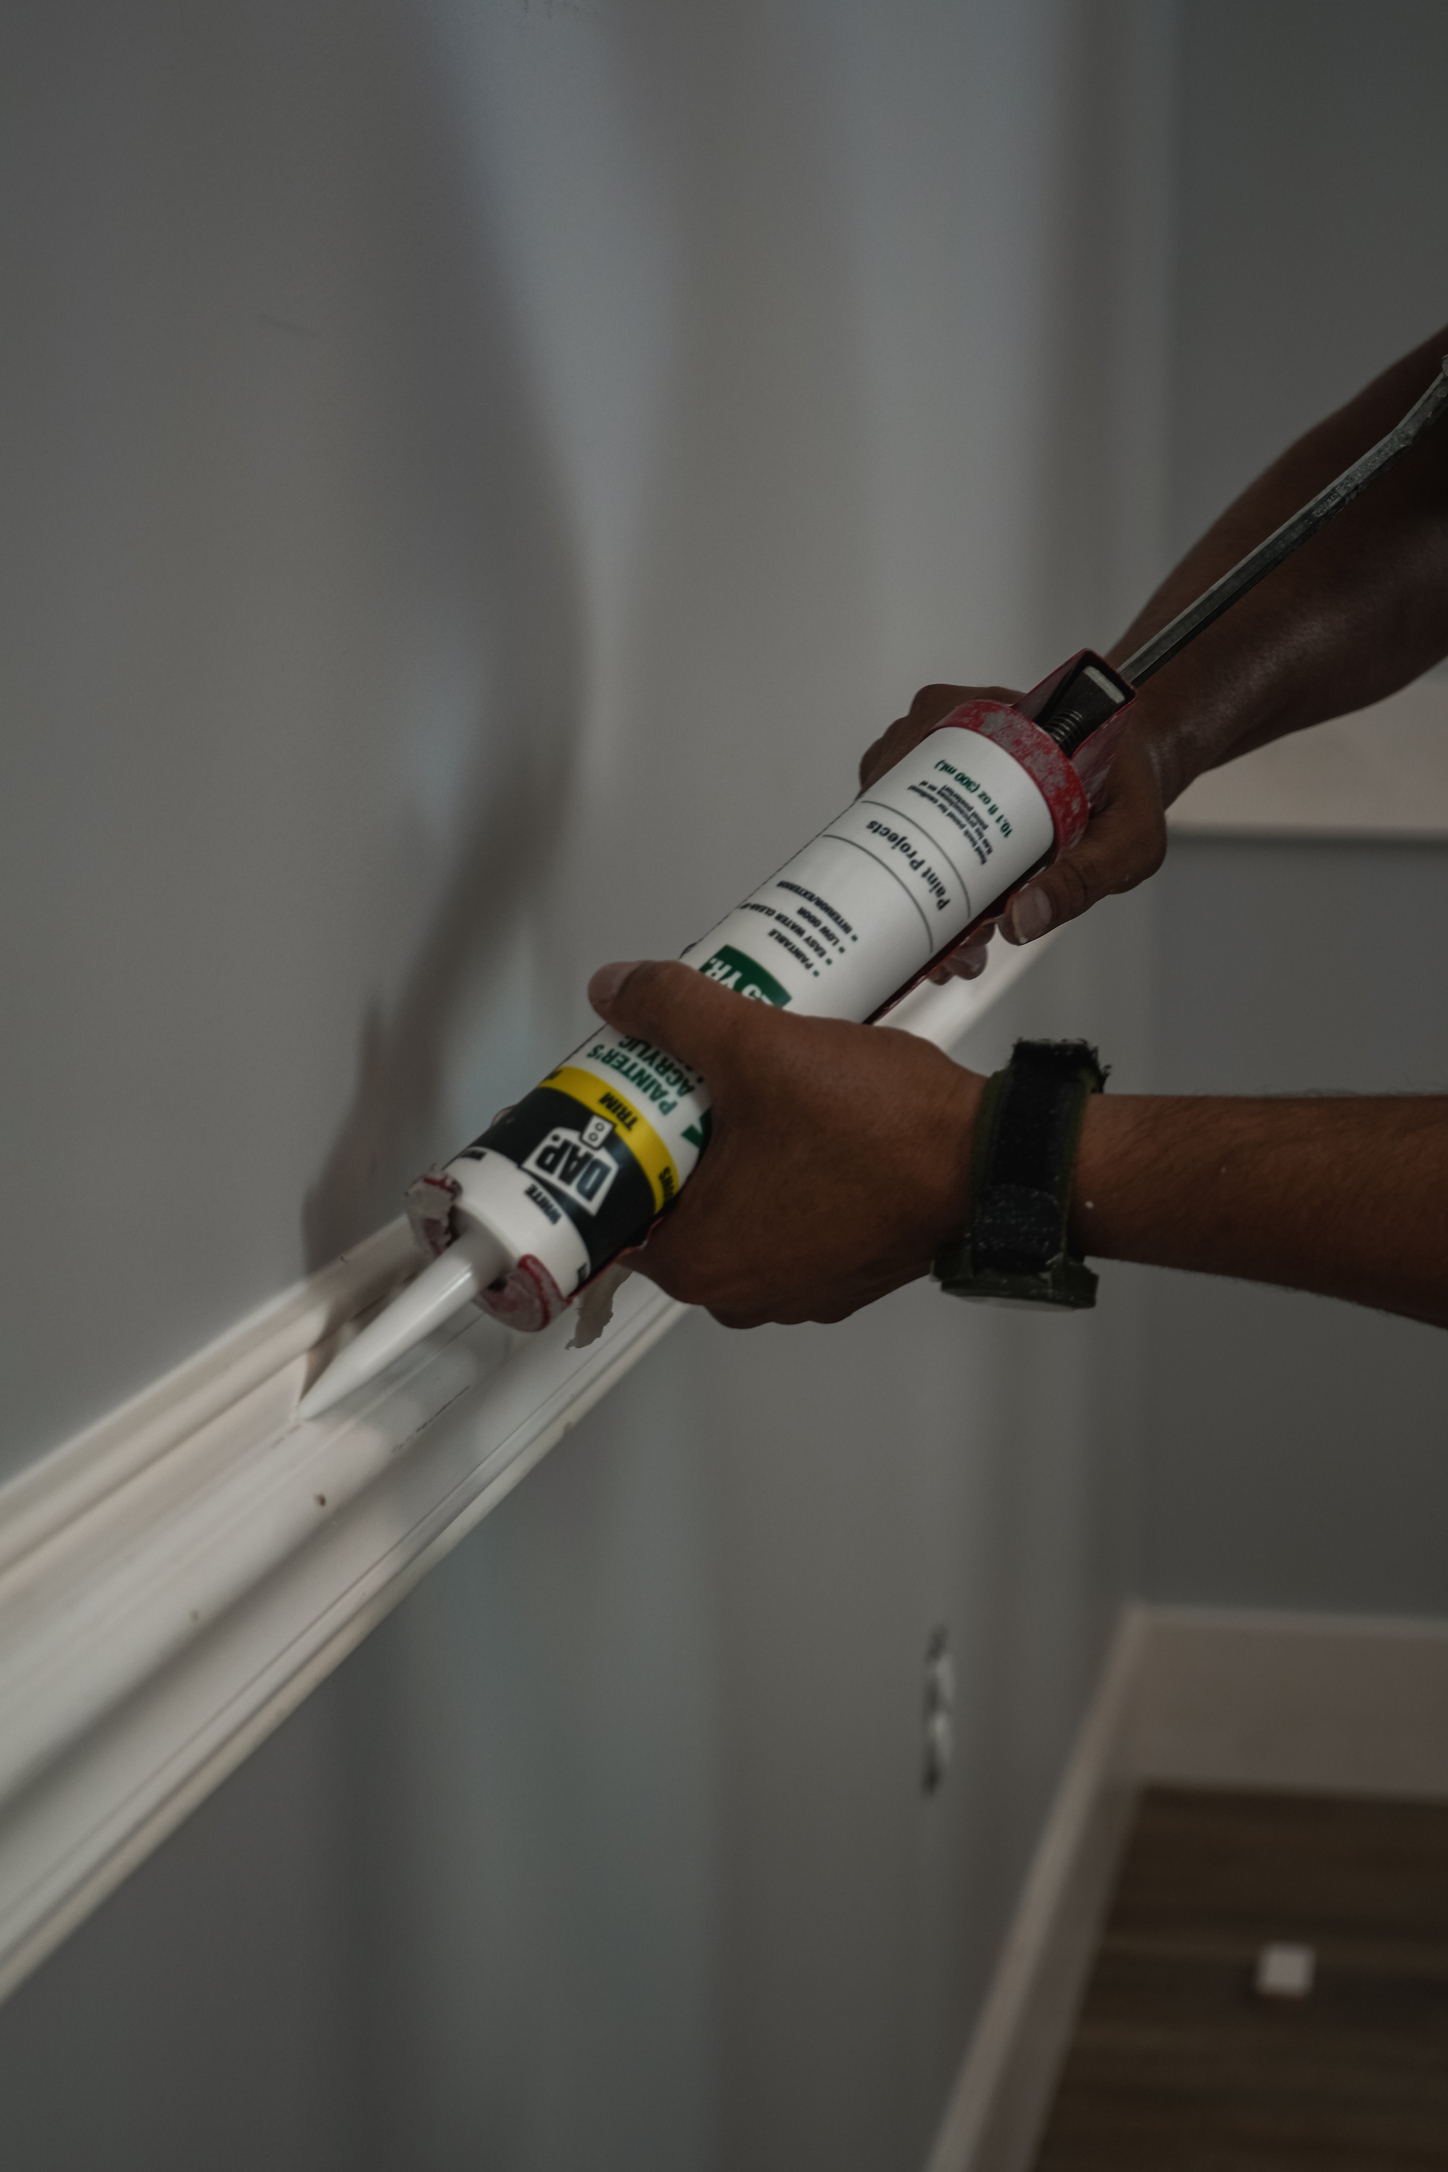
How To Install:
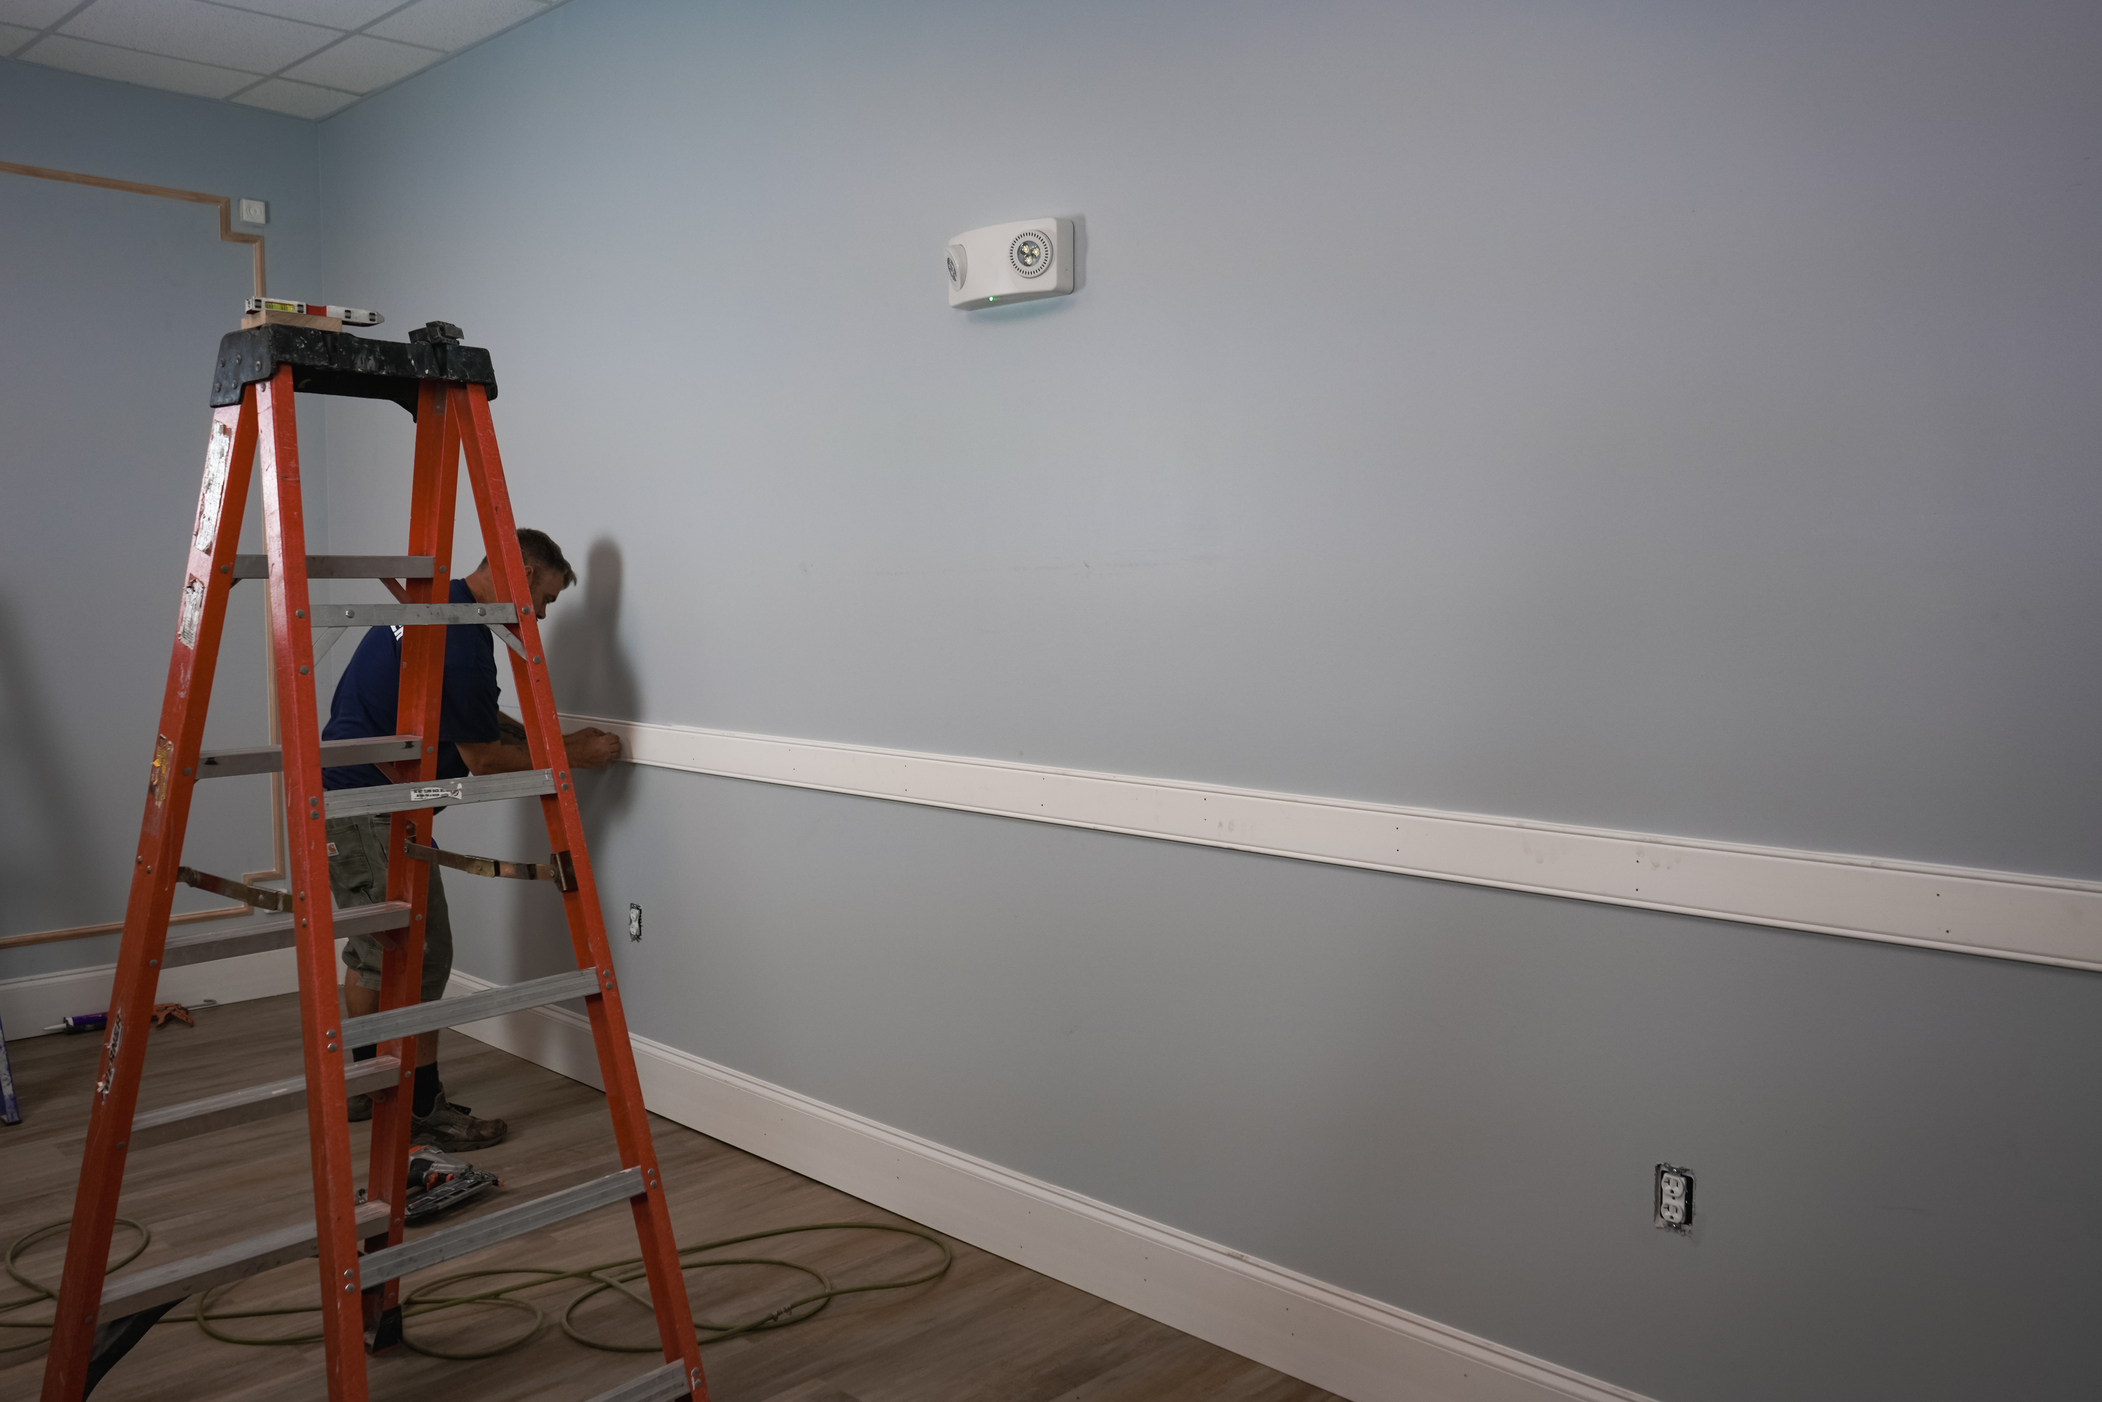
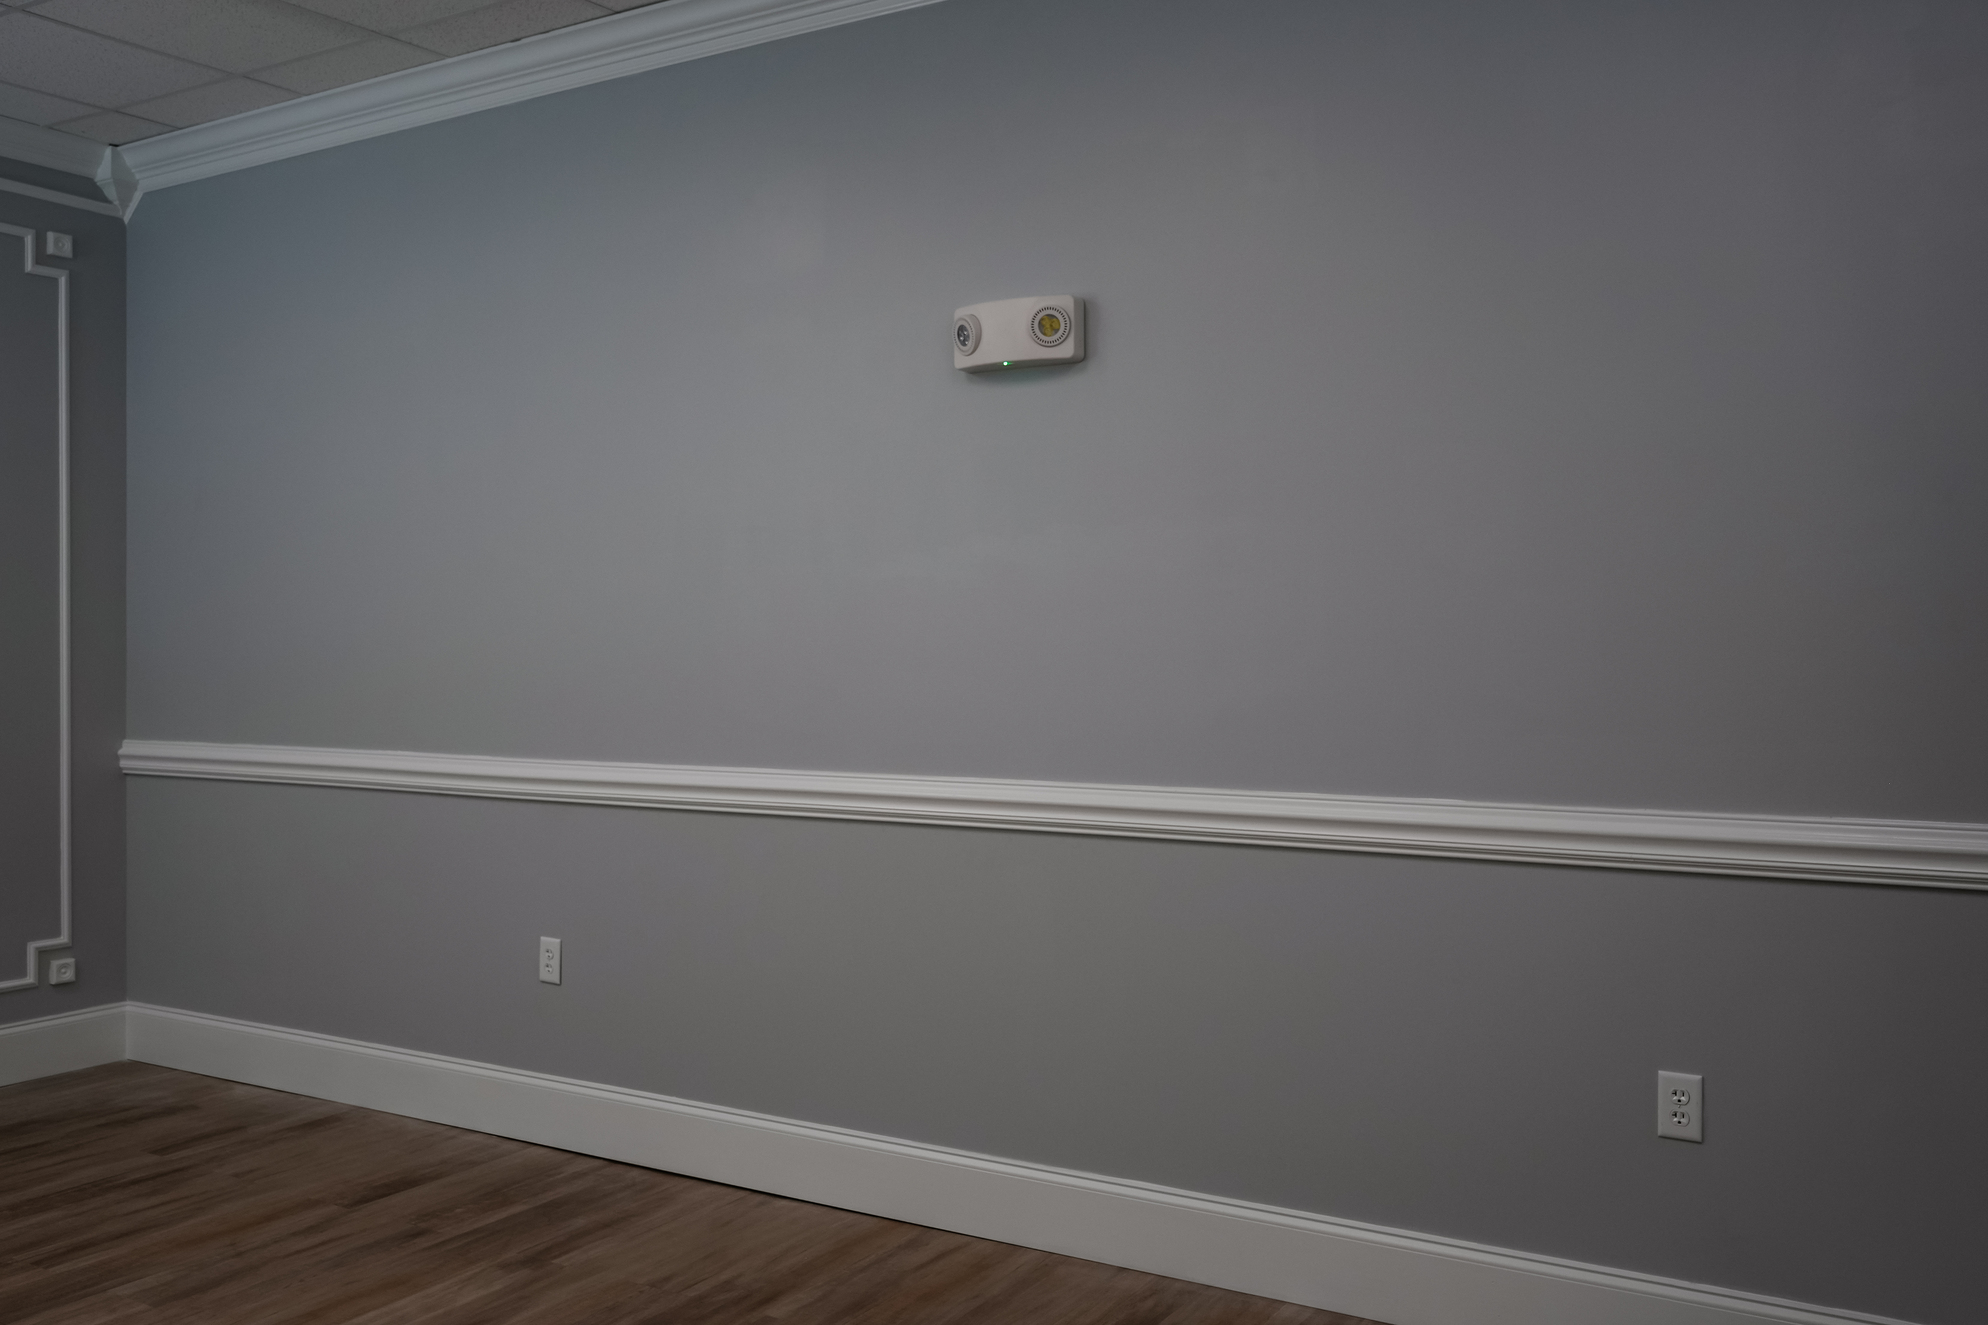
One of the key components of this Colonial wall is a crown buildup. To create the foundation of the buildup, we used 620 Base and flipped it upside-down, while placing it a couple inches below the ceiling. The next step was overlaying 47 Crown at an angle that connects the ceiling and the 620 Base. The image and video below illustrate the components and positioning of the buildup, while showing the relative ease of installing it. Buildups are an excellent way to add depth, detail, and sophistication to your room.
The second Colonial build-up that we created was a chair rail build-up. We first measured 37 inches from the floor and installed a 304H Chair Rail Backer before placing the 390 Chair Rail on top and centering it. A classic component of the Colonial style, a chair rail build-up, not only looks great but also is straightforward and simple to install.

Calm, Cool, and Natural
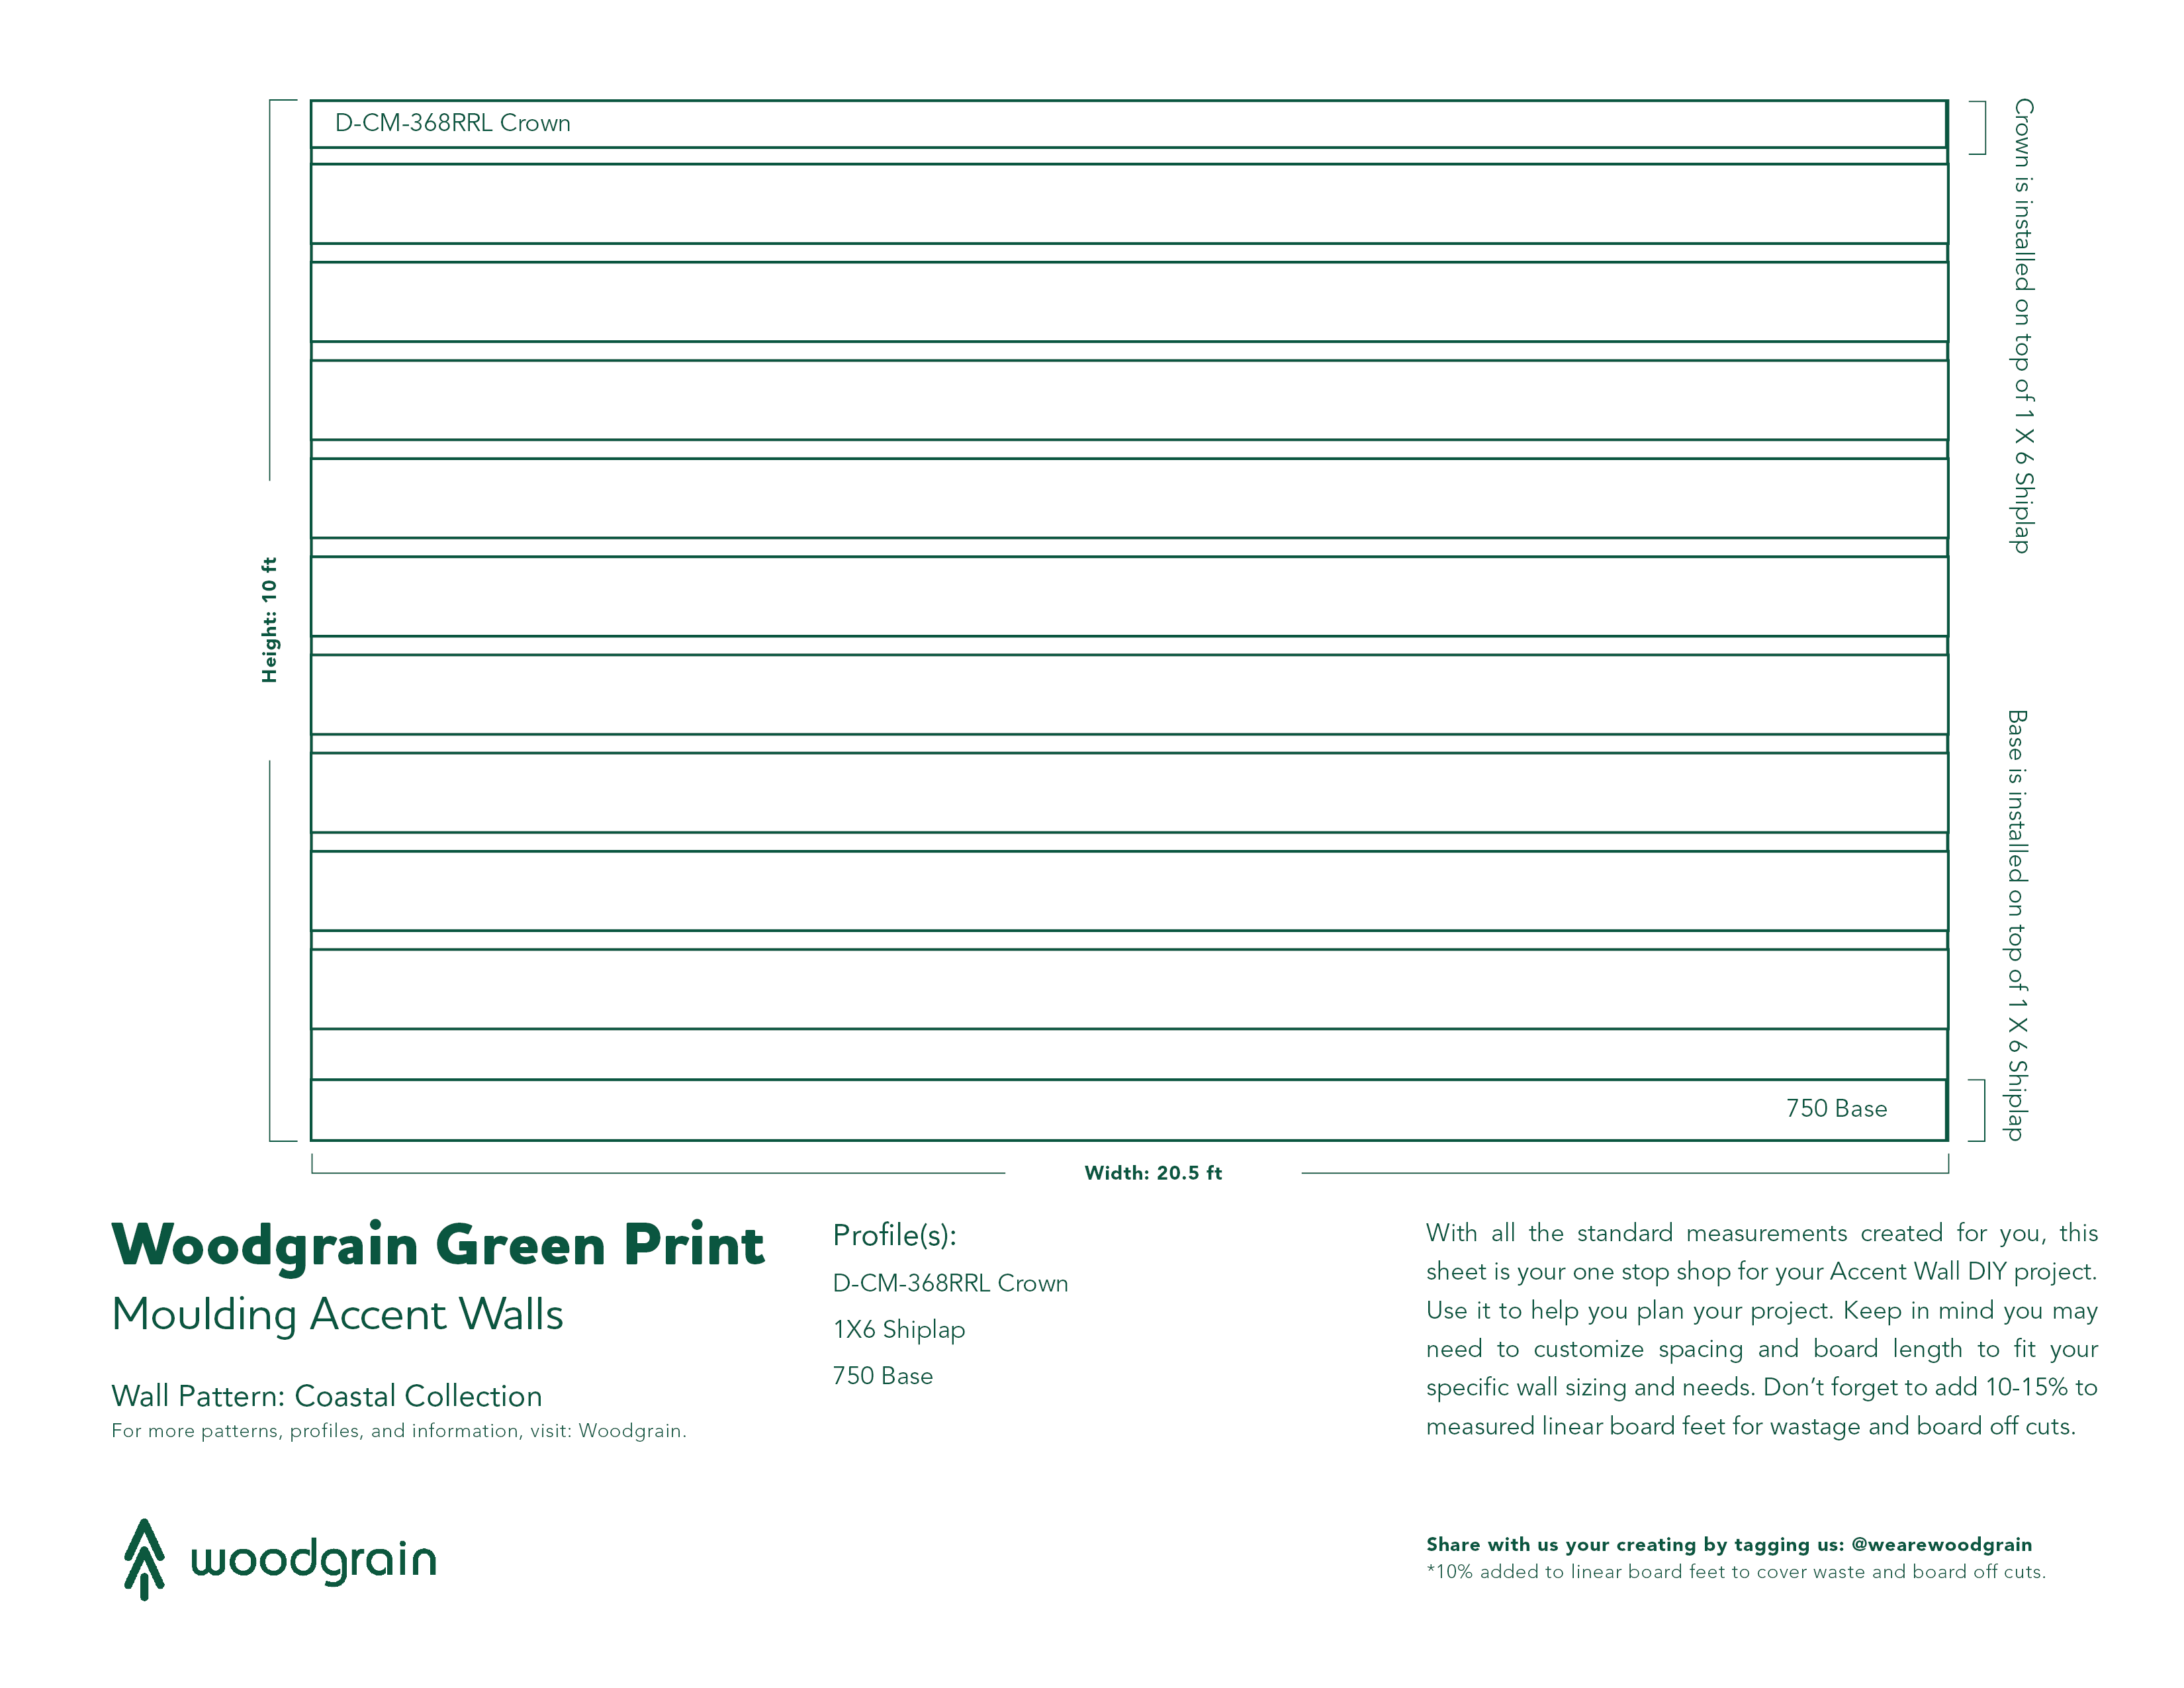
Feel as if you’re at the beach with our Calming Coastal Collection. This collection includes the perfect mixture of beach-themed wood moulding and designs, from wall paneling to wainscoting. These moulding profiles create a custom look that is perfect for a seaside home or someone wanting to bring a little taste of the beach into their house. This interior design trend is all about bright whites and light blues, with poplar wood accents. Our Coastal collection is guaranteed to create a comfortable, relaxed, and ready-to-lounge living space.
Profiles:
How To Install:
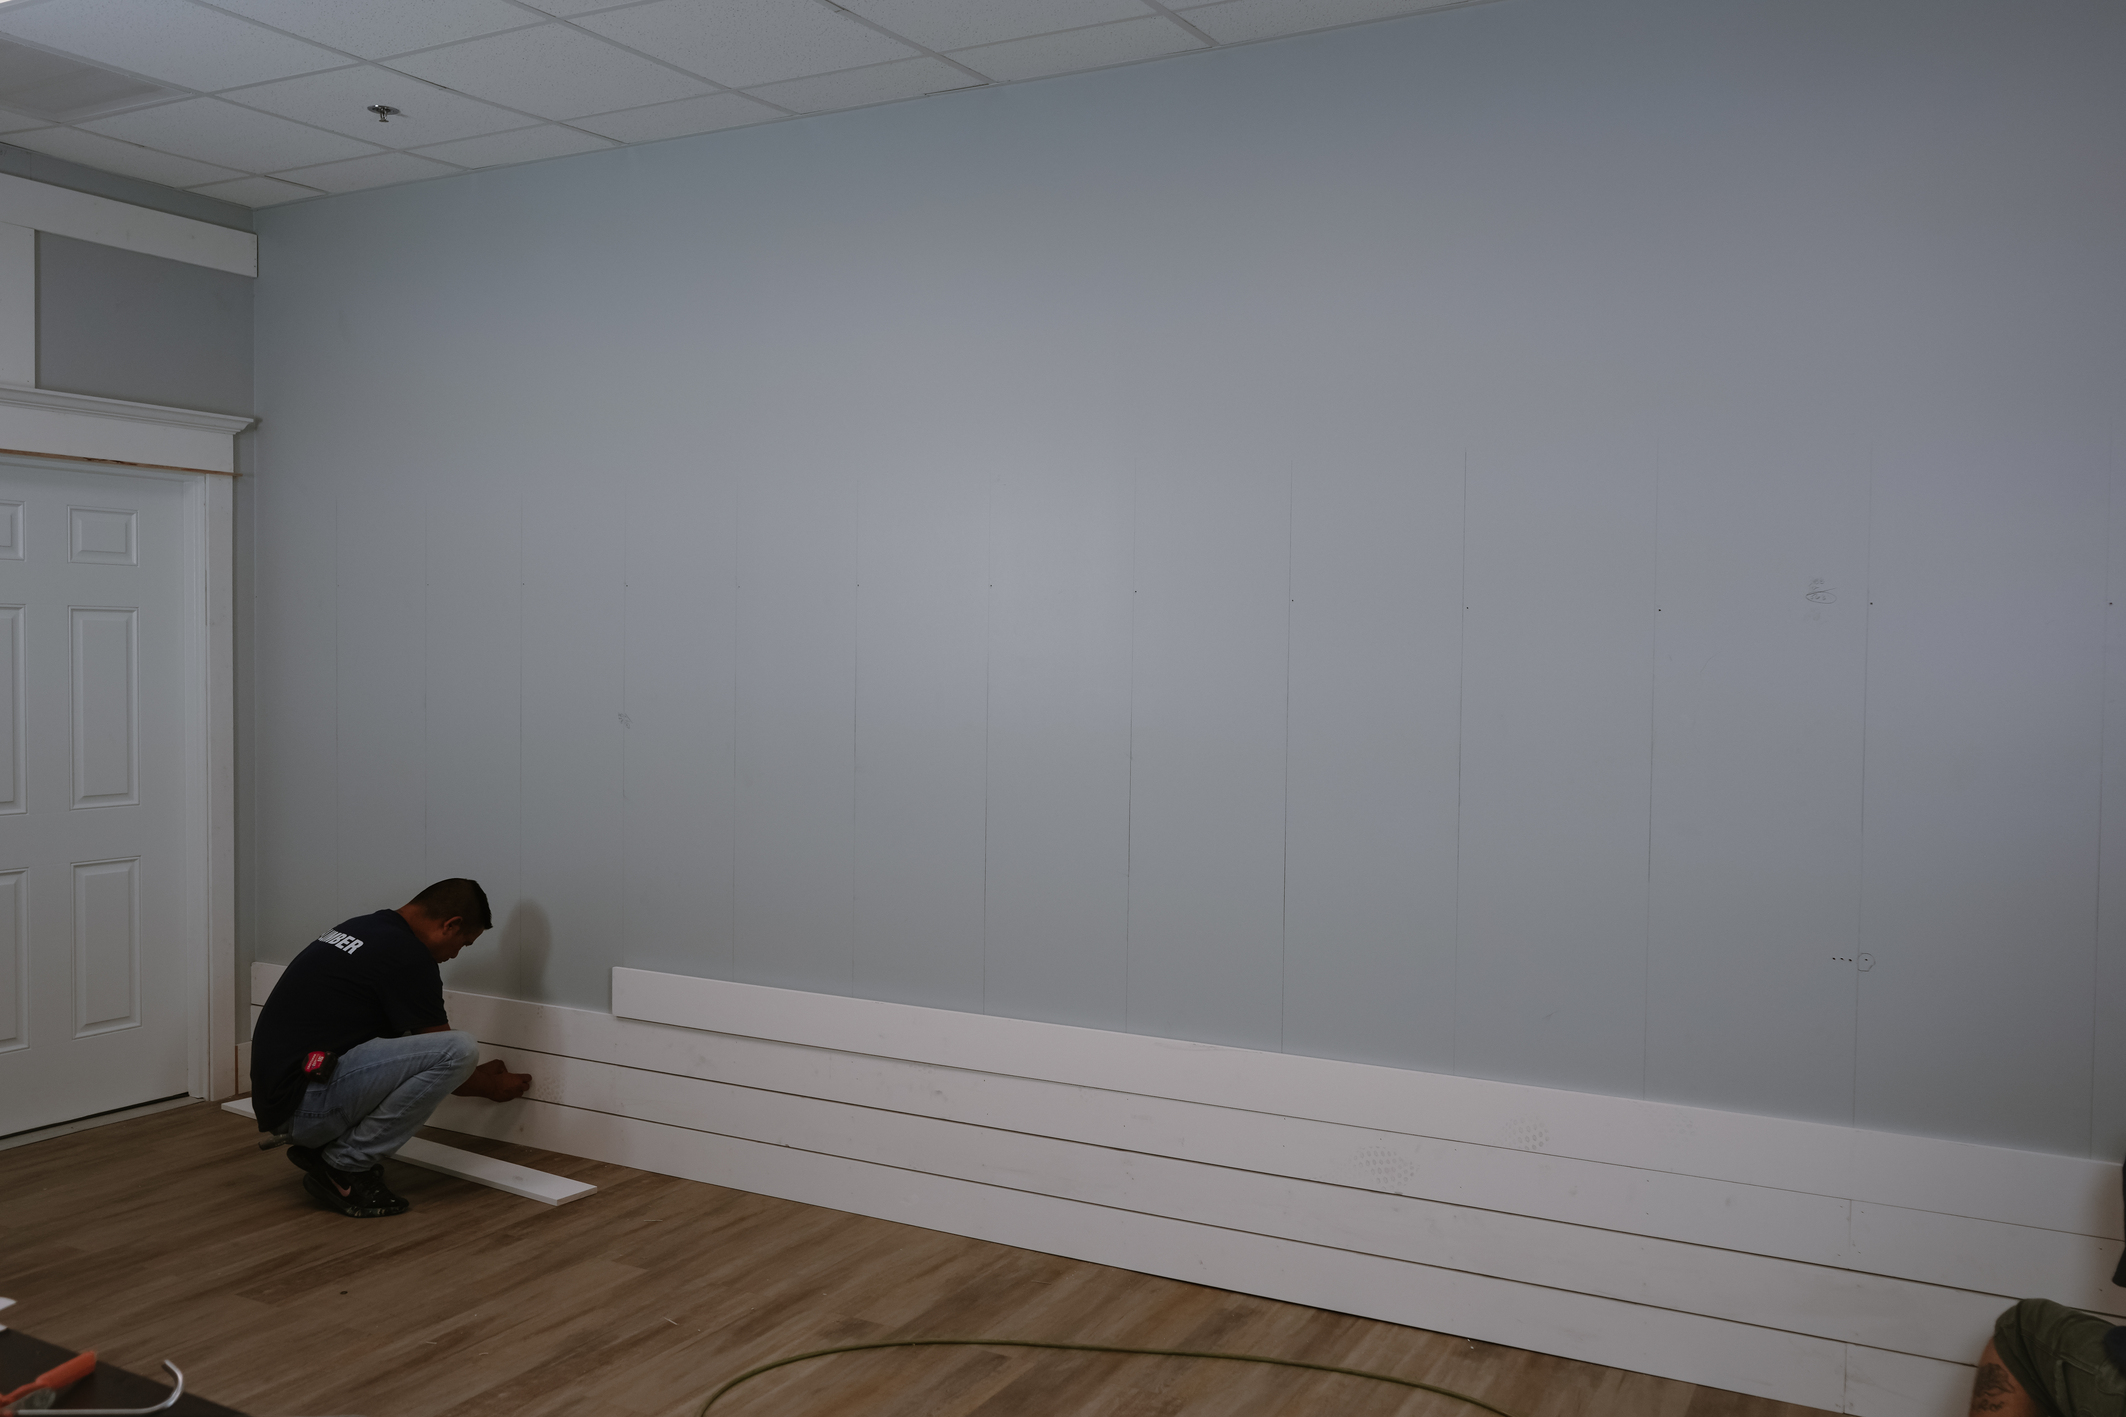
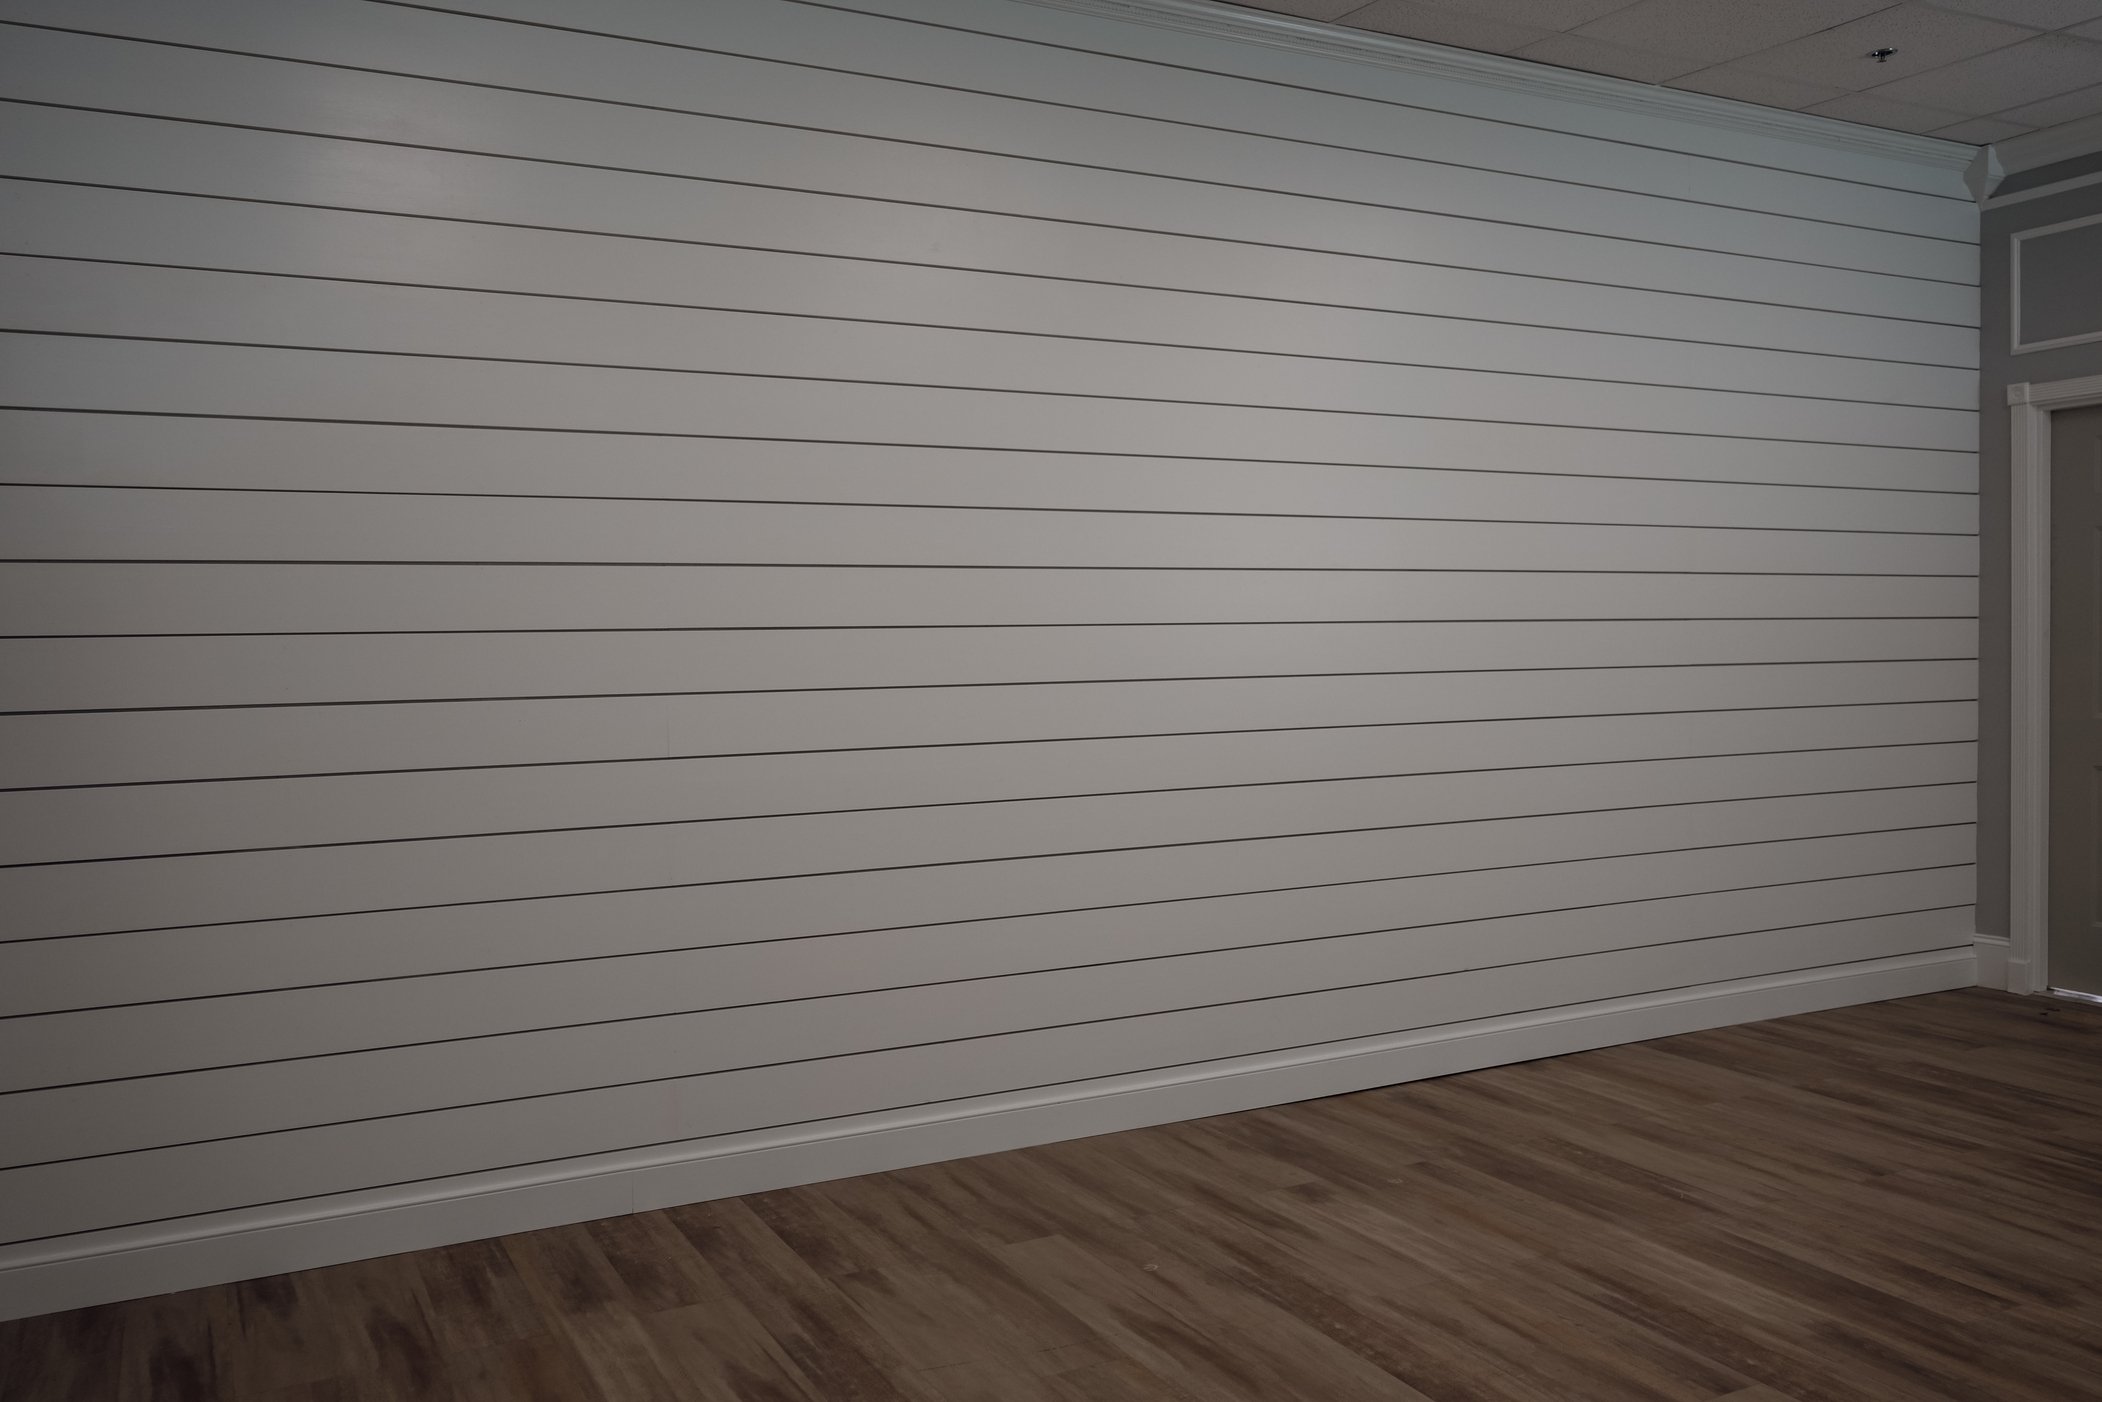
If you don’t have actual shiplap boards, no worries! You can create this unique accent wall using baseboards. To create this shiplap-style wall we used 1x 6 Boards and spaced them out by a quarter of an inch; however, you can choose to space your boards either less or more to give the look you’re wanting. We started the install from the bottom and made our way up, placing spacers after each board to ensure we had equal gaps every time.
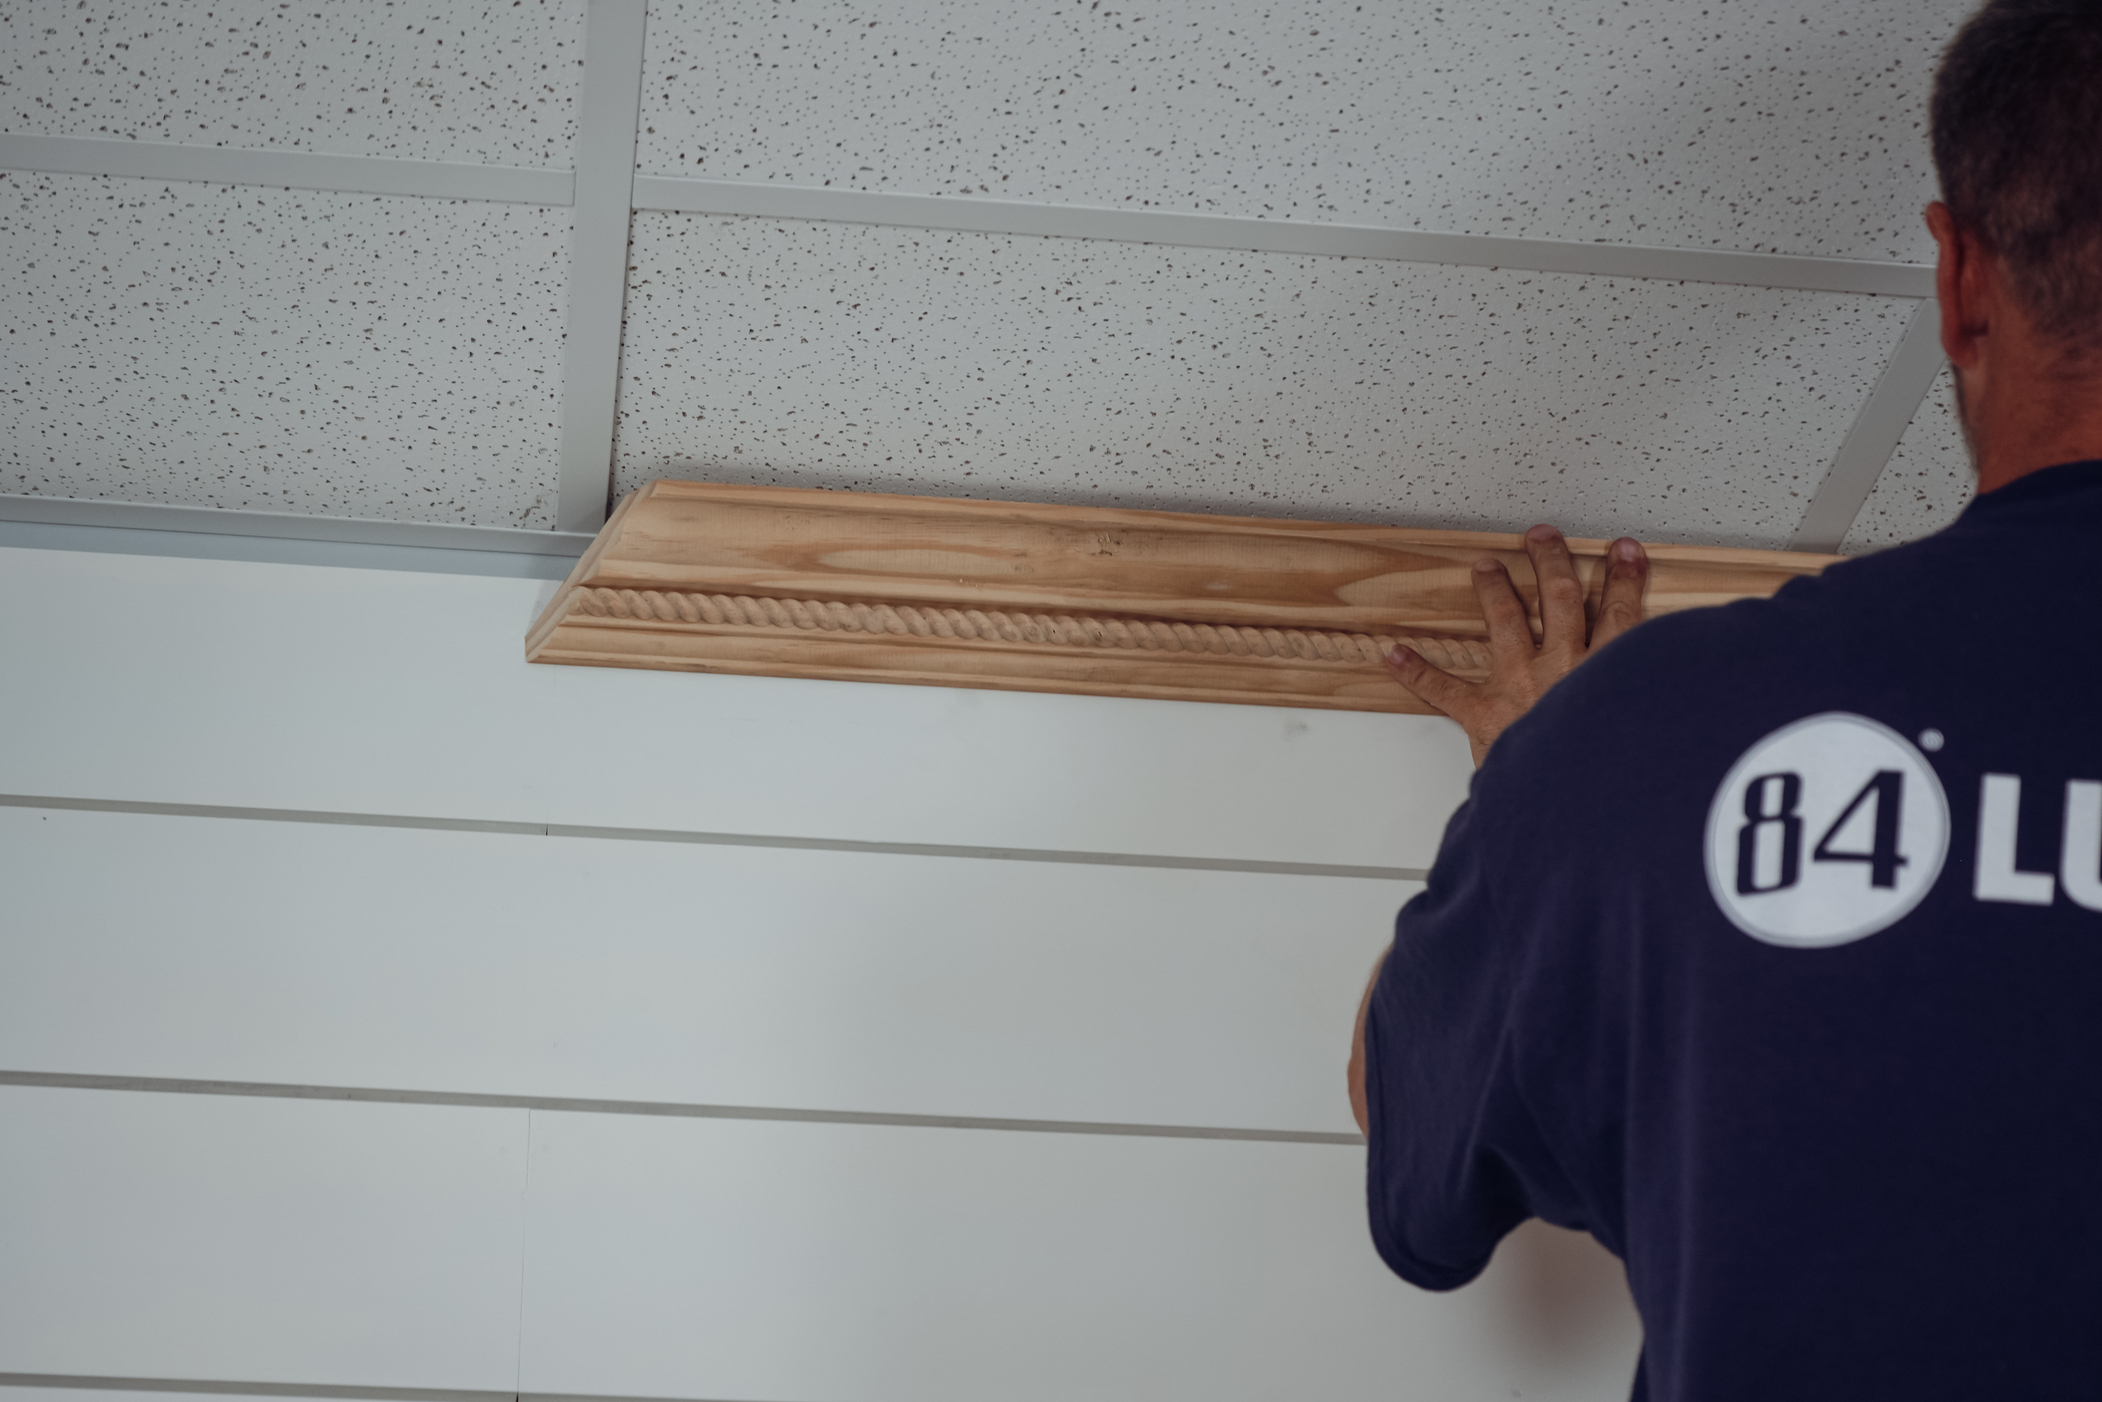
We topped off this shiplap wall with decorative dentil crown moulding to really give it that coastal feeling. An added bonus of installing crown moulding is it covers any gap between the top board and the ceiling, so no need to make an rip cuts on the top board.
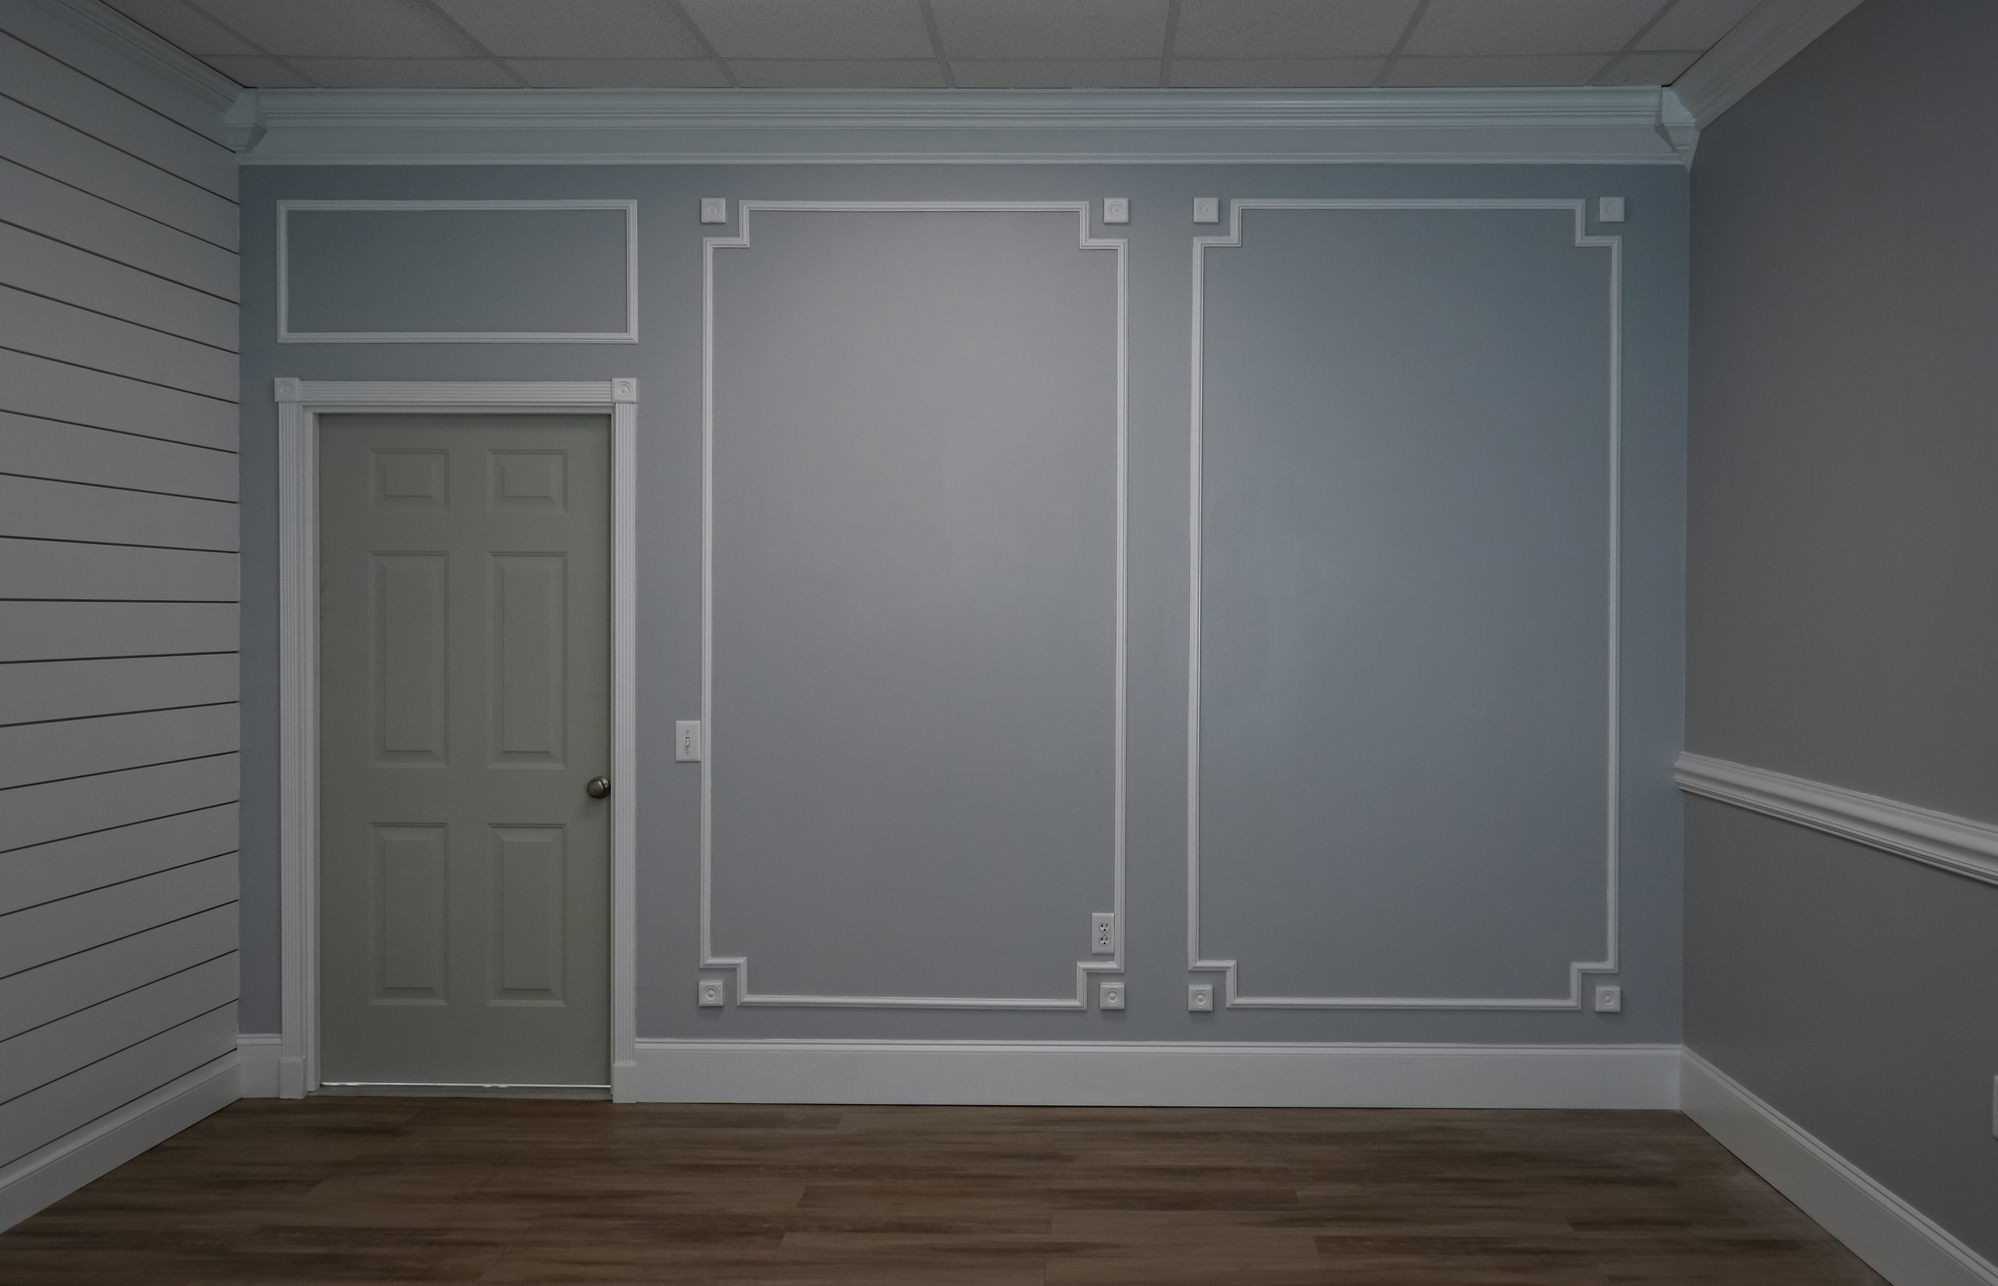
Luxurious, Grand, Opulence
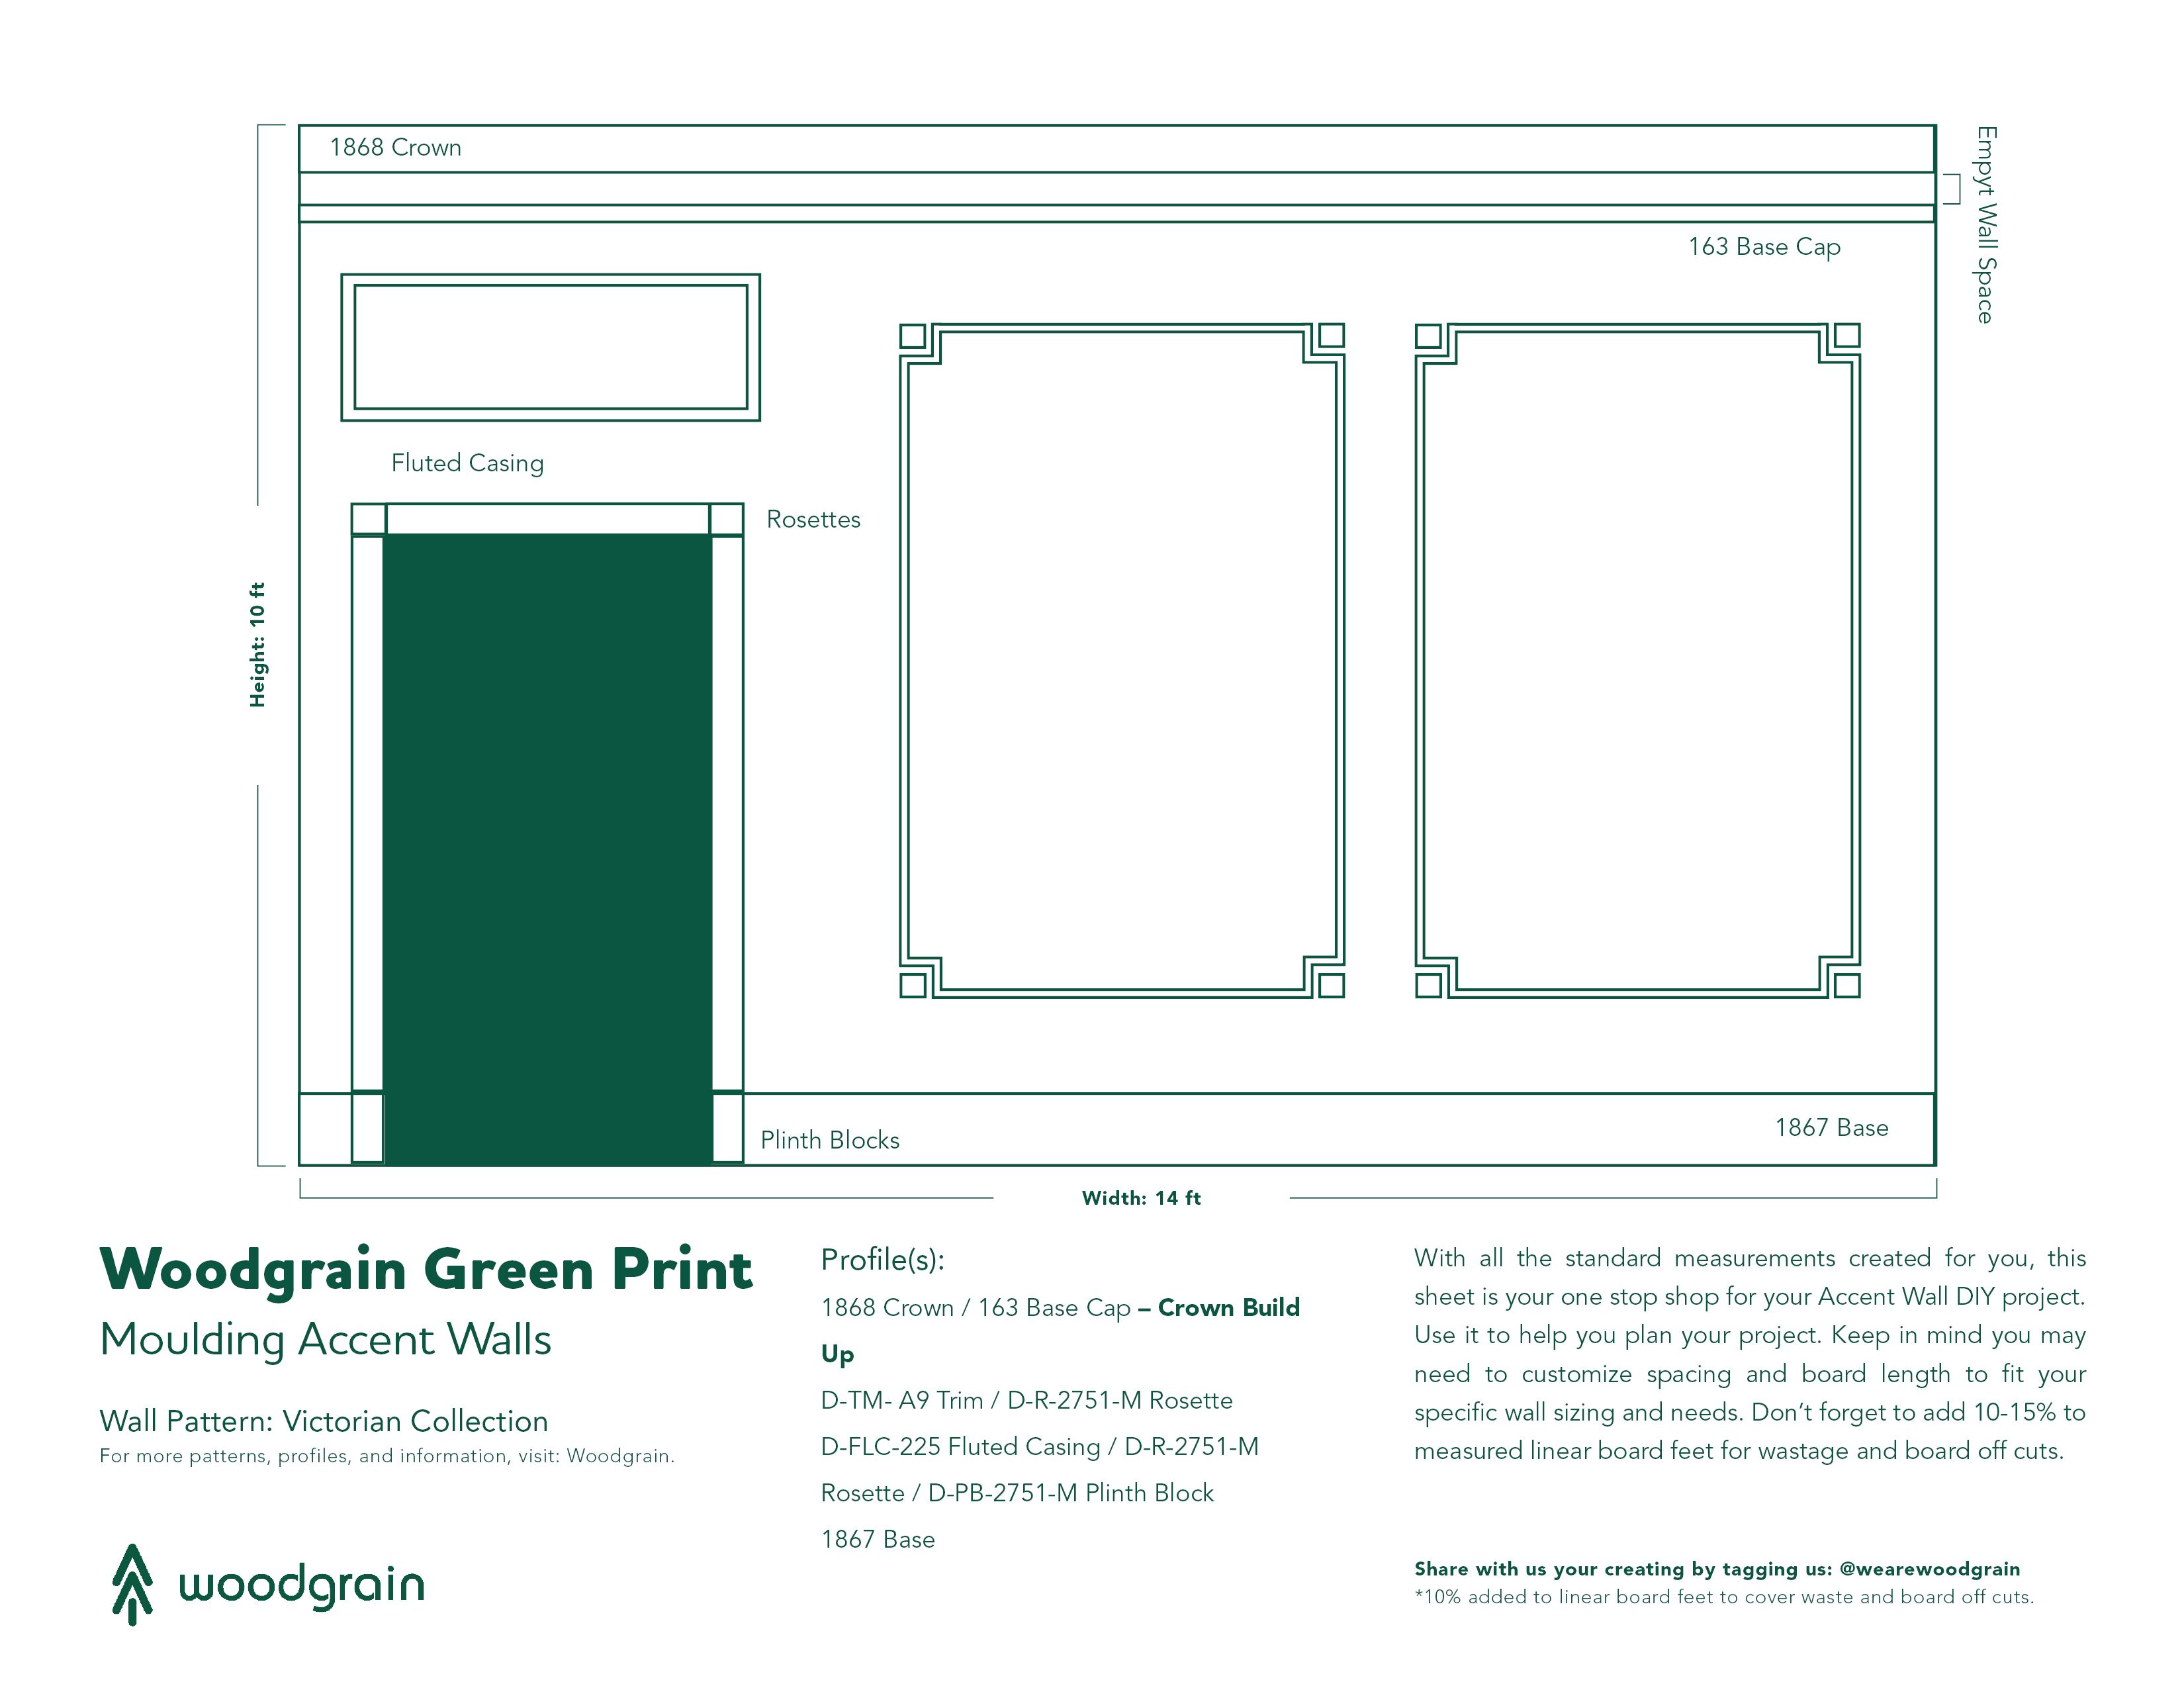
Step back in time to the Victorian era with our Victorian Elegance Collection. The Victorian era is noted for orderliness and decorative ornamentation. This special collection was inspired by the essential trio: fluted casing with plinth and corner blocks. By adding these components, your living space will have a look of luxury and opulence.
Profiles:
- 1868 Crown
- 163 Base Cap
- D-TM-A9 Trim
- D-R-2751-M Rosette
- D-FLC-225 Fluted Casing
- D-PB-2751-M Plinth Block
- 1867 Base
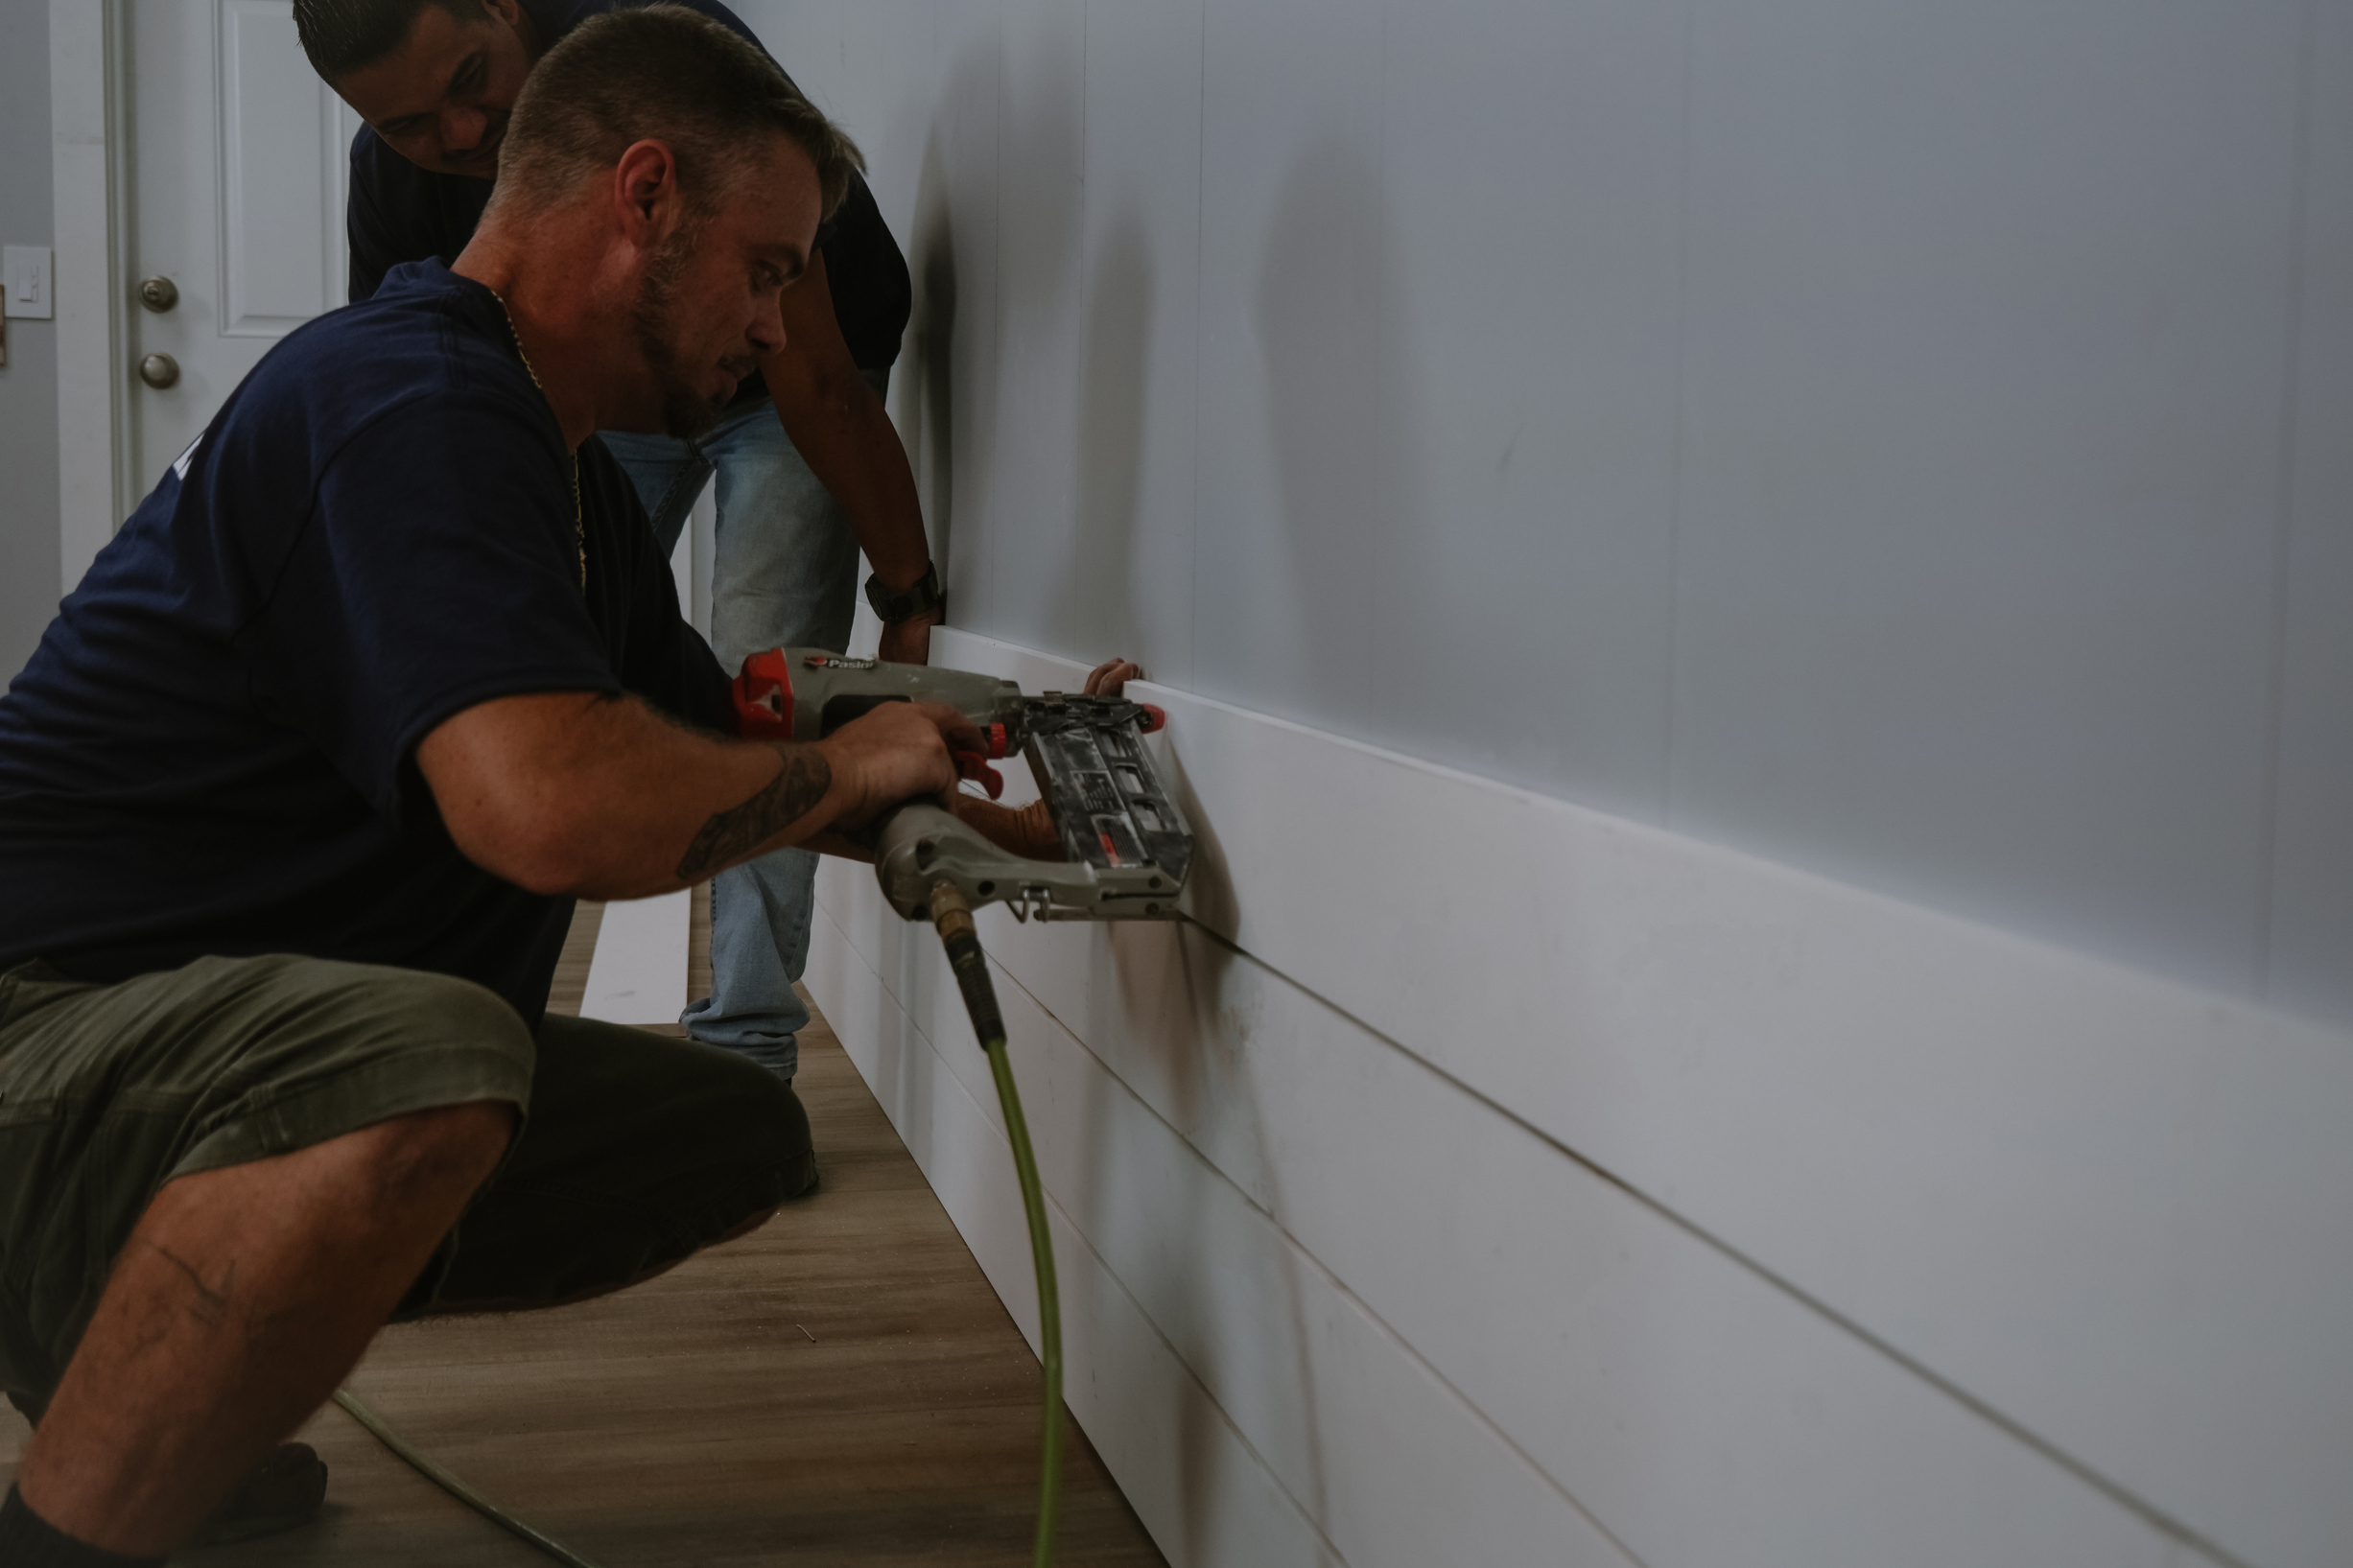
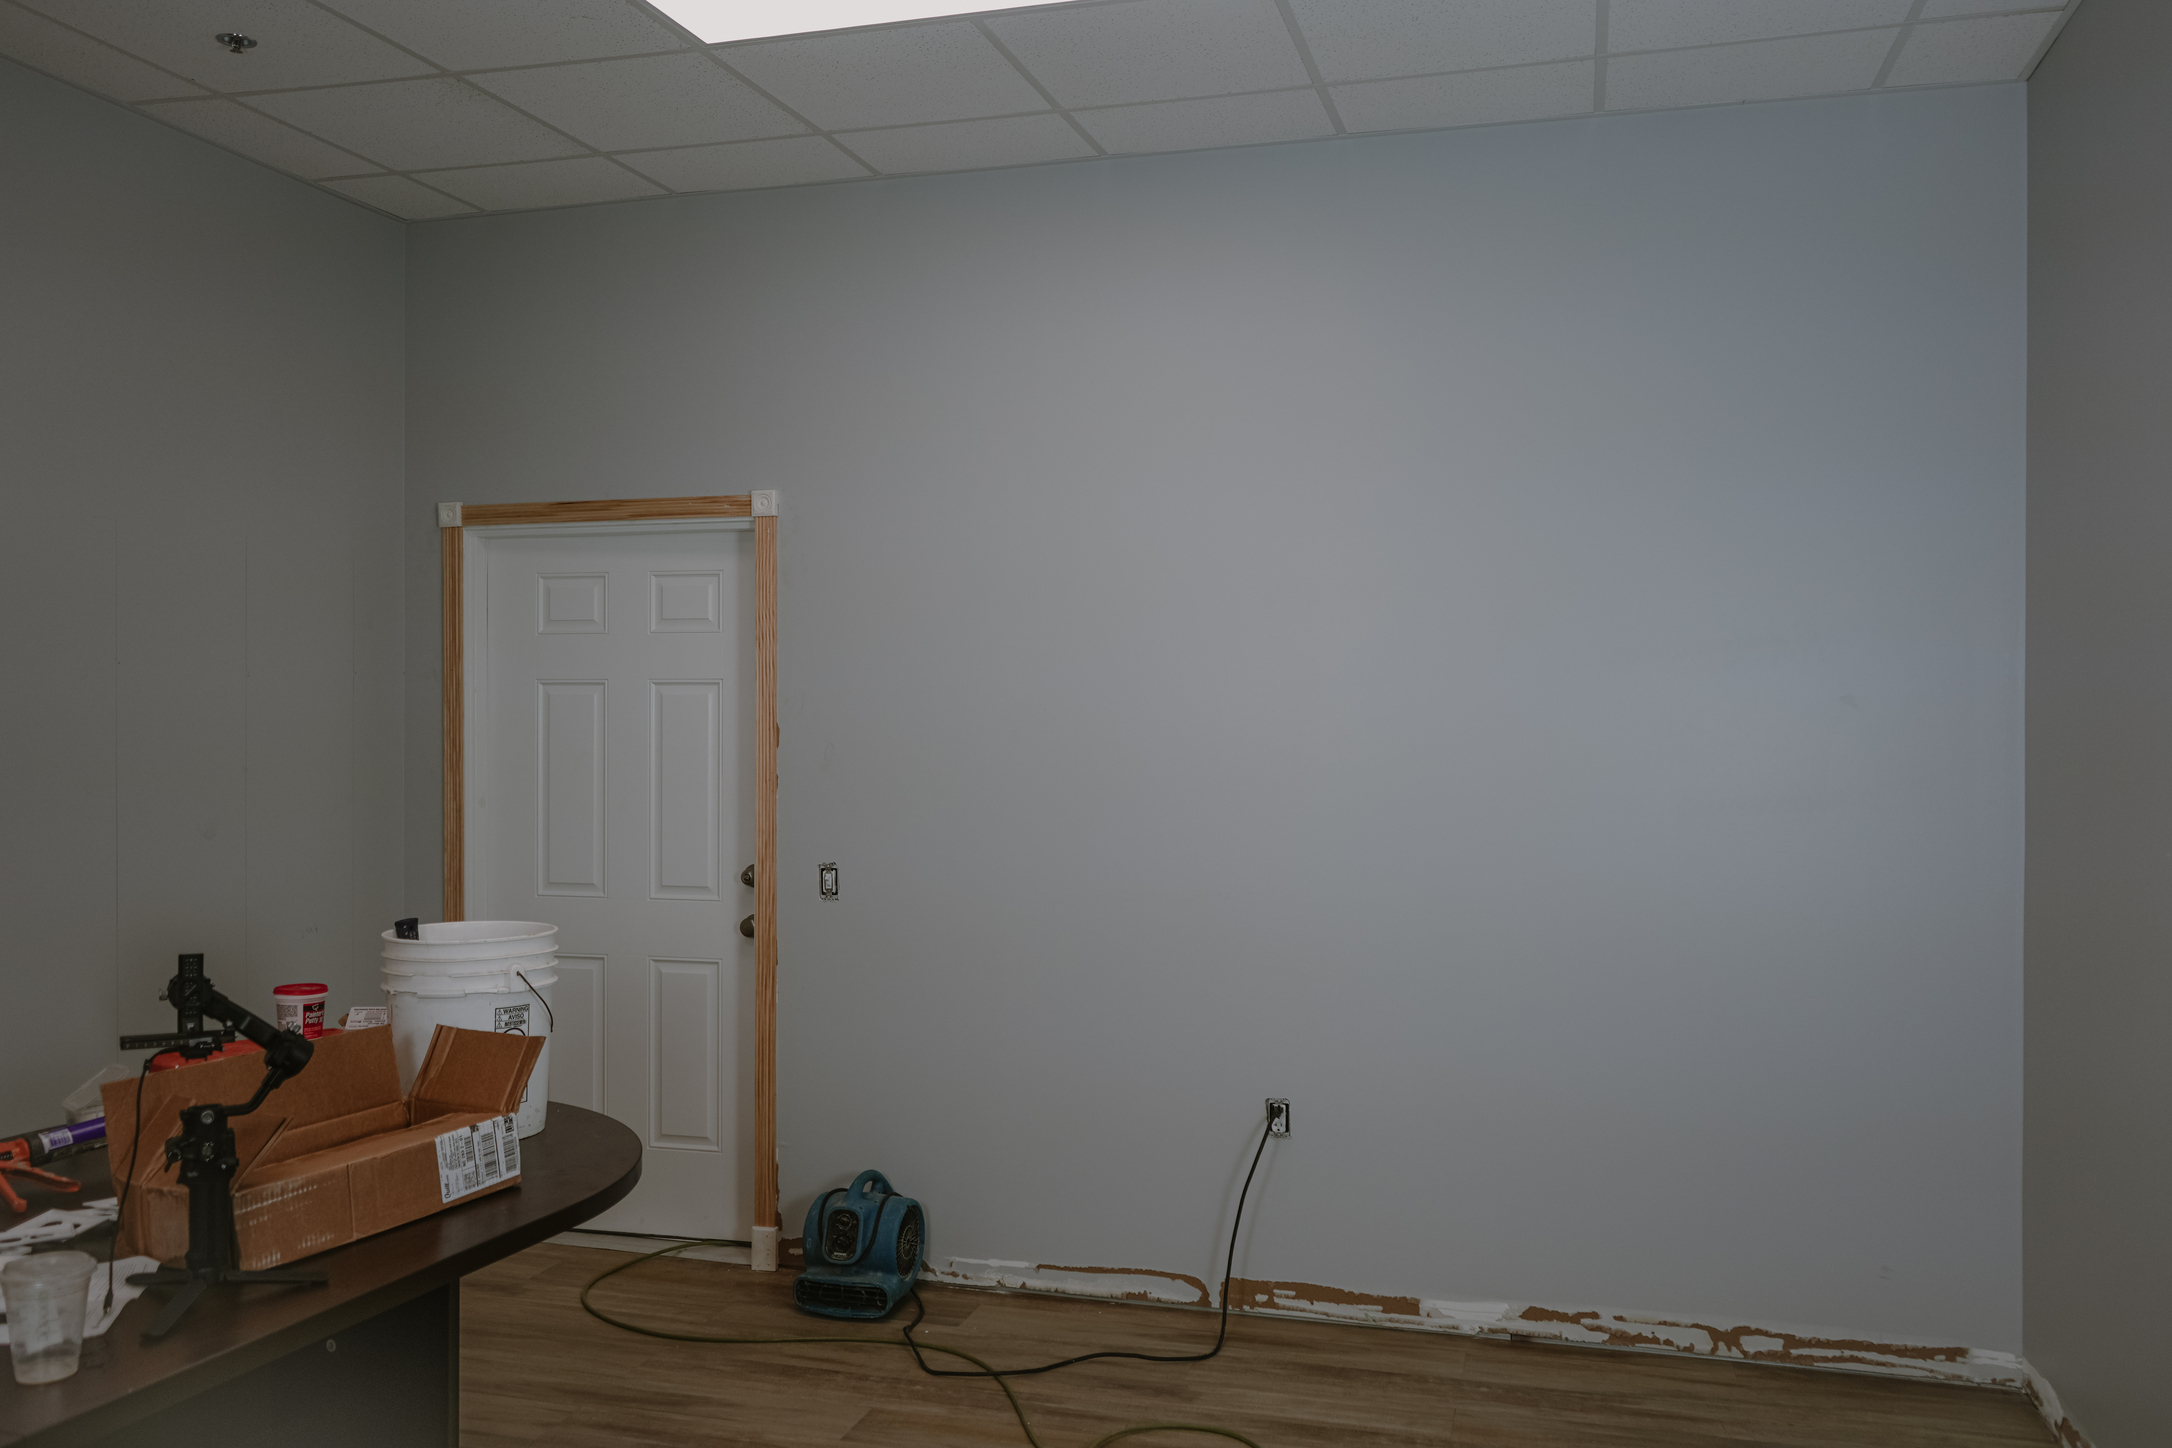
How To Install:
To create our Victorian wall, we first installed 1868 Crown at the top of our wall and then came down about five inches to install 163 Base Cap underneath the crown. By painting the two profiles and the five-inch wall gap in between, it gives the illusion of an opulent crown buildup.
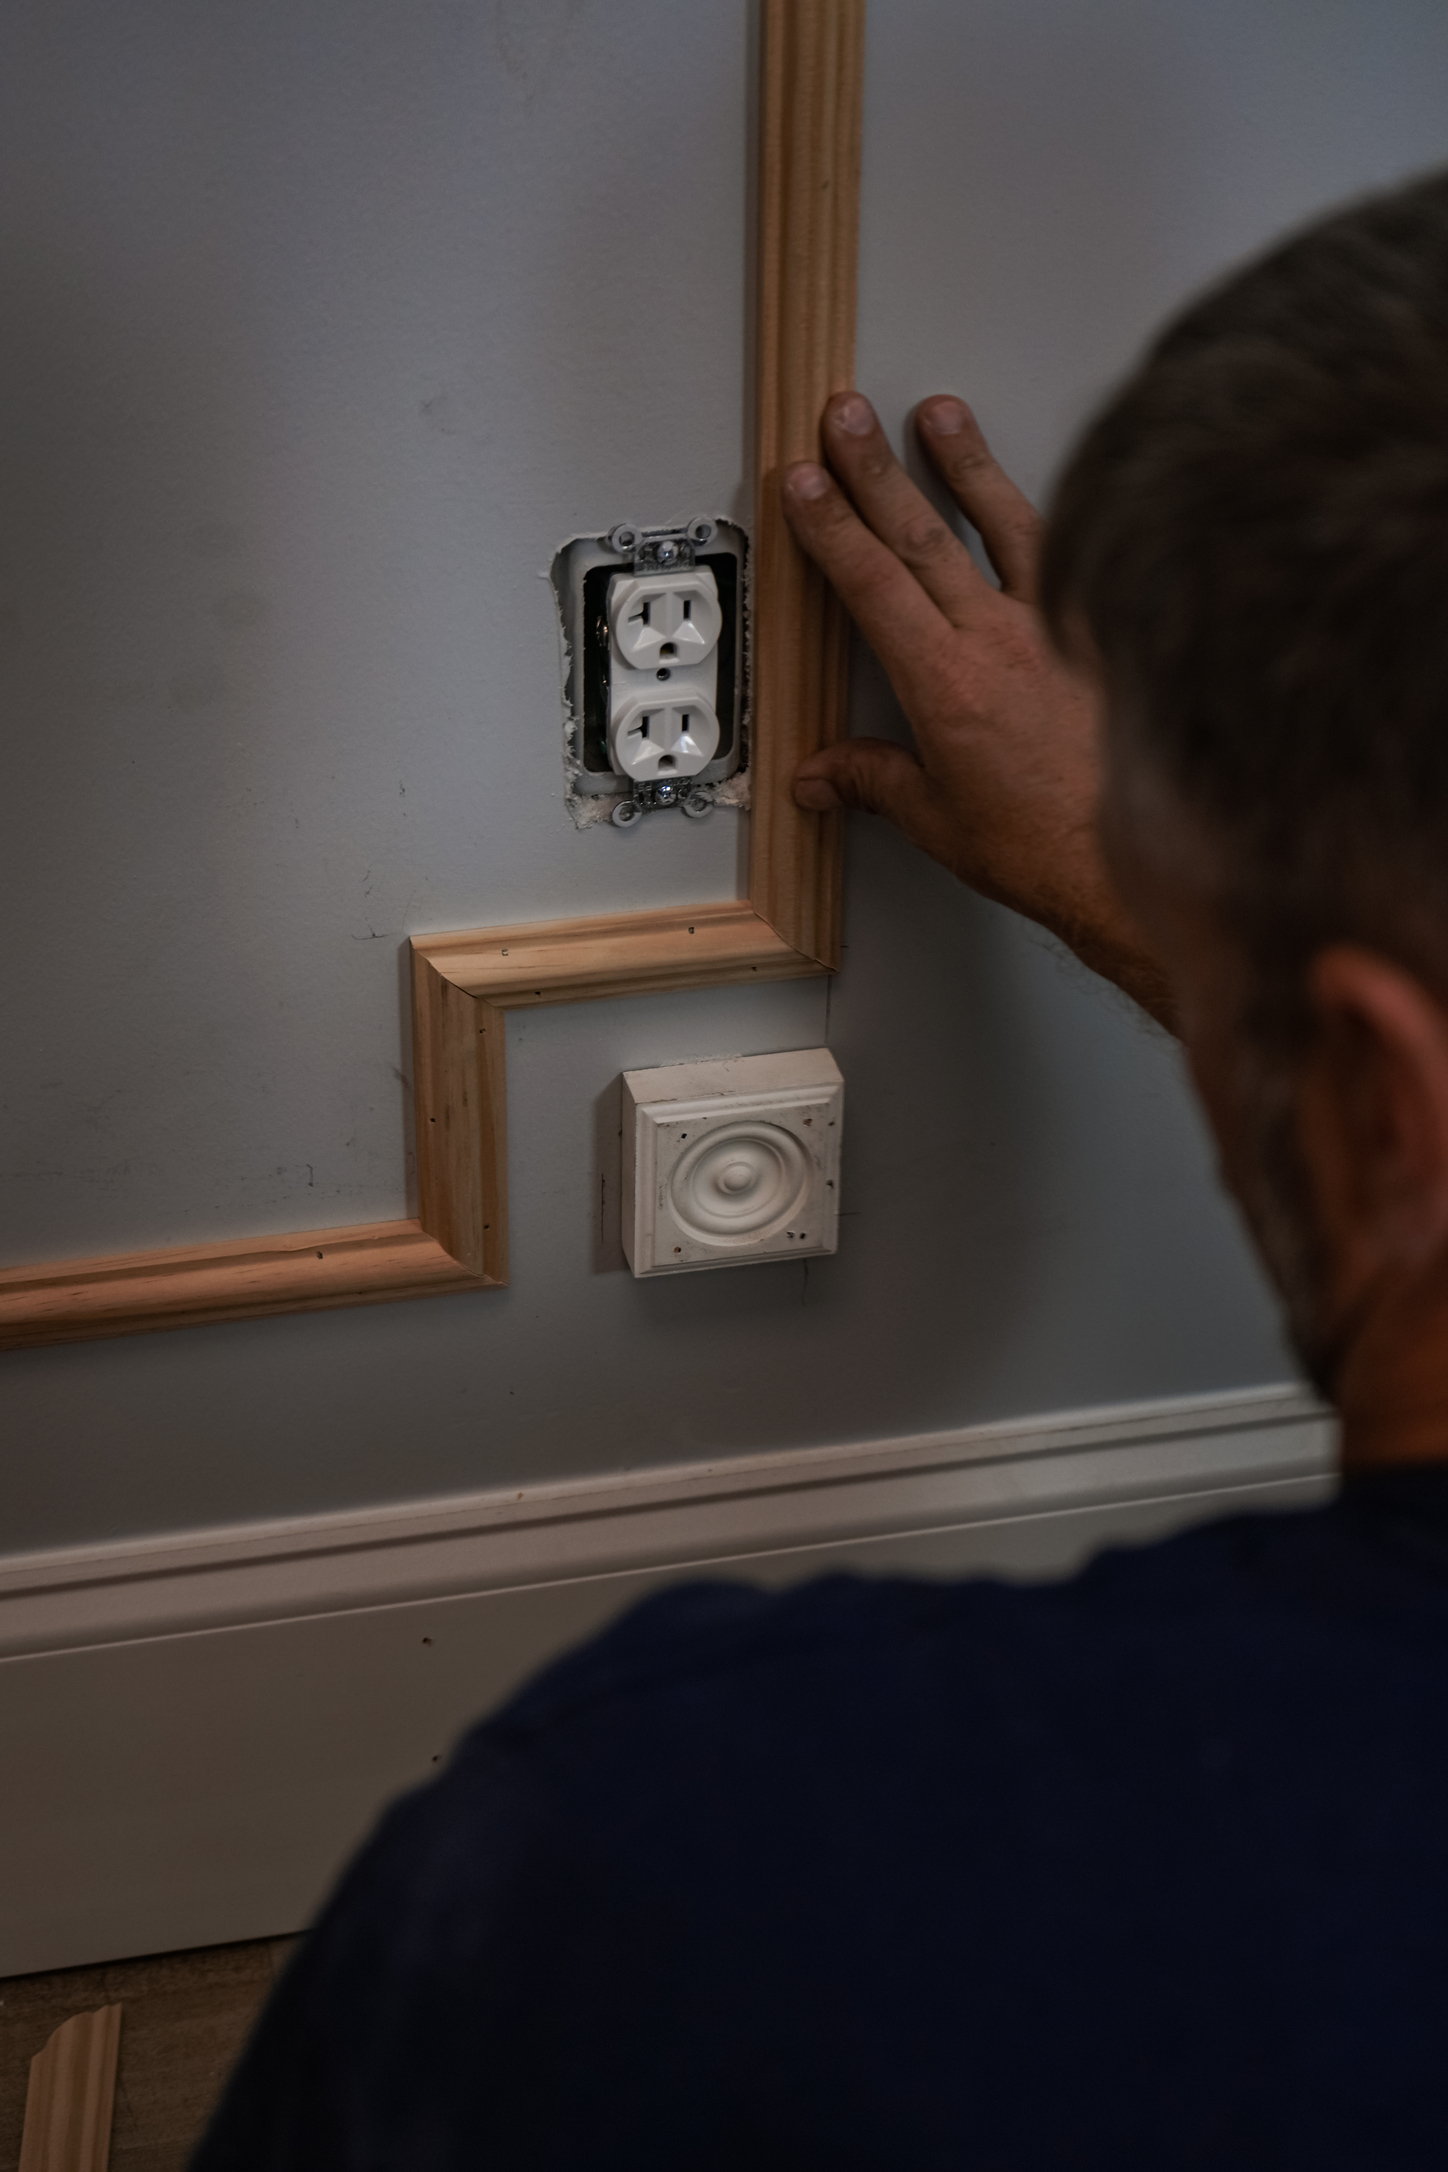
The judges panels we installed are slightly larger than usual; however, they’re very easy to create. Before starting, we measured the width of the wall from the door to the other wall and divided by two, creating equal spaces between the middle and the outer sides of the judges panels. We installed the vertical moulding pieces first, then took half the distance of the rosette blocks to create the gap between the panels and blocks. Afterwards, we traced around the block to properly prep for the creation of the indented corners to finish the paneling.
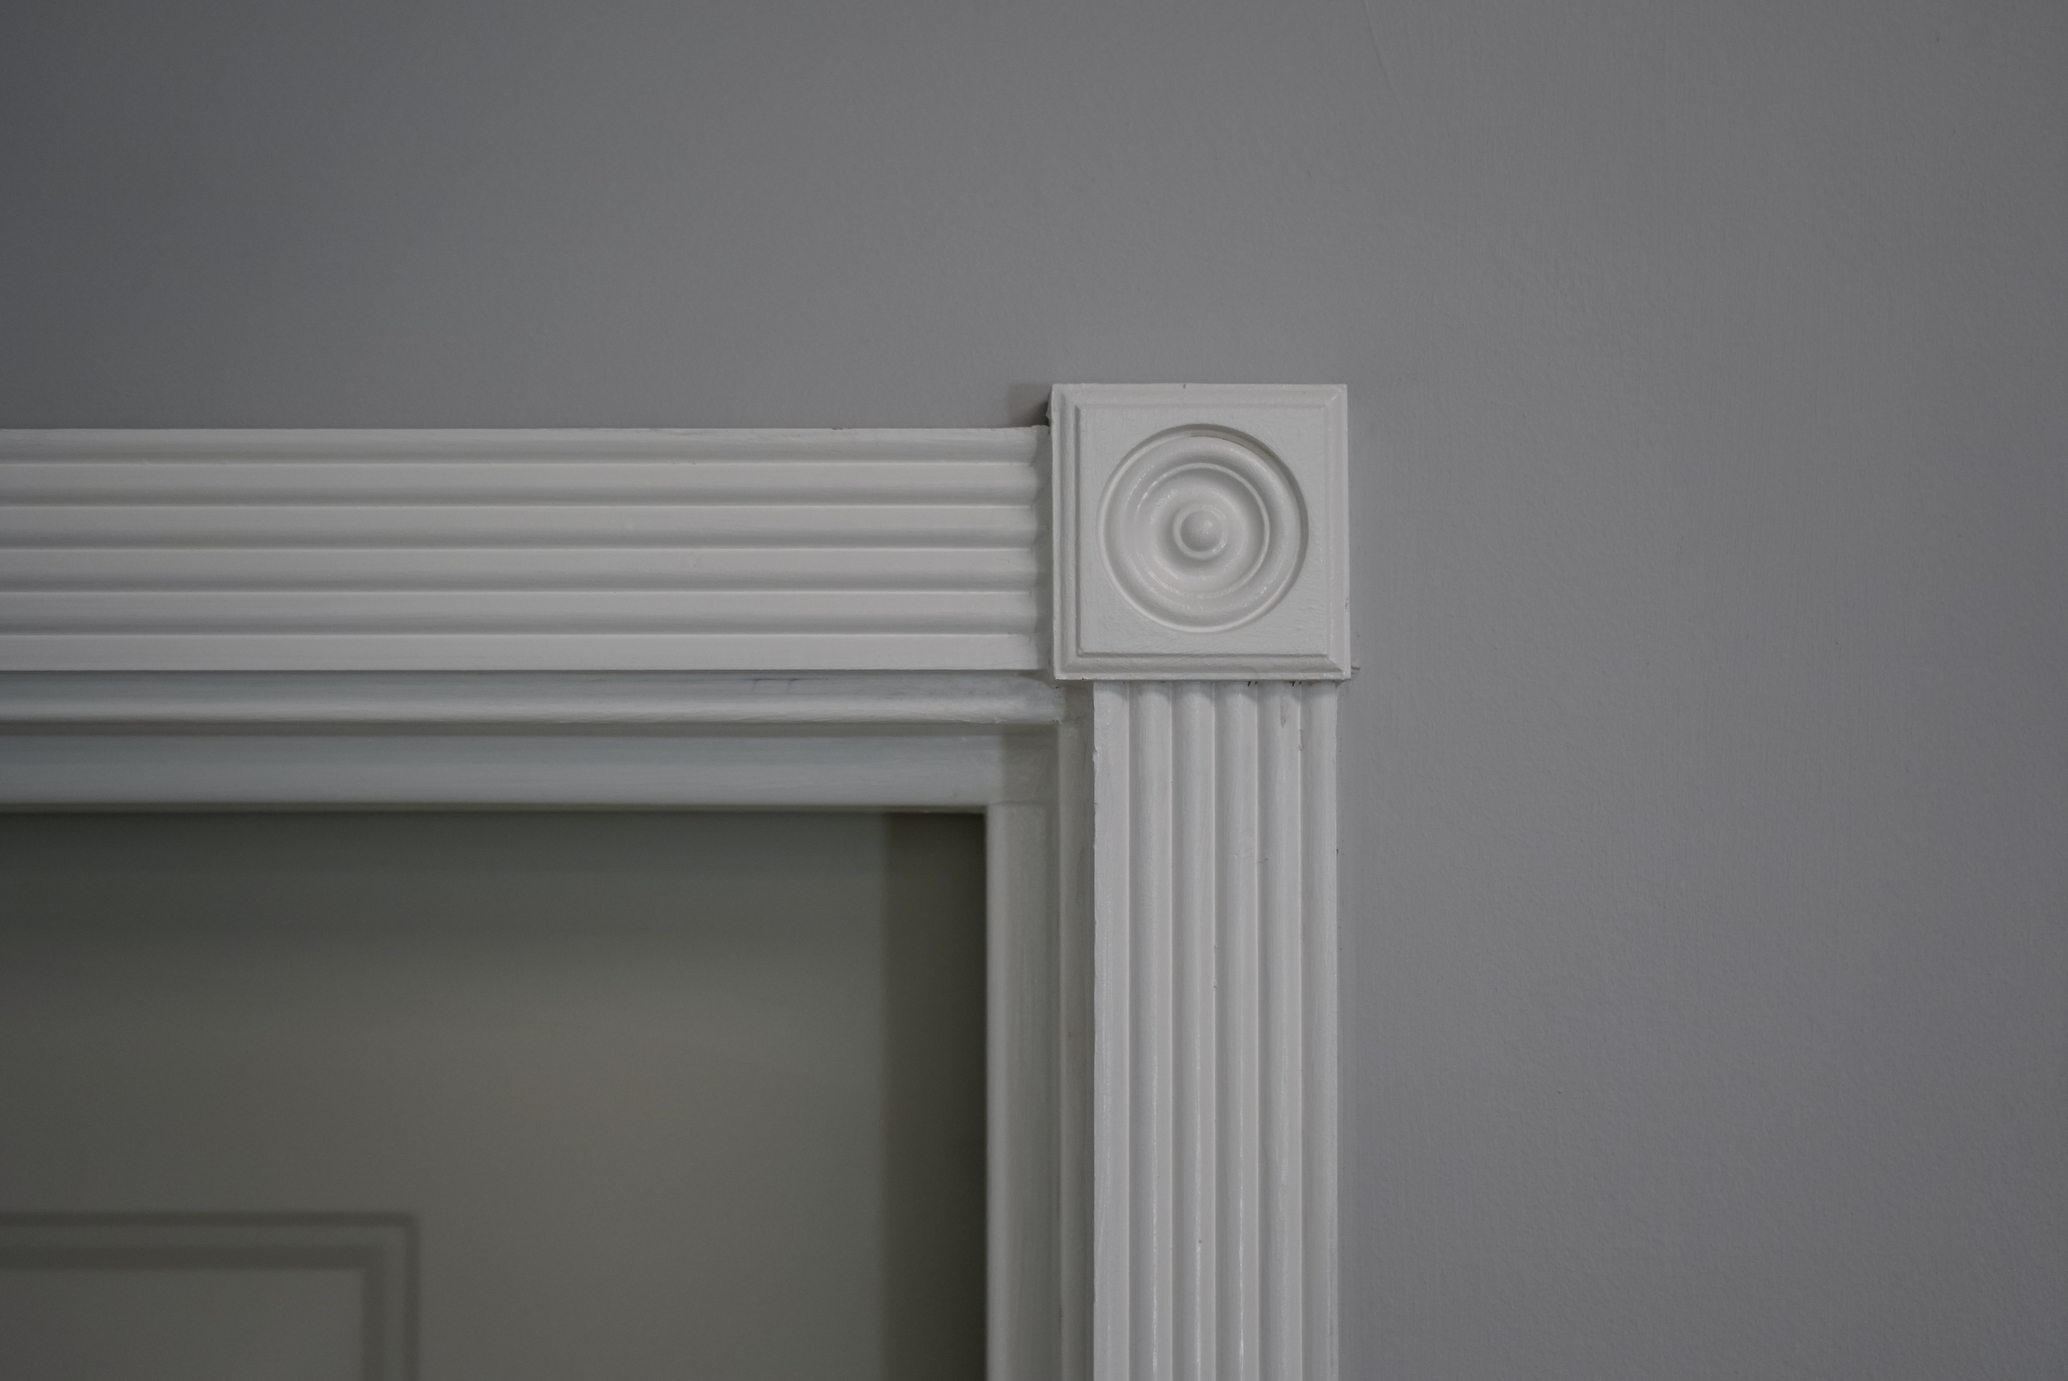
Lastly, we installed fluted casing around door opening, while using matching rosettes in the top corners, which not only add detail and sophistication, but also have the added bonus of not having to make any miter cuts. We placed plinth blocks at the bottom to complete the look.
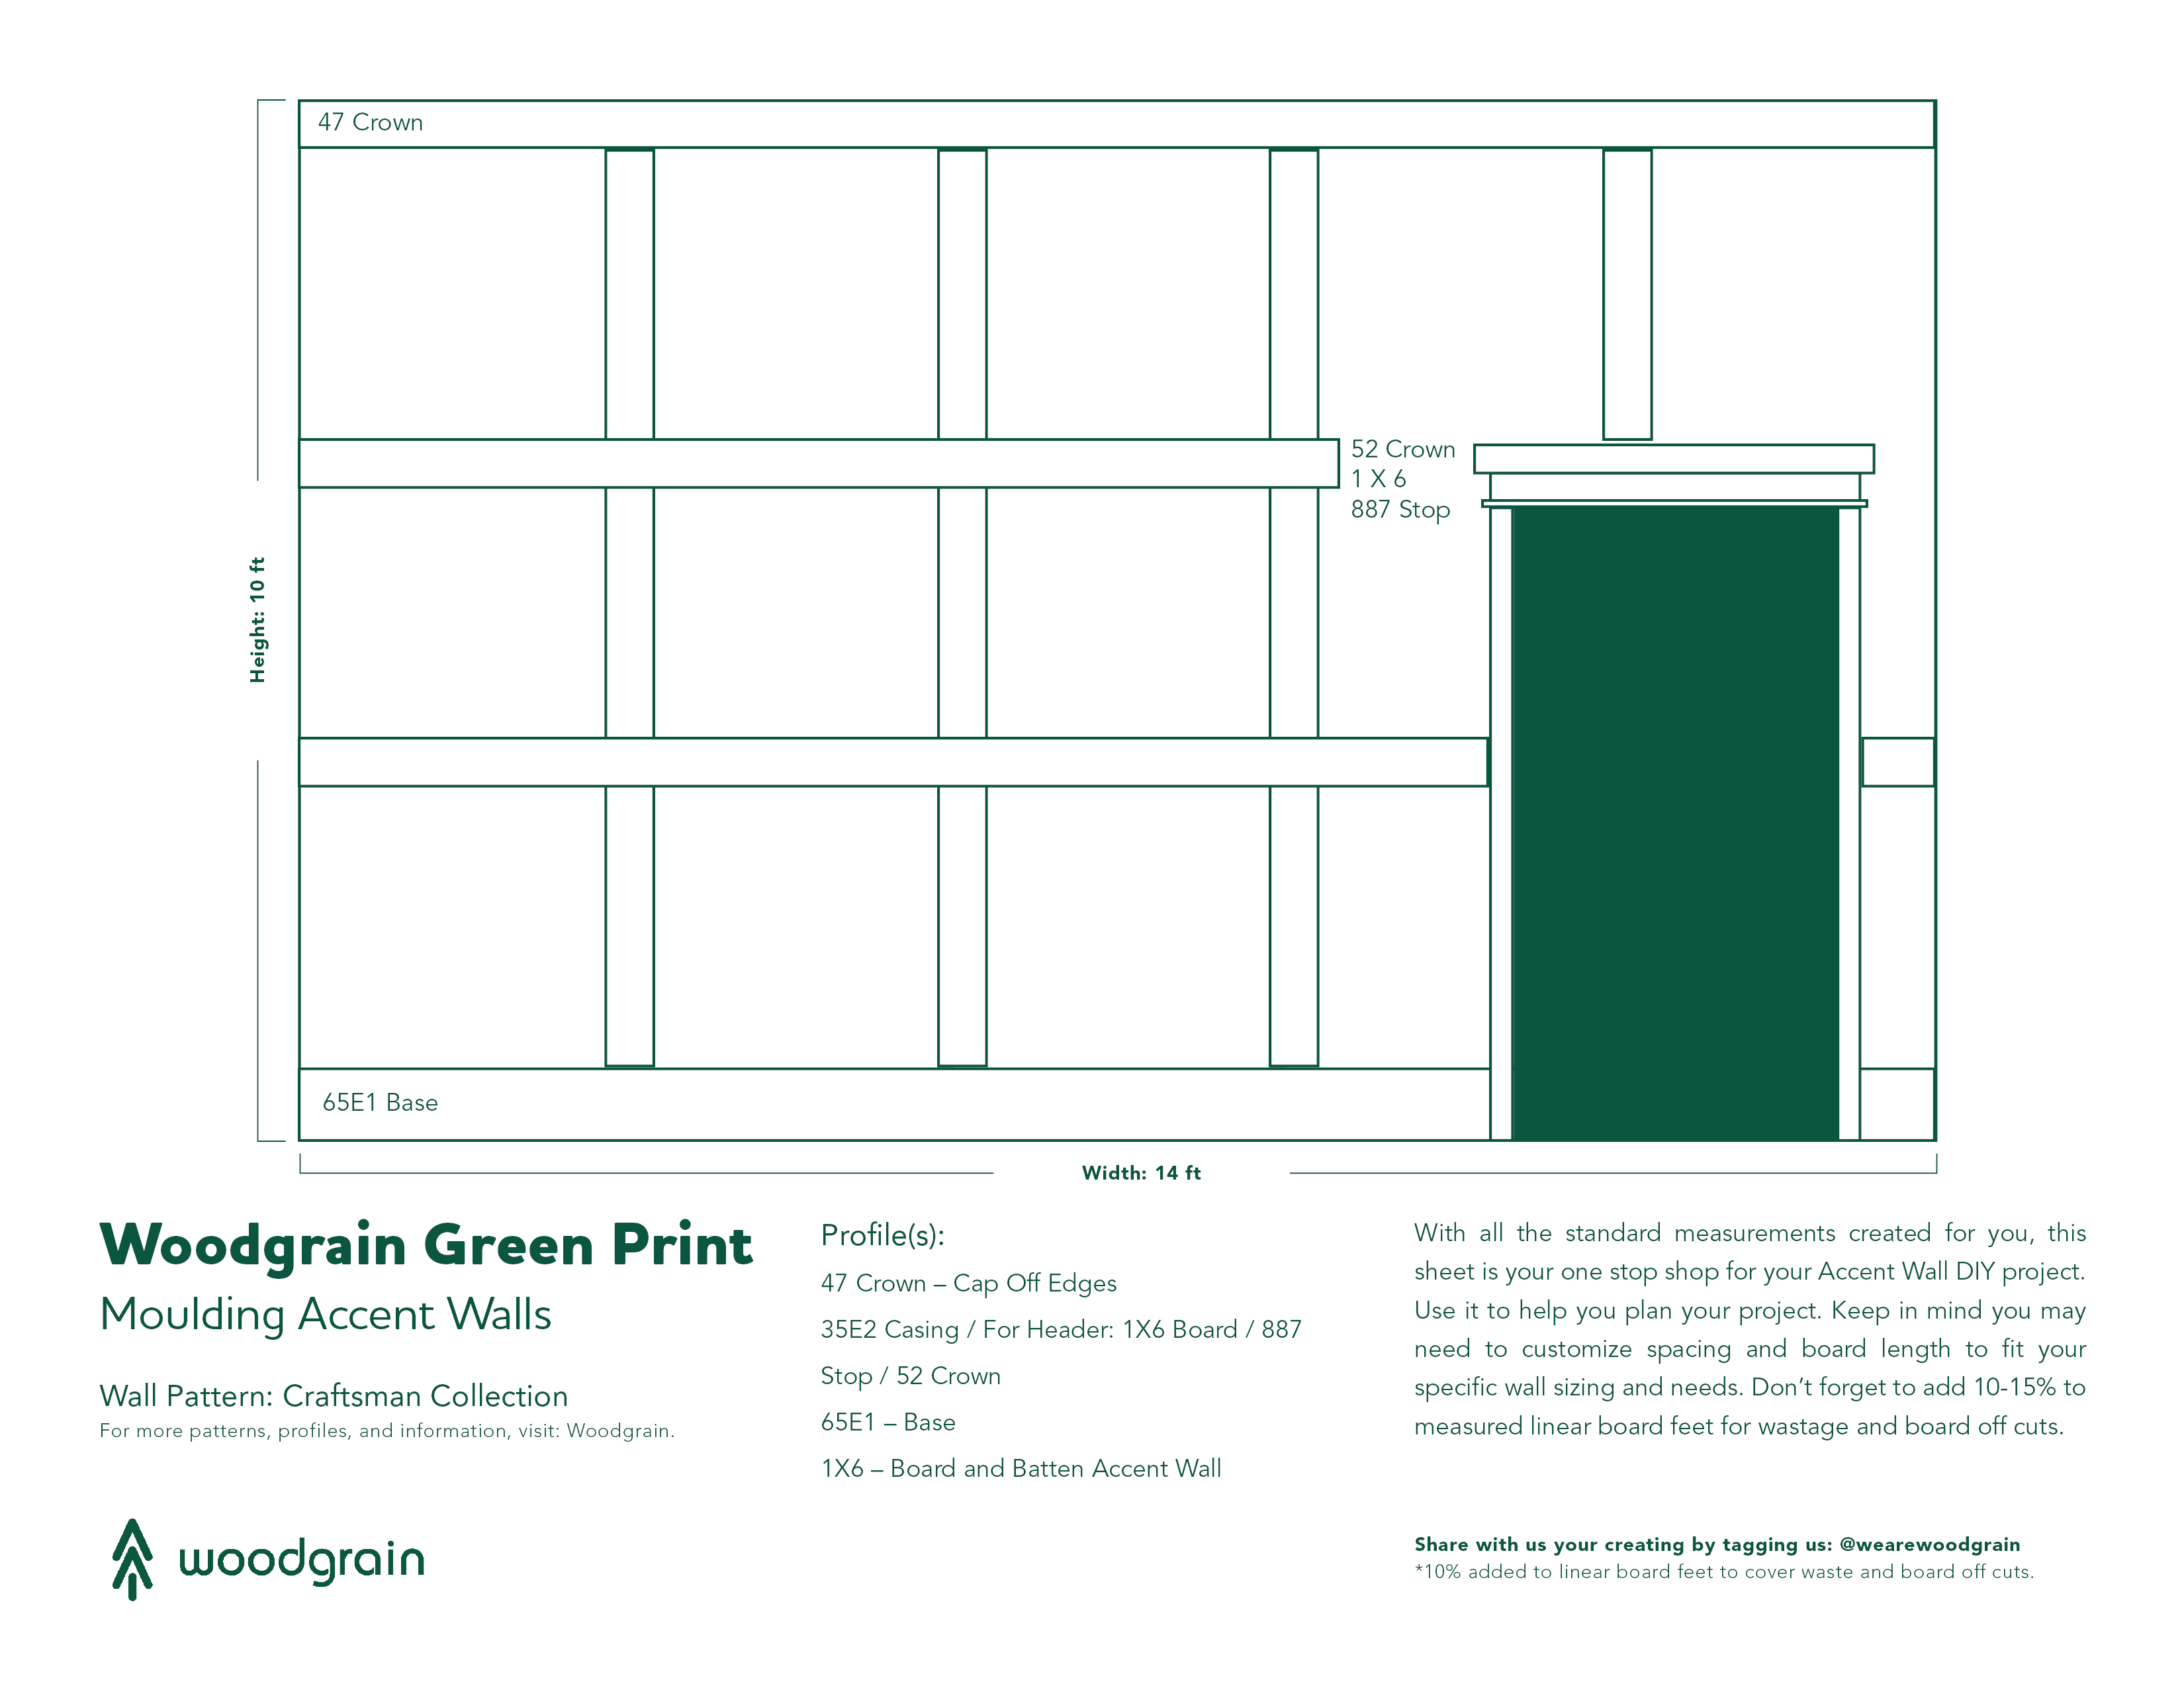
Clean, Custom, Effortless
Craftsman-style moulding and trim date back to the early 1900s, but in no way is this style considered outdated. In fact, craftsman-style architectural elements are highly sought after by homeowners and buyers. The architectural elements of a craftsman-style home mainly includes a large covered front porch, tapered columns, earthy colors, stone detail, and clean, straight lines.
Our Timeless Craftsman Collection brings together all of the moulding, trim, and doors that you’ll need to create a custom craftsman look in any room.
Profiles:
How to install:
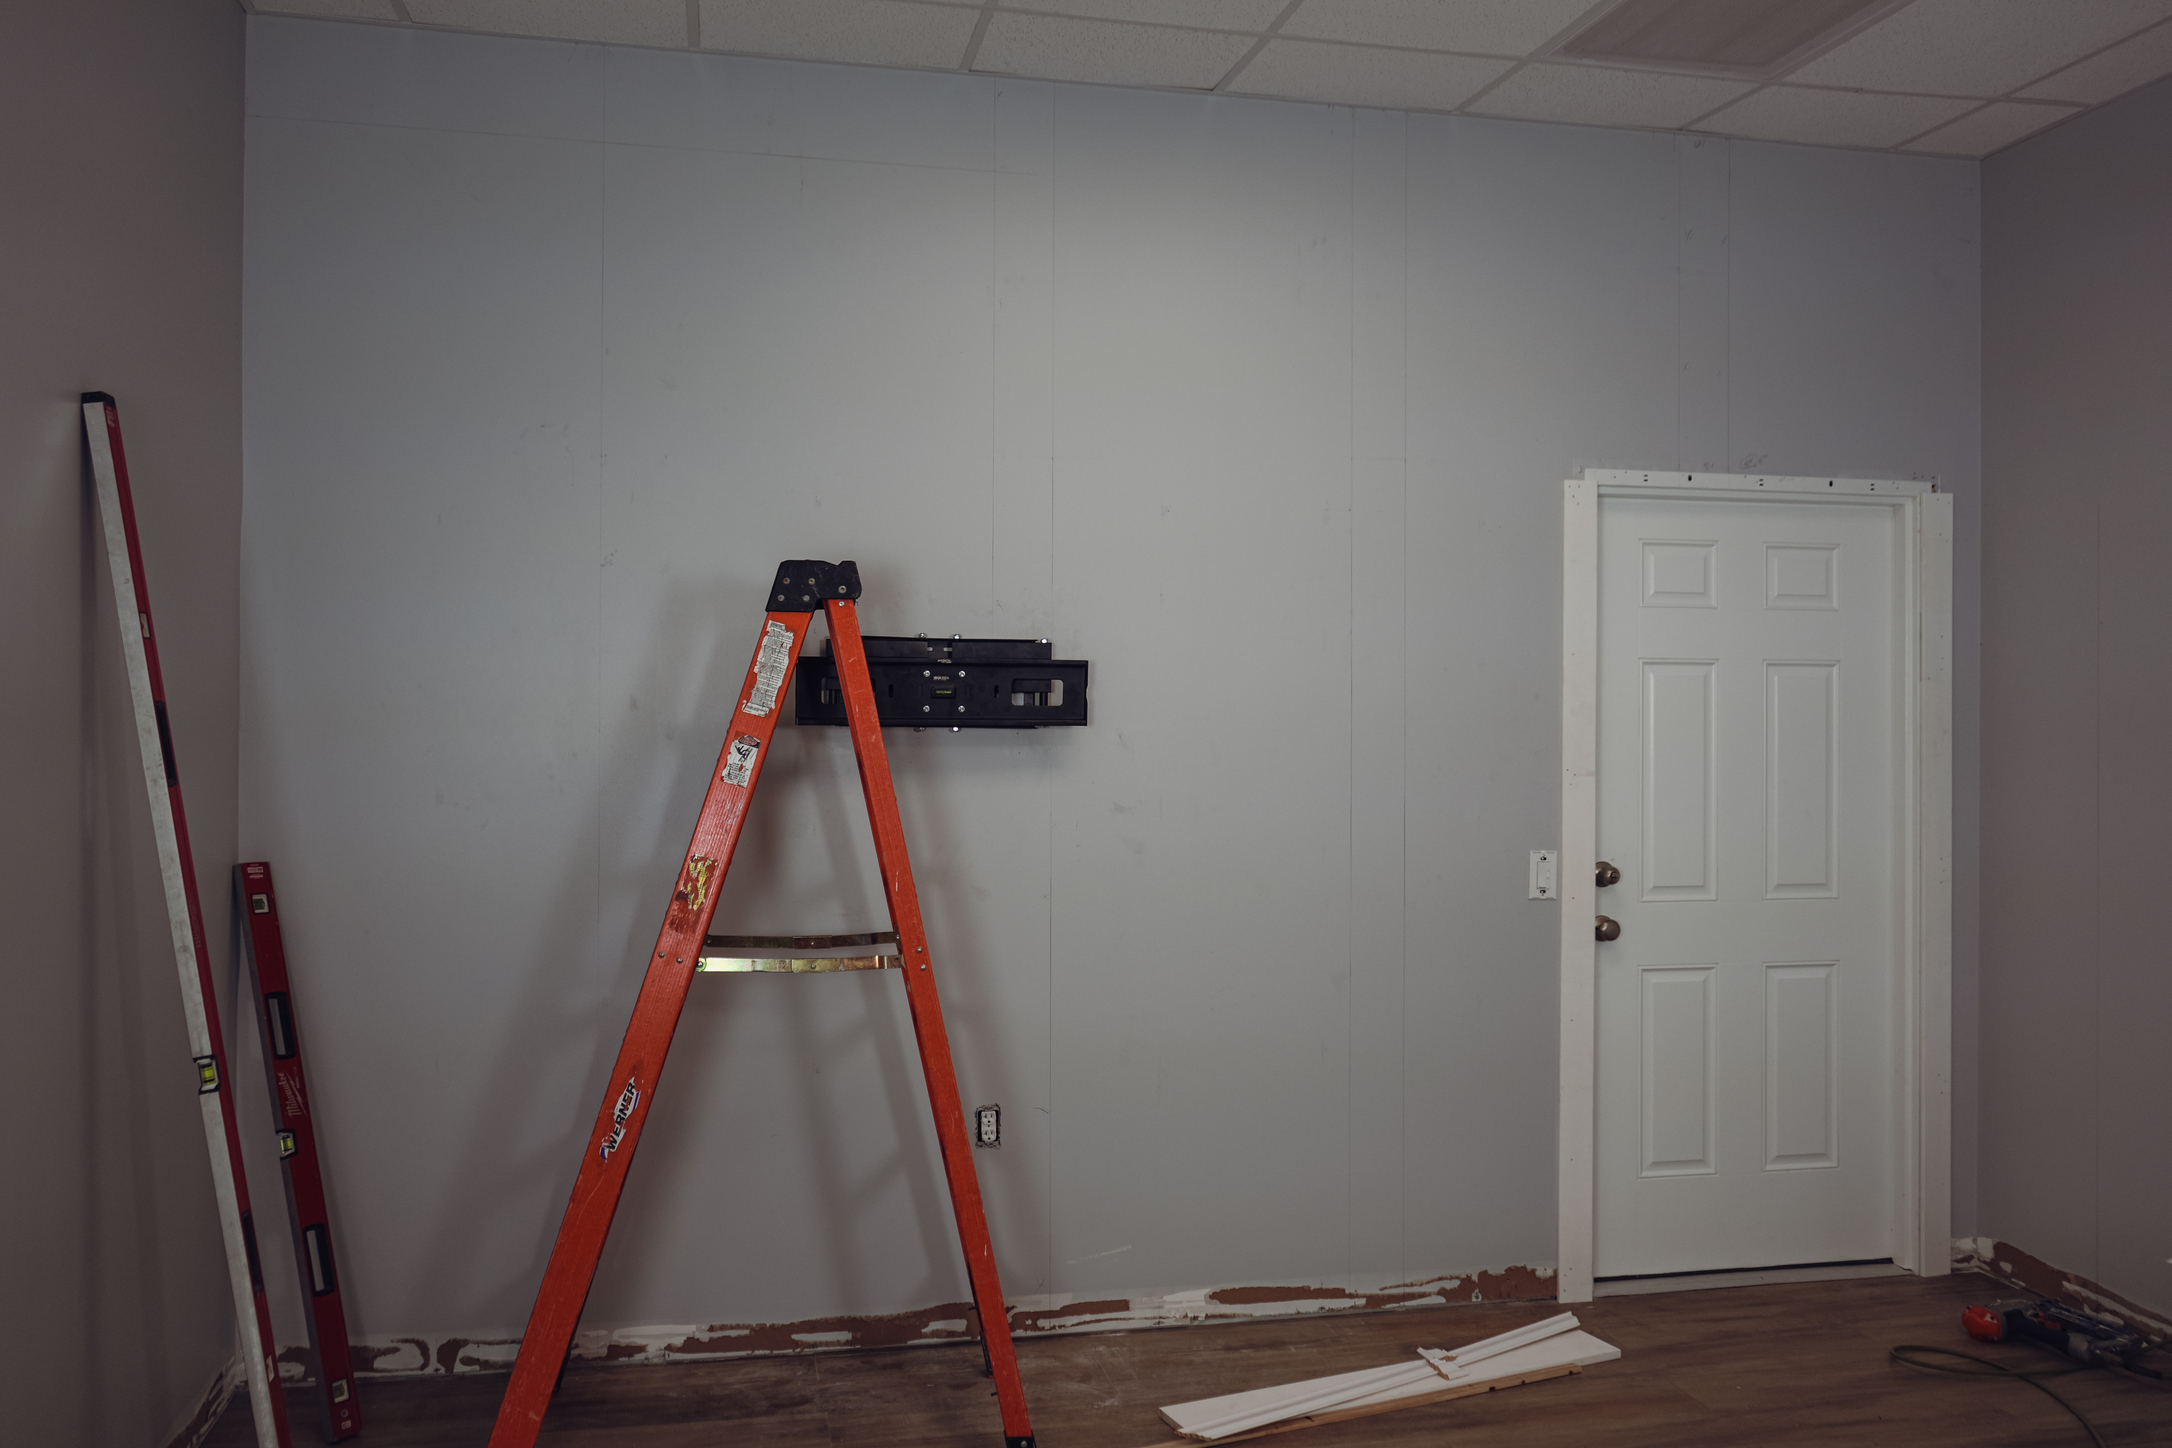
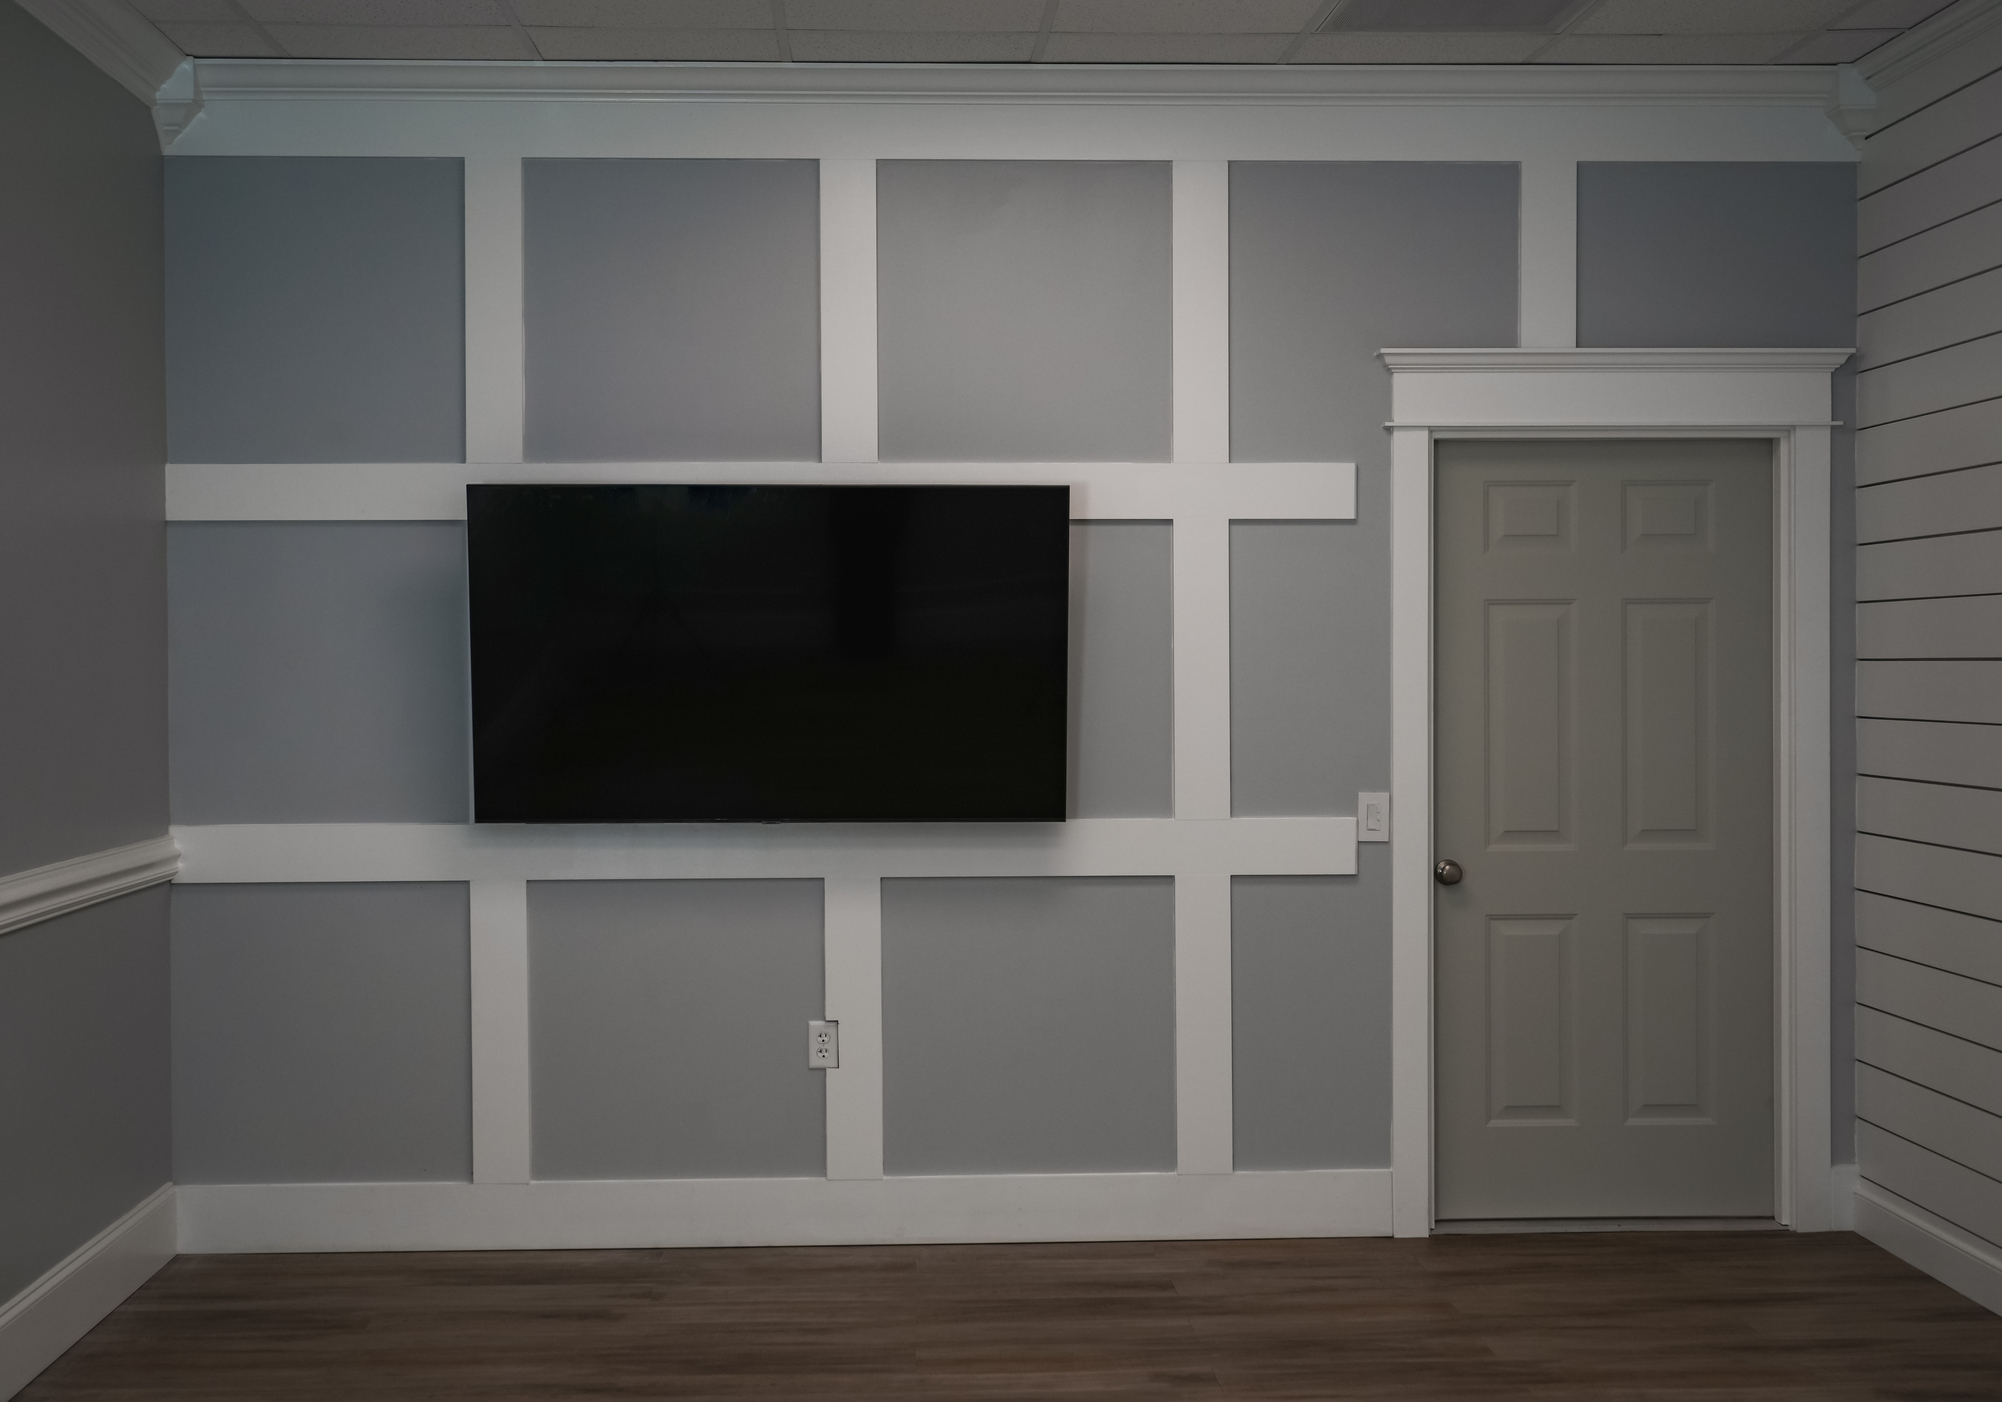
Before starting, we measured out the wall to ensure every box in our board and batten design would be evenly spaced out. Because this accent wall was installed in a commercial building, the moulding had to be screwed in instead of nailed. Typically, in a residential home you install moulding with a nail gun since you’re dealing with wood studs behind the wall; however, in a commercial building there are thin metal studs behind the walls, so the application of the boards is different.
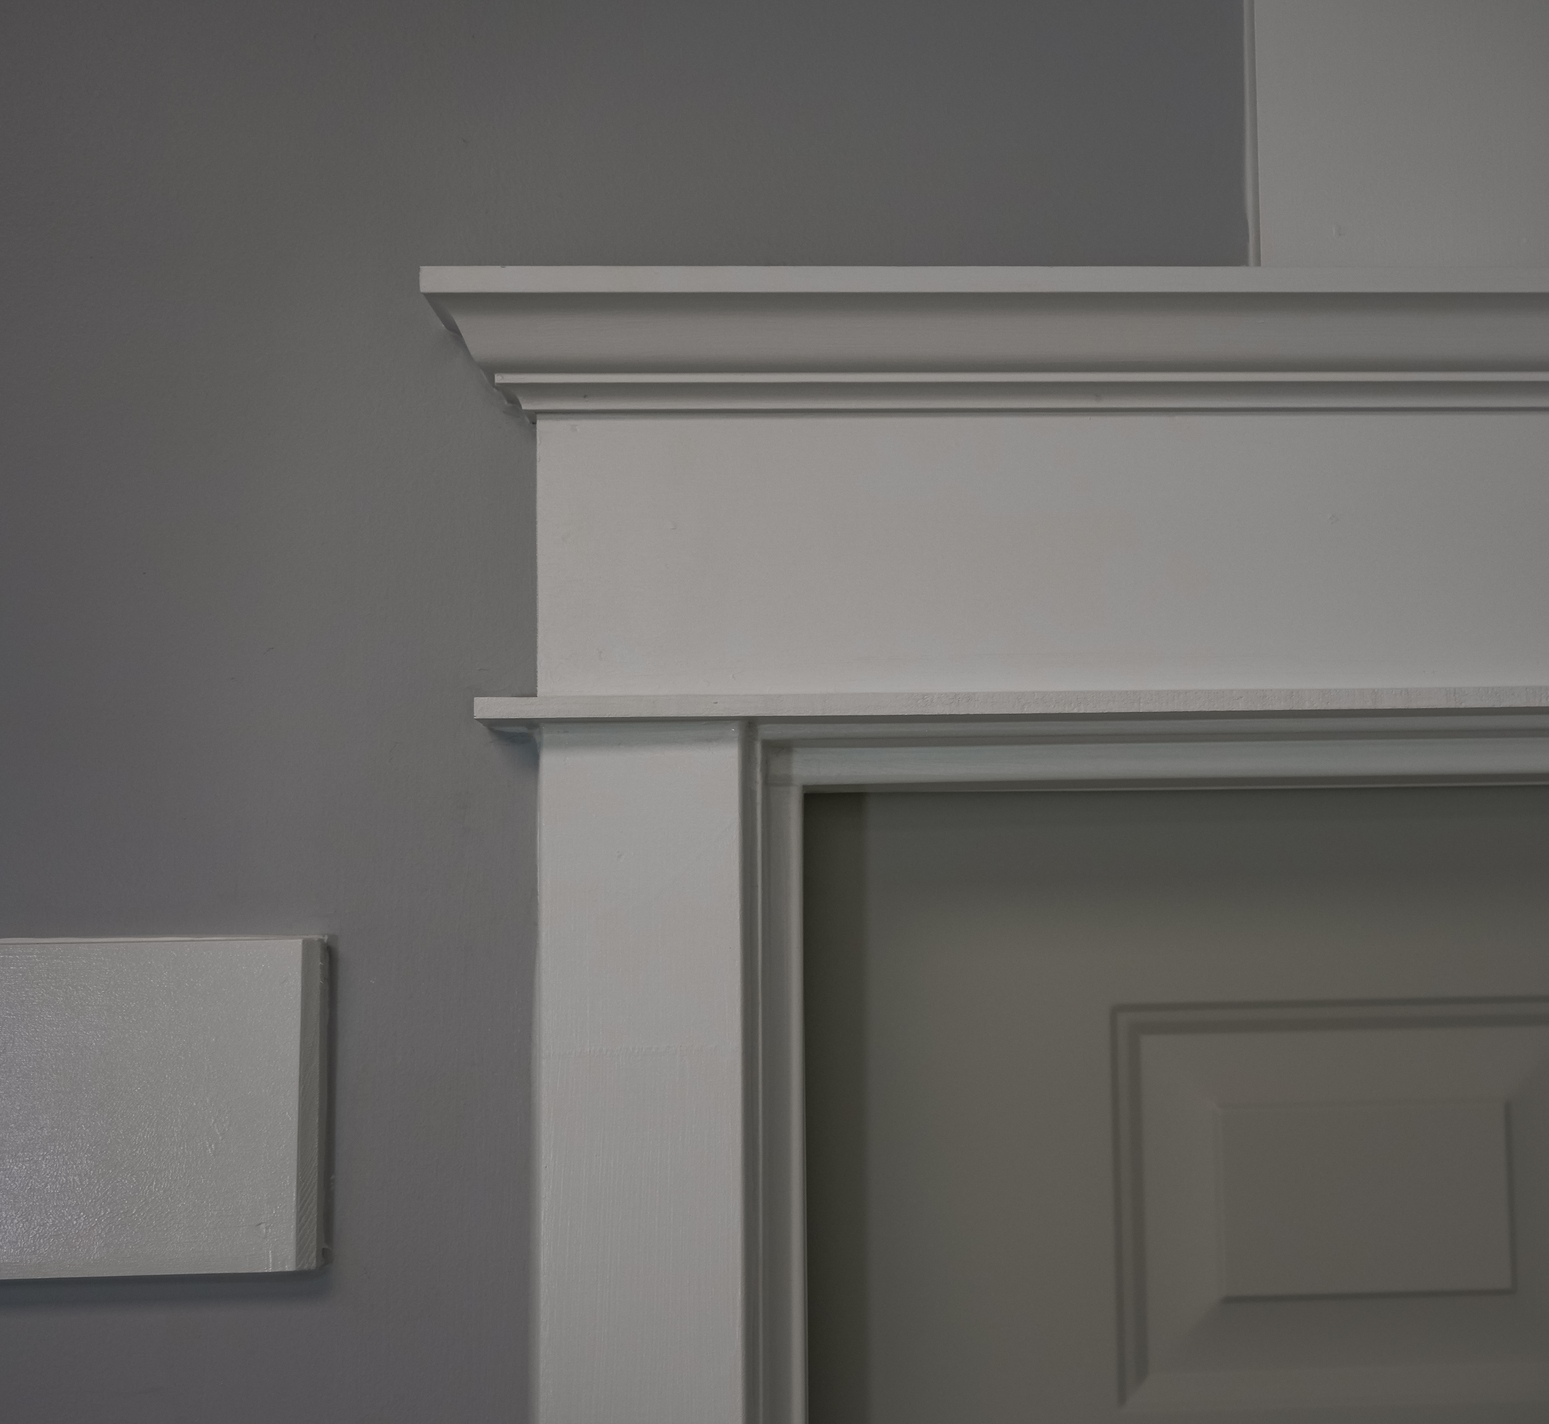
We used three components to create the door header. First, we placed 887 Stop flat and “stood up” a 1X6 Board on top of it. To finish off the door header and give it a classic craftsman’s style, we installed 52 Crown on the top of the header with a return on both sides. When painted, all three components compliment each other perfectly to give you a beautiful door header.

As you can see, Woodgrain offers a variety of wood products to fit any home style, whether its a classic Colonial home or an extravagant Victorian home! Browse through our collections for inspiration on your next project. Our collections bring together all the moulding and trim that you’ll need to to create a Craftsman, Colonial, Victorian, or Coastal look in any space. Each product in our collections has been selected to work together seamlessly, making the design process easier.
Contractor:
We Nailed It 2 LLC
Brently Farmer : wenailedit2llc@gmail.com
For inspiration check out our Pinterest Board and make sure to follow us on Instagram, Pinterest and Facebook ! Follow us @WeAreWoodgrain