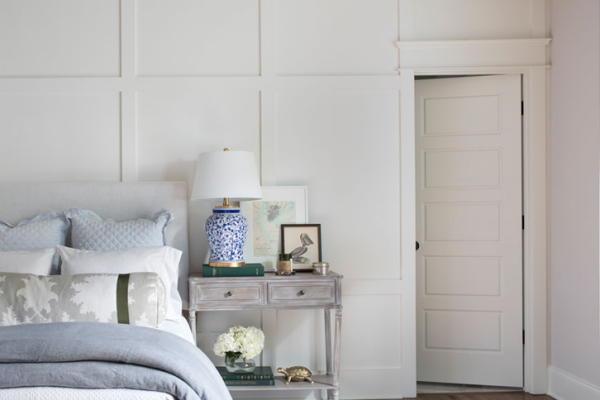
How to Frame Your Craftsman Style Doors
To trim a door you will need:
- Pencil
- Level
- Measuring Tape
- Miter Saw
- Interior Casing Moulding (boards and a header for the Craftsman look)
- Nails
- Nail Gun
- Wood Glue
- Spackle
- Caulk
- Liquid Nails (optional for extra security)
Step 1: Measure and Cut Leg Moulding
Measure the length from the top corner of the doorway to the floor and cut your leg moulding pieces to size using straight cuts.
Step 2: Nail Leg Moulding
Nail the leg moulding to the sides of the door, making sure to drive the nail heads below the surface of the door trim. You can also apply a line of liquid nails to the back of the moulding before install to keep it secure.
Step 3: Calculate the Header Moulding Length
Measure from the outside of the casing to determine the width you want for the header. The header should extend slightly past each side of the casing pieces.
Note: You can use a header piece for this or create your own custom build-up. You can even create a simple header that you do not need to miter using boards!
Step 4: Cut the Head Moulding
Cut your head moulding to the desired length, beveling the ends at 45 degrees. Then, cut small pieces for each end, with one end beveled at 45 degrees on each. These are your mitered returns and will attach to the header to finish the look. You can attach these with liquid nails. No need to bevel cut if you are using boards that do not require mitered ends.
Step 5: Nail the Head Moulding
Make sure the head moulding is even with a level. Then, nail the header just above the side casing pieces, using 3D or 4D nails every 12 inches along the bottom and 6D to 8D nails along the top. Avoid adding a nail ¼ inch from the side edges and 1 inch from the ends of the moulding so that you don’t end up splitting the moulding.
Step 6: Touch Ups
Fill divots from nails with spackling compound in order to create a clean finish and paint. If you use Finished Elegance, you can skip the painting!
Whether you’re installing a door frame or a mirror frame, you can always take your measurements to your local home improvement store and have your moulding cut to your liking.
If you prefer not to miter cut your moulding, you can purchase a “no-miter” solution—such as our Block Shop products—that secures long pieces of moulding together with a corner block.
As always, we look forward to seeing your home improvement projects. If you frame your doors or mirrors, show us your handywork by tagging us on Facebook, Instagram and Pinterest.