Guide to Finishing Your New Year's Resolution Moulding Project
It’s no secret that I highly recommend Finished Elegance® – the most durable, flawless, and easy-to-install moulding on the market. For the person trying to wrap up a moulding project with a limited time frame, there’s just no better option. You can see the steps required to install traditional moulding compared to installing Finished Elegance below:
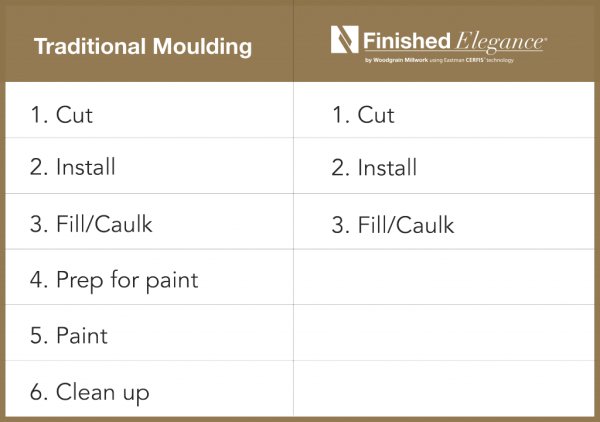
Because Finished Elegance is already coated with Eastman Cerfis™ Technology, it does not require painting. The benefit to you: less time to install and less frustration. You can see a video of the installation process here:
Whether you elect traditional moulding or Finished Elegance, here are some tips to help you get started and finish your project:
- Educate yourself first. Pick your moulding type, and dedicate the time needed based on the size of your space. YouTube is a great resource not just for cat videos, but for tutorials on installing moulding, as well.
- Measure twice! Take time to make sure your measurements are accurate. Once you’re in the store, purchase the amount of moulding you think you need PLUS 15% more. Measurement mistakes are almost inevitable, and having that extra moulding will save you a trip back to the store.
- It’s all about the tools. I highly recommended using a nail gun and miter saw for the smoothest installation process. If you don’t have these tools at home, you can borrow them from a friend or rent them.
Best of luck completing your resolution home improvement projects, and Happy New Year from all of us here at Woodgrain!