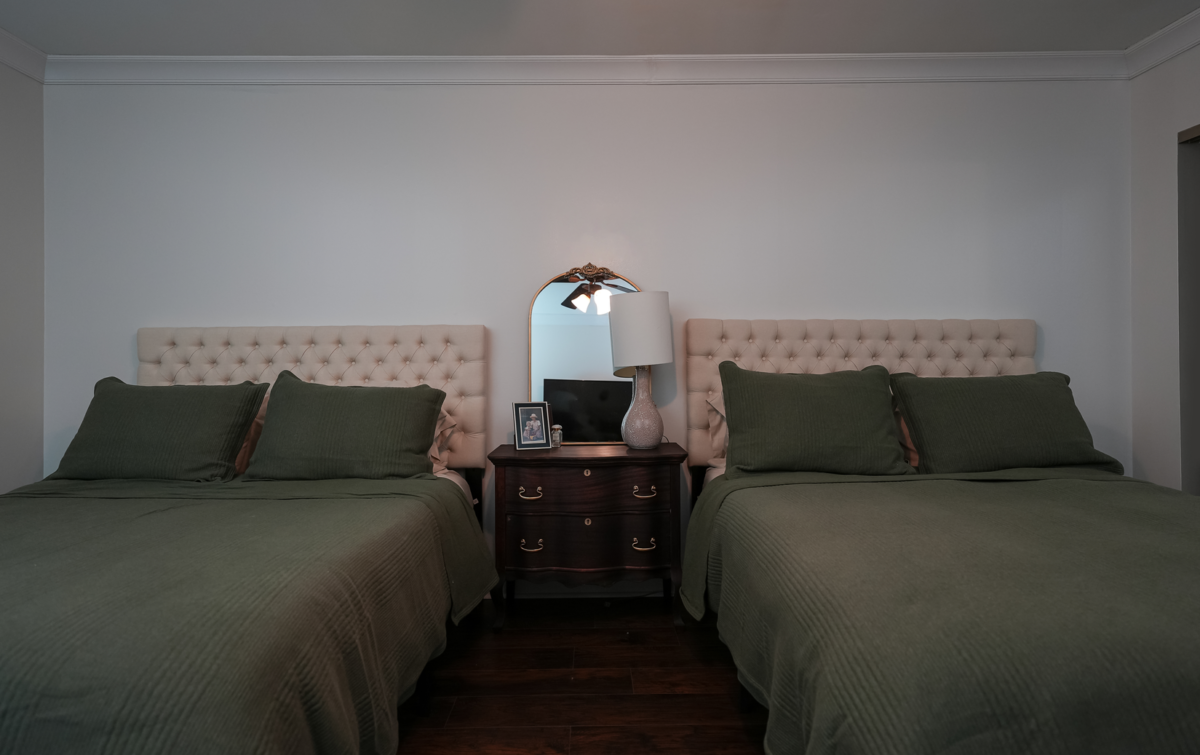
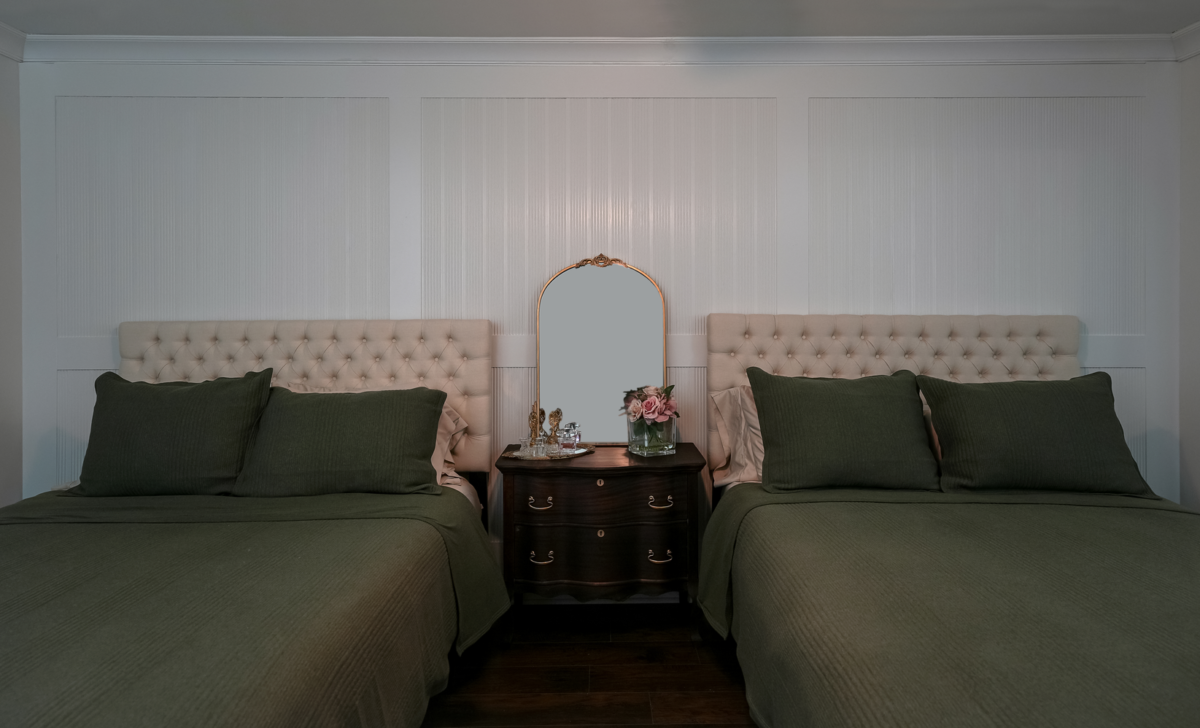
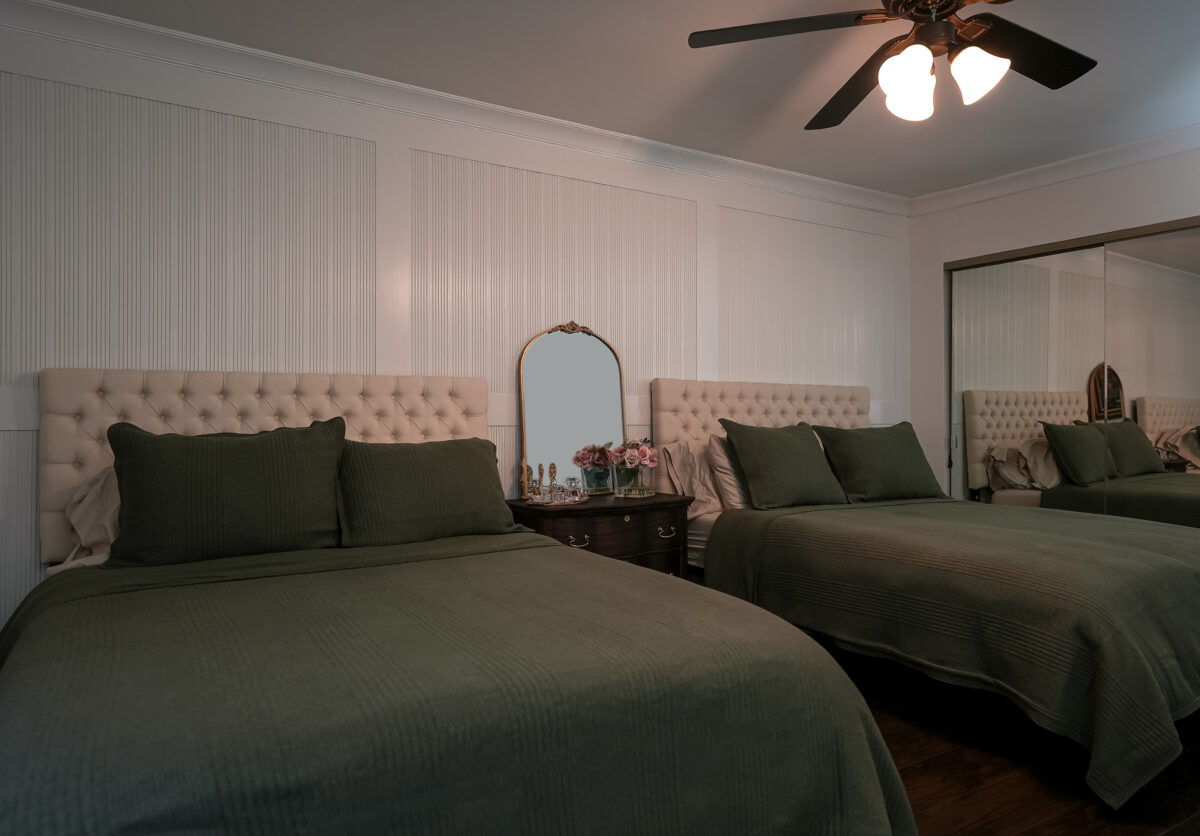
DIY Accent Wall: Fluted Casing Wall
Our DIY Accent Wall is a Fluted Casing Wall that uniquely brings texture into a space and elevates the aesthetic of the room. Contrary to popular belief, the style originated in Egypt, not Greece. Found on large columns, the narrow grooves carved into them promoted a play of light on the column and made the columns appear more perfectly round, according to the Grecian designers. Fast forward hundreds of years, the fluted style is still widely popular. Fluted is defined as a groove or set of grooves forming a surface decoration; commonly seen on furniture or accent walls. This style can also be easily incorporated into cabinets, doors, and more. Fluted casing fosters elegance anywhere it’s placed. Add fluted casing to your home and create a clean and symmetrical design that creates a picture-perfect finish to any space. The best part of this is that you can do it yourself! Watch our video to see how you can build your own Fluted Accent Wall here!
Love it? Here’s the materials you need and how you can bring depth and texture to your space:
Materials:
- Paint
- Measuring tape
- Nail gun and nails
- Paint brush and roller
- Caulk gun and caulk
- Saw to cut moulding
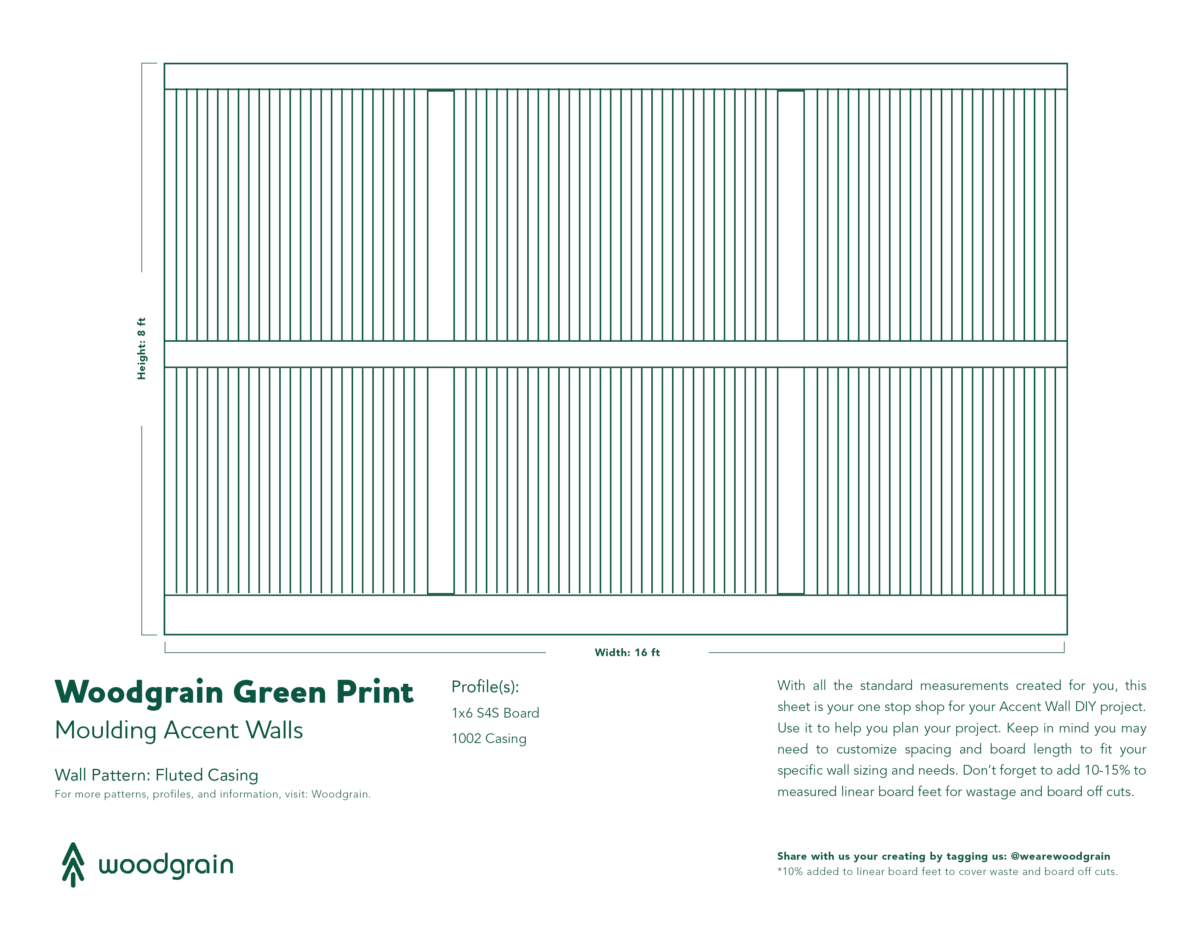
Profiles:
Use this Green Print as a guide, but feel free to be creative with your design! Note: the size of your wall and the moulding used will affect the placement of the moulding.
How to Install:
Step One: Measure the wall height and width, and make sure you take into consideration outlets, windows, and light switches. Mark the wall where the boards and fluted casing will go. This will help you get a feel for what is needed and where to place pieces. When you finish measuring, proceed to cut all your material.
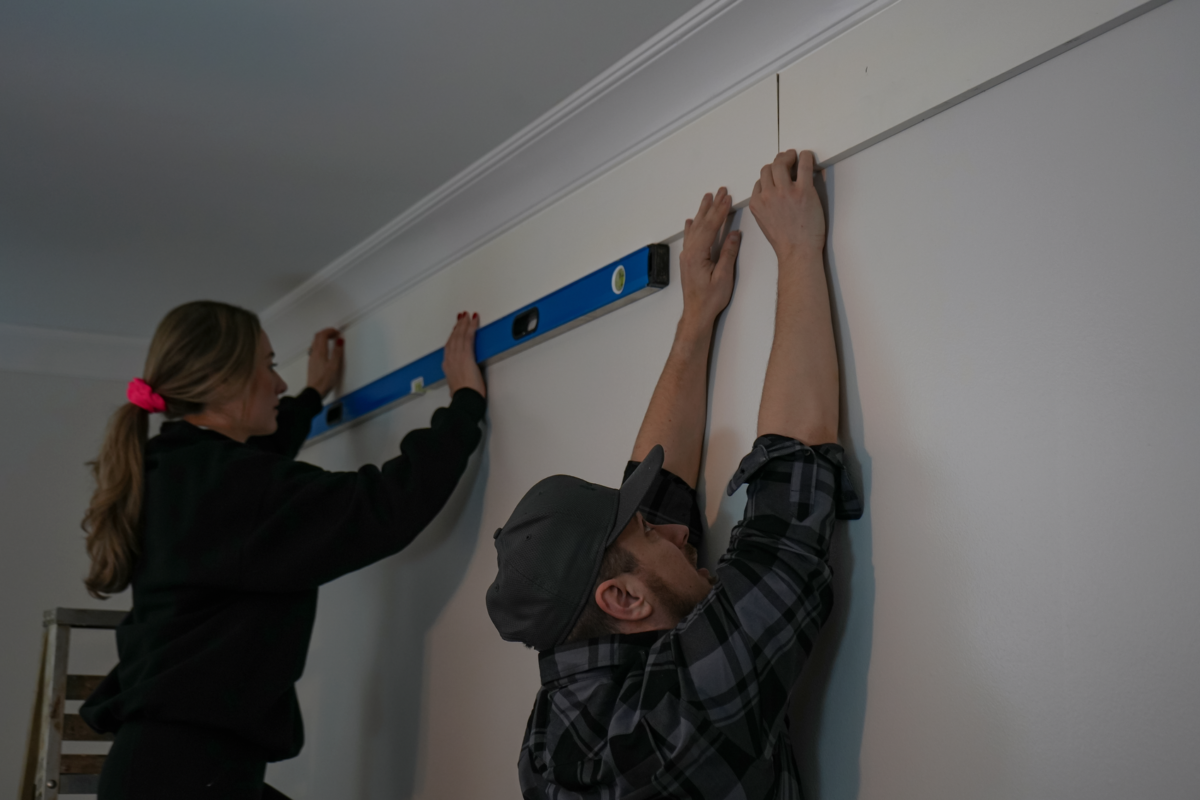
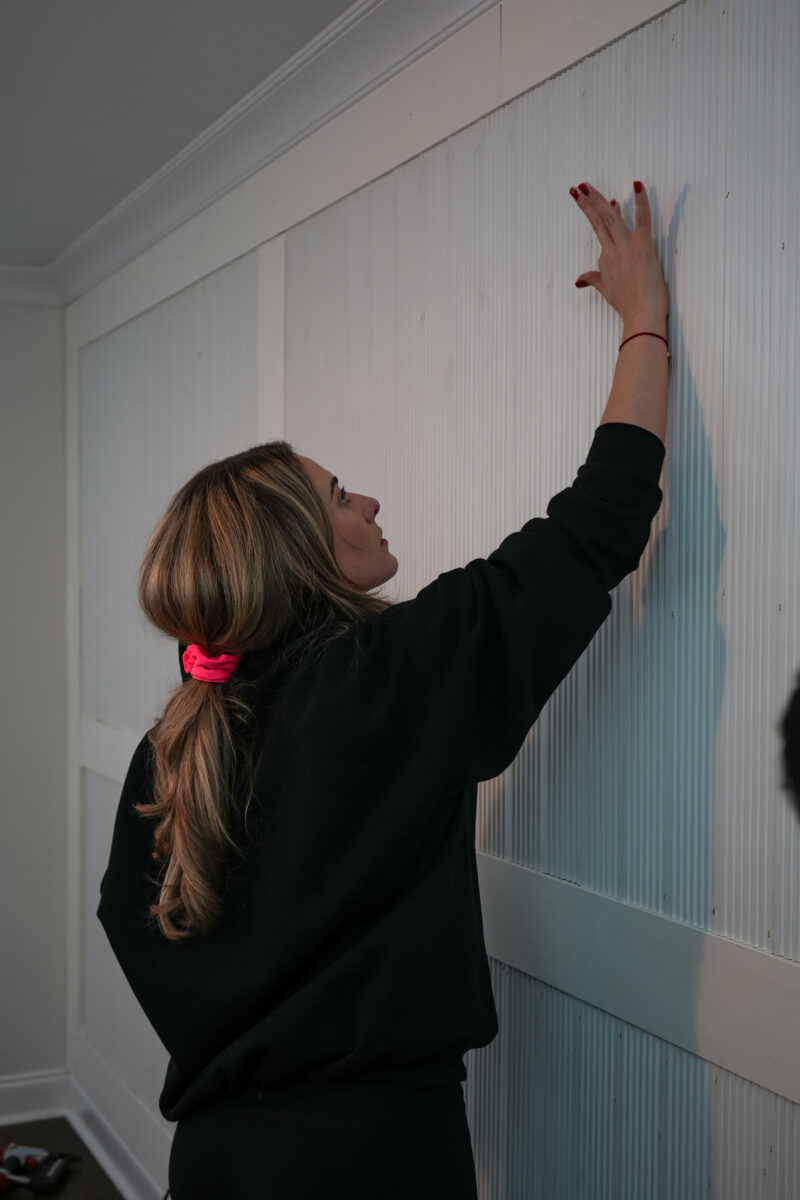
Step Two: Frame out the top, bottom, and sides of the wall using 1X6 boards. After nailing the boards, we measured and cut each piece of fluted casing and installed it into the wall using our nail gun. Tip: Work from one side of the wall to the other. Begin by installing the fluted casing on the side of the wall closest to the entryway. You will stop each fluted section at the marked point. After all of the fluted casing is installed in the first section proceed to frame it out with 1X6 boards. This will allow for a seamless transition into the framed section without having to rip a piece of fluted casing to make it fit. If ripping a piece of fluted casing is required, it’s preferred to be furthest from the entry.

Step Three: After installing the boards and fluted casing, we went in with the caulk. Caulking the seams and nail holes will hide the gaps between each piece of fluted casing and give the wall a seamless look! When caulking, make sure to keep a cup of water handy. As you caulk each section, dip your finger in water and smooth down the caulk. Let the caulk completely dry before you start painting.
Tip: Use the extra caulk to cover any chips or nail holes in the fluted casing and boards.
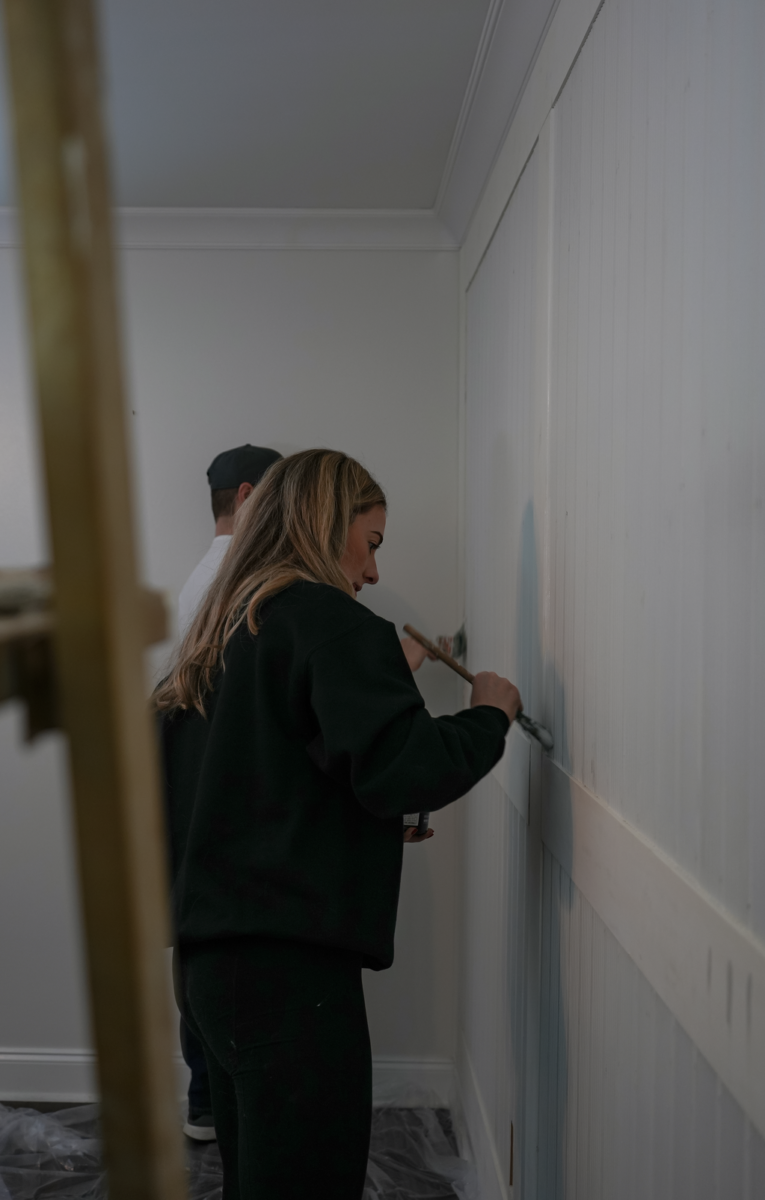
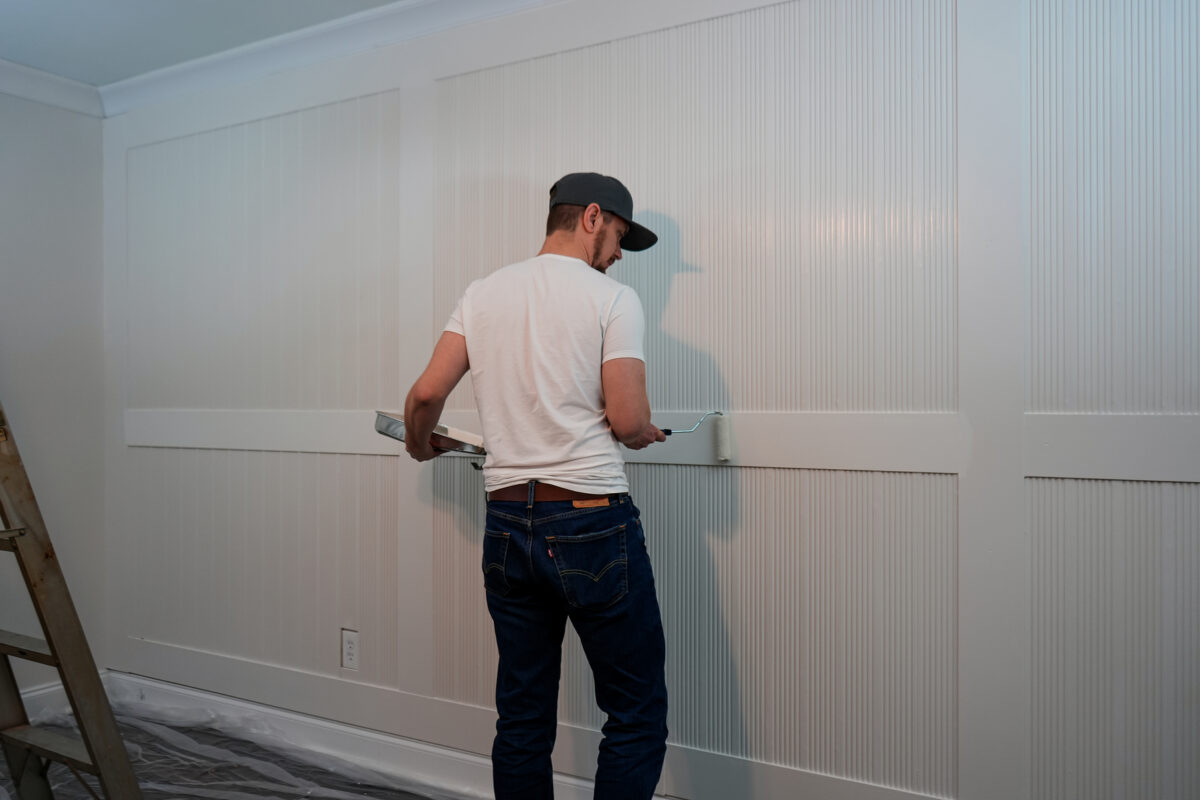
Step Four: For this accent wall, the boards we used were primed. We added two coats of Shoe Lace White paint to give the accent wall a pristine look. Give your accent wall two coats of paint for good measure. We used a paint brush for the casing to get deep into the grooves of the fluted parts and used a roller for the boards. Once the paint is dry, look for any spots that need a touch-up.
Step Five: Enjoy your new accent wall!
Helpful Tips When Creating an Accent Wall
- Choose a balanced, unobstructed wall that stands out.
- Choose rooms or spaces where you want to make an impact. Bedrooms, living rooms, and entryways are great spaces to create a custom look. Select spaces where guests will see it, or where you spend a good amount of your time.
- Bold colors make a statement. Dark greens, grey, black, and blue are currently in.
- White accent walls make a statement without being too bold.
- Try to pick a style of accent wall that complements the look of your home and room; just because you like a modern-style wall doesn’t mean it’s the best pick for a colonial-style room.
- Go in with a plan and draw out your design before beginning.
- Find 2-3 moulding profiles that you think will achieve the look you’re going for. Then, take each sample and place it on the wall to see which you like the best.
- Create a jig if you have to repeat a cut. This will save time and help with consistency.
- Use hot glue to apply moulding first so that you can adjust the moulding if needed. Then use finishing nails to secure the moulding.
- Rent a nail gun, use your own, or use an adhesive.
- Once everything is in place, apply more nails to ensure it is long-lasting.
- Use putty to the nail holes rather than caulking for a better finish.
- If using a paint sprayer, keep 1.5 to 2” of space between you and the wall for an even application.
- Take your time in the finishing stage. The little details when you finish will make the wall look more polished.
- We estimate that creating an accent on a 12′ x 8′ wall can cost around $200. This includes paint, moulding, tool rentals, and other materials. You can save money by using tools from your home or borrowing from friends.
Check out our Fluted Accent Wall Board for more inspiration. Tag us in your pictures on Instagram, Pinterest, and Facebook! Follow us @WeAreWoodgrain!