How to Install Base Shoe
Everyone seems to be in accordance that now is the time for home renovation projects. A project that we have seen a lot of recently is installing new floors.
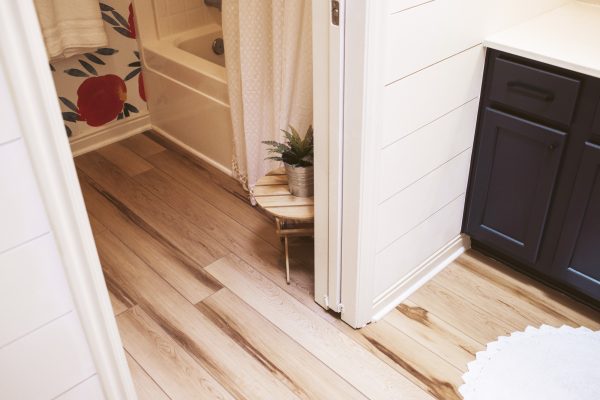
Why base shoe?
When installing flooring with baseboards already installed, your floors may not line up perfectly. This is where base shoe comes in.
The application purpose of base shoe is to be placed along the intersection of the baseboard and floor. This is to hide uneven floors or seams with laminate, vinyl, and hardwood flooring. Installing base shoe is a super easy project that can make a world of difference!
Other applications of base shoe include picture mould, chair rail, corner mould and many more.
Tools needed:
- Nail gun
- Finishing nails
- Tape measure
- Wood
- Stain or finish
- Stud finder
- Miter saw / Miter box and saw or / Moulding clippers
- Caulking
- Wood putty
- Coping saw
- Tape
- Pencil
How to install base shoe:
Step 1: Pick your profile
First, determine how many square feet of moulding you will need for the project. It’s always good to over calculate by 10-15% for waste. Once you determine the amount of base shoe required for this project, you can then pick out which profile you would like to use.
Quick Tip: We recommend painting or staining your moulding before installing it. This will be easier than having to mask it off and do it once installed.
Step 2: Determine your cuts
There are many different tools you can use to miter your moulding (Ex. miter saw, miter snips, or a miter box and hand saw). Any tool will work for this project. You can use an angle calculator to calculate your angles.
Quick Tips:
- When mitering it’s usually not a true 45 degree angle.
- When cutting start with your outside edge. Your inside edge will be a focal point so you will want this edge to be mitered perfectly.
- Coping your moulding – cut into the back of your moulding, following the outside face. Carefully cut away the back of your moulding to fit into the corner. Keep your coping saw at an angle; you can also sand the area that was cut out to get a precise fit.
Step 3: Install with nail gun
When installing the base shoe you should nail it into the wall or moulding to keep it secure. It helps if the floor is a floating floor for expansion and contraction purposes.
Quick Tips:
- Determine where your studs are if possible and nail into them to ensure extra security.
- Use a block of wood or a hard flat surface and apply pressure to the base shoe. This ensures it will stay in place and will be flush with the wall and floor.
Step 4: Finishing
Once installed, fill all the nail holes with putty, and caulk the top seam. Once the putty is dry, sand all of the imperfections to create a smooth finish.
Stay tuned for upcoming how-to YouTube videos and blog posts! Don’t forget to tag us @wearewoodgrain on Instagram, Pinterest and Facebook. We would love to see your moulding and millwork projects!
Make sure to check out our Youtube Channel for How to Videos –