DIY Accent Wall: Coastal Chevron
This accent wall has a beautiful chevron pattern with offset profiles for a unique look.
Watch our video and follow the steps below!
New to accent walls? Check out our DIY Accent Wall: Quick Start blog post to learn the basics!
Materials:
- Boards (# of boards depends on the size of the wall)
- Caulking (2 tubes)
- Caulking gun
- Measuring tape
- Level
- Spackle, joint compound, or wood filler
- Paint (1 gallon)
- Nail gun and finishing nails (2” nails)
- Paper and tape to cover up areas for paint
- Saw to cut moulding
- Paint sprayer or brush and roller
- Sandpaper/Sander (220 Grit)
Profiles:
- 254 Stop
- 1X4 Board
- 623 Base
Use this Green Print as a guide, but feel free to be creative with your design! Note: the size of your wall and the moulding used will affect the placement of the moulding.
How to install:
Step 1: Choose your wall and moulding
Identify the wall you will be working on and determine the style of moulding that would best fit the space.
Step 2: Measure everything and determine the spacing and angles for your chevron pattern.
Measure the wall height and width, and make sure you take into consideration outlets, windows and light switches. This will help you get a feel for the board footage needed and where to cut your moulding. We recommend adding 10-15% board feet for waste and board cuts.
For this accent wall, we decided to have 5 different breaks in the wall, so we determined our spacing by dividing the length of our wall by 5. Knowing this will help you determine how much material you will need for your wall and the number of pieces you will need for your project.
Step 3: Mark it up
Mark the wall where moulding will be placed to get a visual of how the moulding will look. Don’t be afraid to draw on your wall, since you’ll be painting over it anyway. Using a laser level can help you project lines onto your wall.
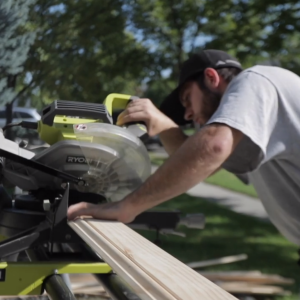
Step 4: Cut your moulding
Cut the moulding needed for your wall.
Step 5: Apply your baseboard
Start by applying your baseboard. We recommend using 2” finishing nails and a nail gun to secure the moulding profile for long term wear and tear. Keep in mind you’re going to have to finish the moulding with caulking and putty, so the fewer nails, the better for less work on the finishing process.
Step 6: Apply the rest of the moulding to your wall
We recommend creating your own jig to ensure there is consistent spacing between the boards (see the above video for our example).
Step 7: Fill in the gaps
Caulk all the seams to fill in any gaps and apply putty to all of the nail holes. This ensures a completed look. Sand any areas if needed.
Pro tip: cut your caulking tip at a 45-degree angle for easier application.
Step 8: Prepare for painting
Mask areas that you don’t want to get paint on (outlets, lights, furniture, window ledges) and put a ground cloth on the floor to ensure the paint does not get on the floor.
Step 9: Paint your wall
If using a paint sprayer, keep 1.5 to 2” of space between you and the wall for consistent application. Be sure to apply paint in the corners and the underside of moulding profiles.
We recommend using a paint sprayer rather than a paint roller, as the style of this accent wall makes it difficult to paint with a roller.
Don’t forget to paint the bottom sides of mouldings and corners where mouldings meet.
Step 10: Enjoy your beautiful Coastal Chevron accent wall!
Helpful tips when creating an accent wall
- Choose a balanced, unobstructed wall that stands out.
- Choose rooms or spaces where you want to make an impact. Bedrooms, living rooms and entryways are great spaces to create a custom look. Select spaces where guests will see it, or where you spend a good amount of your time.
- Bold colors really make a statement. Dark greens, grey, black and blue are currently in.
- White accent walls make a statement without being too bold.
- Try to pick a style of accent wall that complements the look of your home and room; just because you like a modern style wall doesn’t mean it’s the best pick for a colonial style room.
- Go in with a plan and draw out your design before beginning.
- Find 2-3 moulding profiles that you think will achieve the look you’re going for. Then, take each sample and place it on the wall to see which you like the best.
- Create a jig if you have to repeat a cut. This will save time and help with consistency.
- Use hot glue to apply moulding first so that you can adjust the moulding if needed. Then use finishing nails to secure the moulding.
- Rent a nail gun, use your own or use an adhesive.
- Once everything is in place, apply more nails to ensure it is long lasting.
- Use putty to the nail holes rather than caulking for a better finish.
- If using a paint sprayer, keep 1.5 to 2” of space between you and the wall for an even application.
- Take your time in the finishing stage. The little details when you finish will make the wall look more polished.
- We estimate that creating an accent on a 12′ x 8′ wall can cost around $200. This includes paint, moulding, tool rentals and other materials. You can save money by using tools from your home or borrowing from friends.
For more tips and home inspiration, follow us on Instagram, Pinterest and Facebook! @WeAreWoodgrain